Contents {#contents .TOC-Heading .unnumbered}
[Pre-requisistes: 1](#pre-requisistes)
[Guide 2](#guide)
[1. Details 8](#details)
[2. Destination 9](#destination)
[3. Location 9](#location)
[4. Questions 10](#questions)
[5. Settings 13](#settings)
[6. Access 13](#access)
[7. Review and submit 13](#review-and-submit)
[8. Caseworker form: 25](#caseworker-form)
[9. Report a case 28](#report-a-case)
[10. Case officer receives a new disciplinary case 30](#case-officer-receives-a-new-disciplinary-case)
[11. Other relevant ServiceNow user documentation 31](#other-relevant-servicenow-user-documentation)
Pre-requisistes: {#pre-requisistes .unnumbered}
-
User has the role customer manager (technical role name if you need to contact support: x_steas_uh_core.customer_manager)
-
Logged in user has English as their preferred language
Guide {#guide .unnumbered}
All screenshots attached to this document are intended to help the user find buttons and functions in their own screen, and the screen that the user sees may look different, based on their roles, accesses, what version of ServiceNow the instance is, and how the instance is configured.
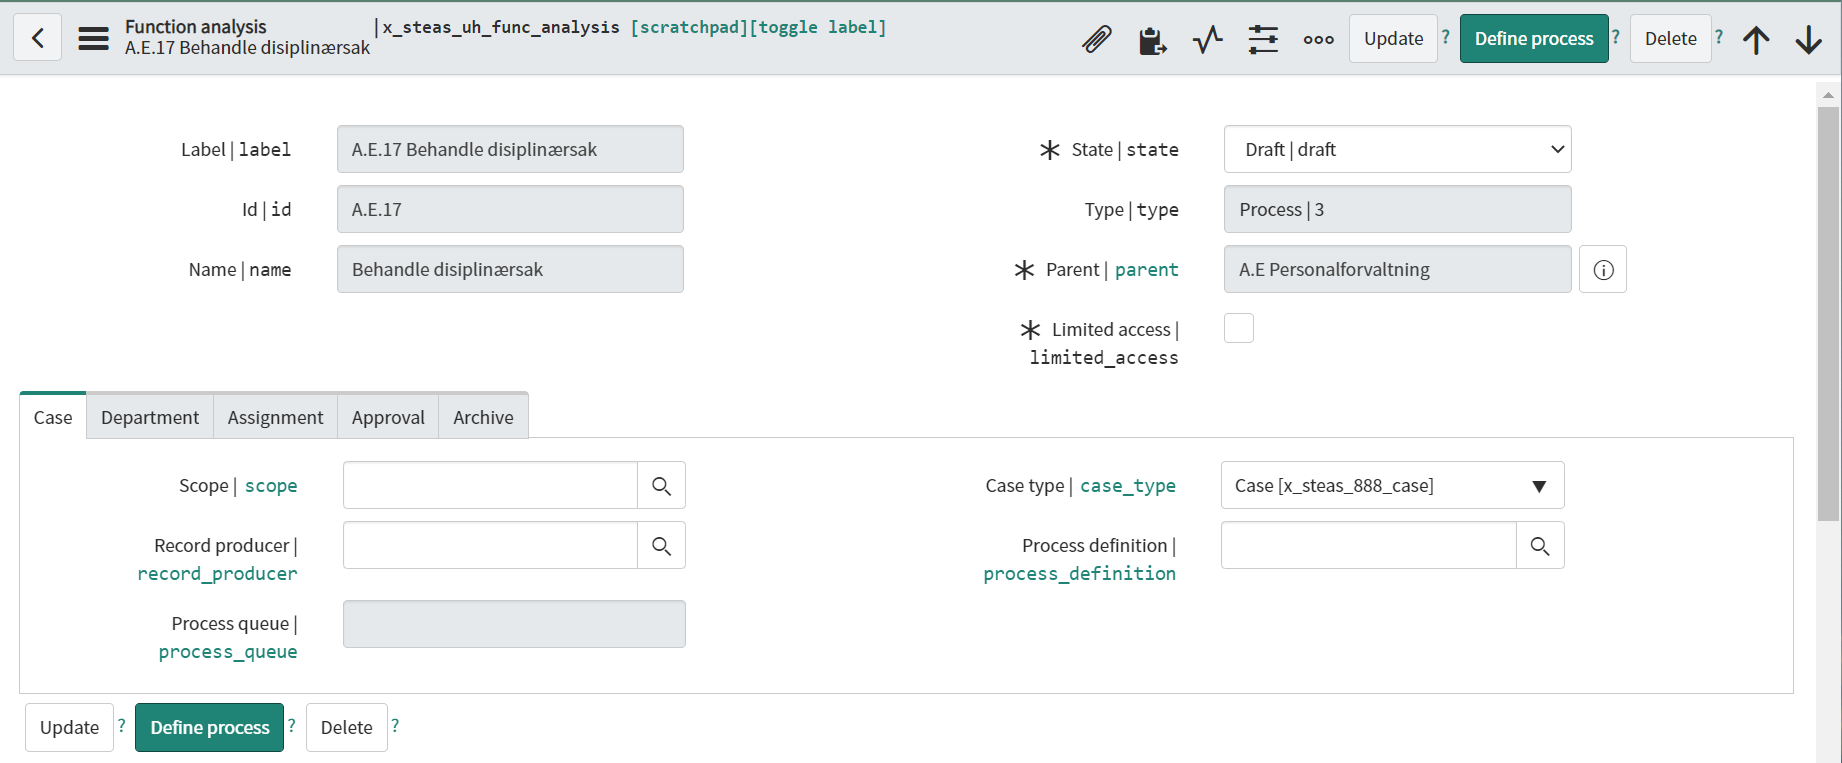
To define a process navigate to the UH Core > FUP (use the search functionality under 'All'). Choose which process you want to create a flow for. Then click on the "Define process" button.
User is further taken to App Engine Studio. Here you get the opportunity to choose which template you want to use. Each template should give a small description about its content. You also have the opportunity to create your own template.
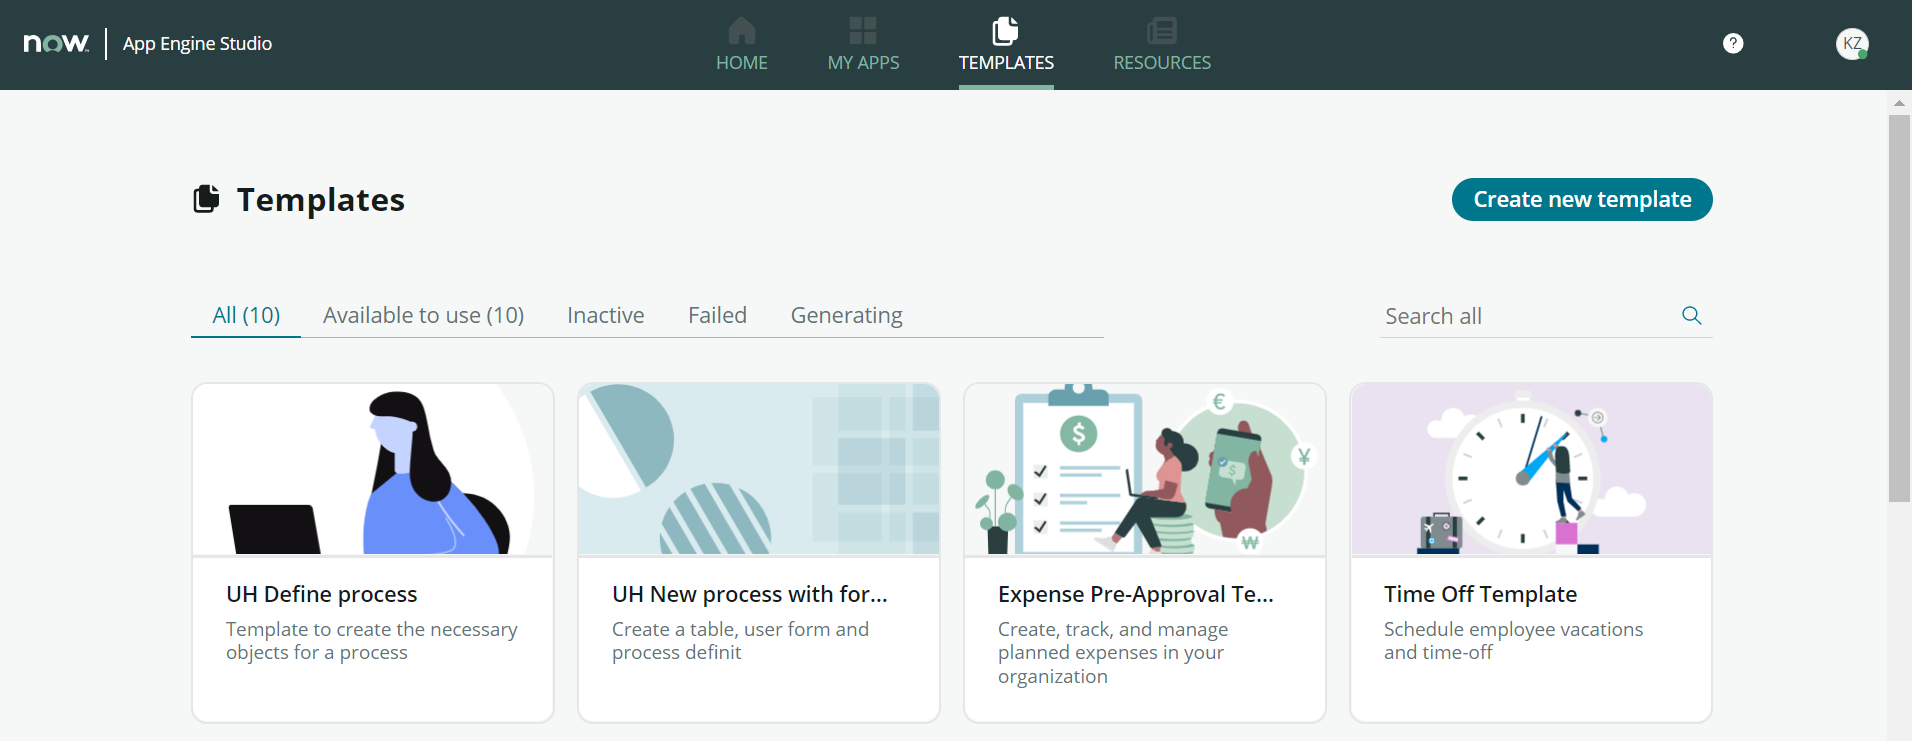
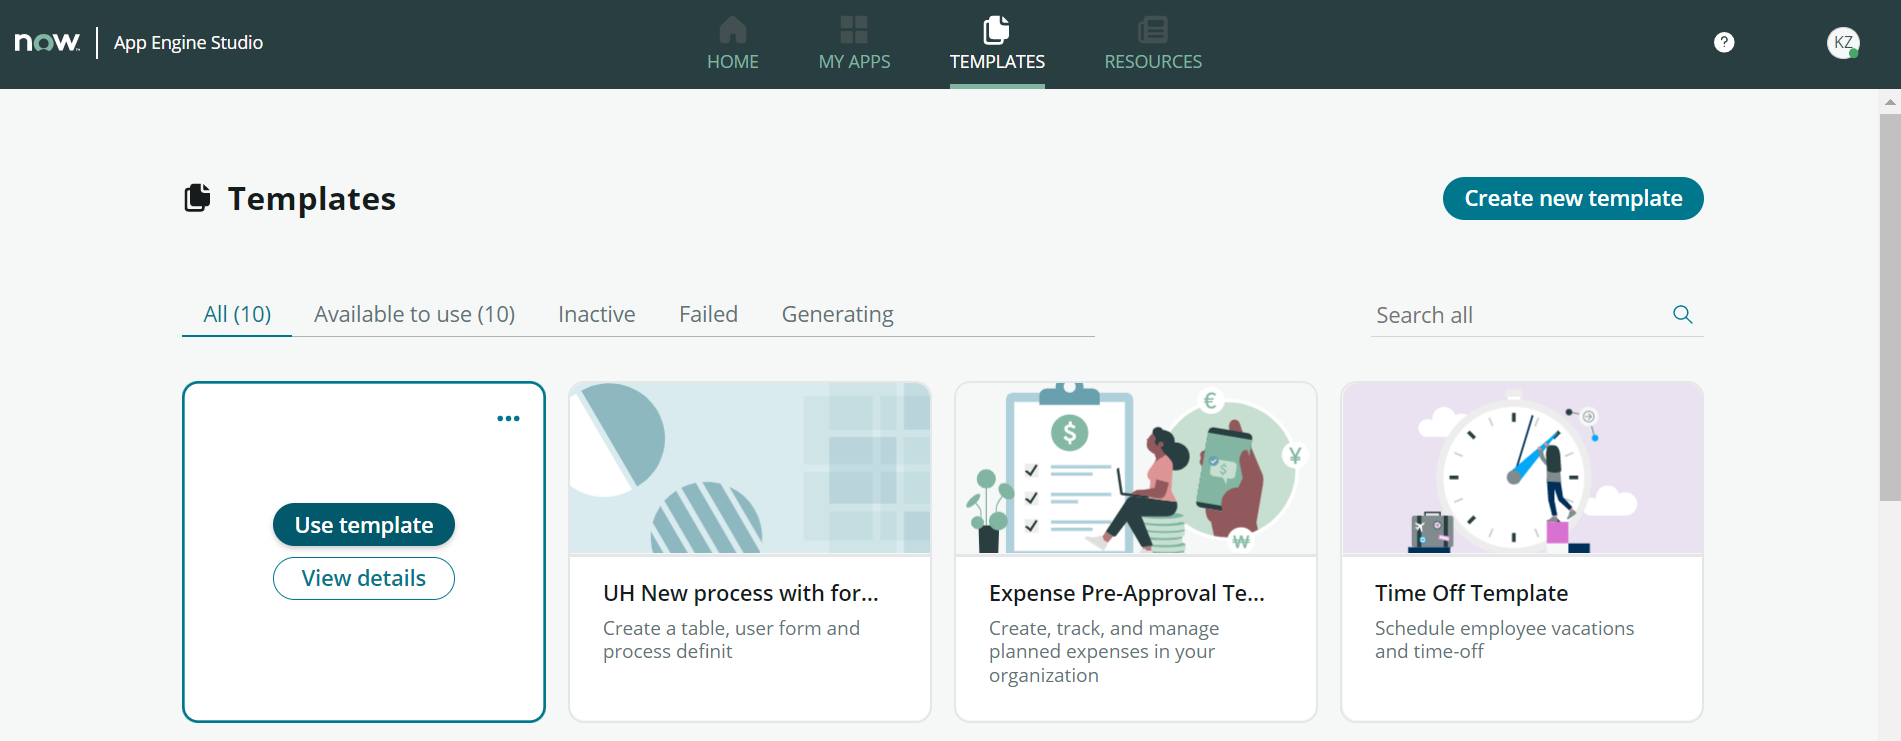
For this user guide, "UH define process" is used, where components such as schema, process definition and a table are included. To select this template, hover over the field and click "Use template".
On the next step add your name and description. The name should reflect the process following the best practices of their institute. In the example below, we use names from the functional analysis and provide a brief description. After filling in the fields, click "Continue".

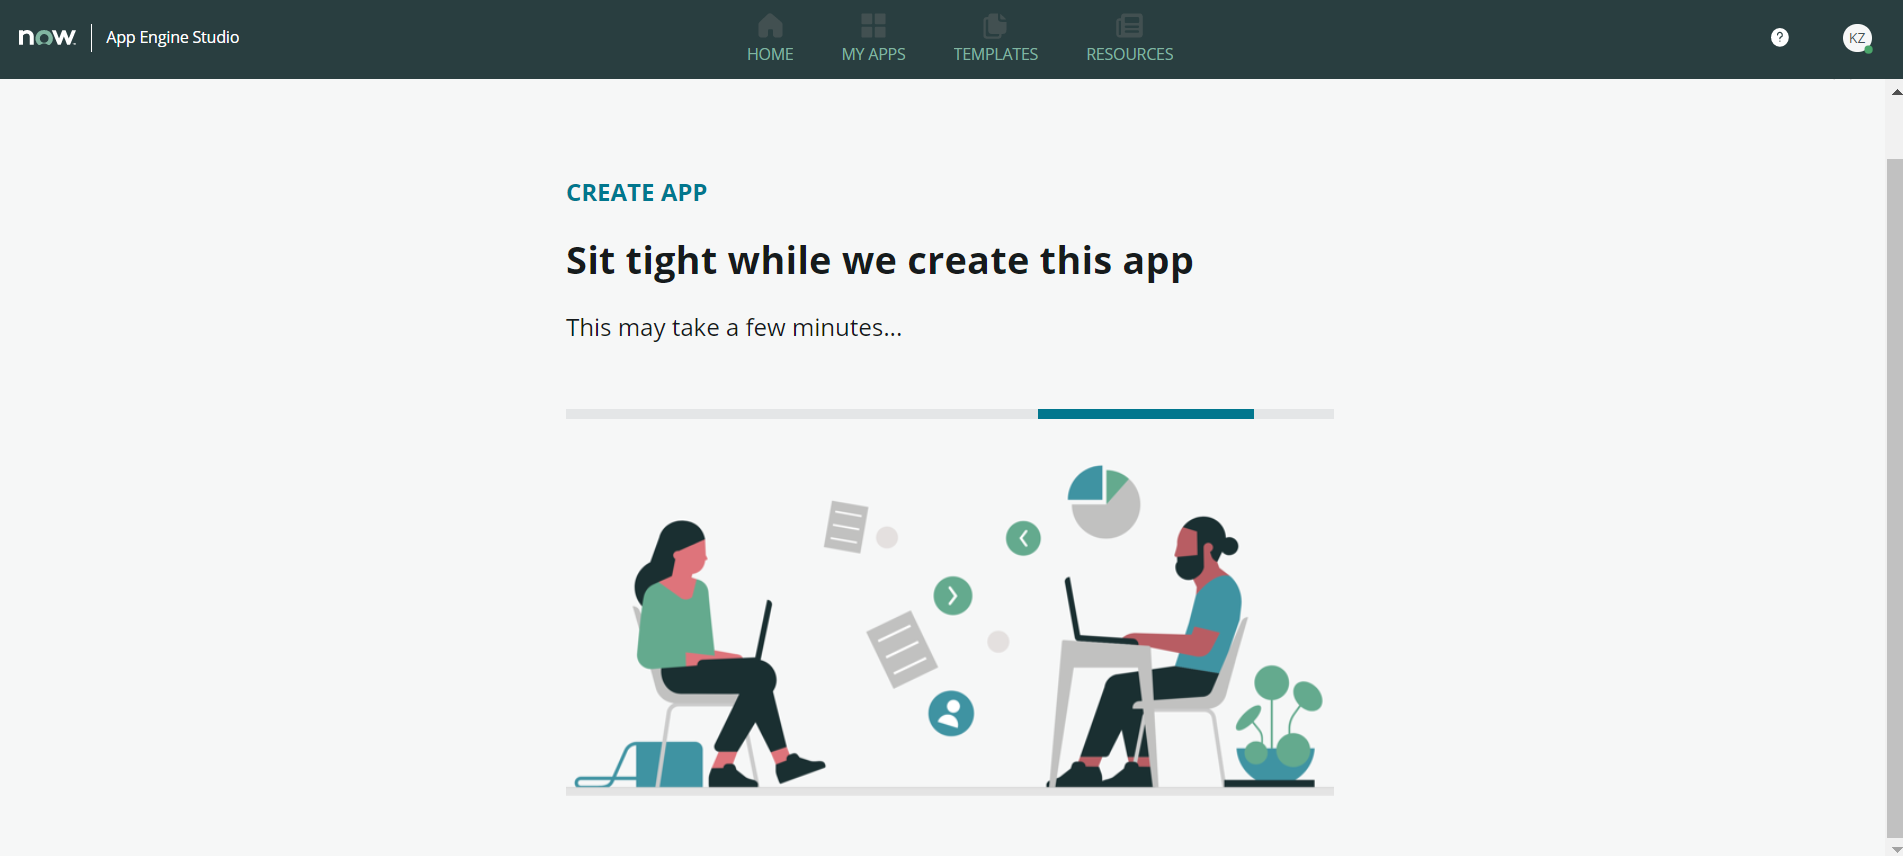
It may take up to a few minutes to generate the application. After it is created click on "Go to app home".
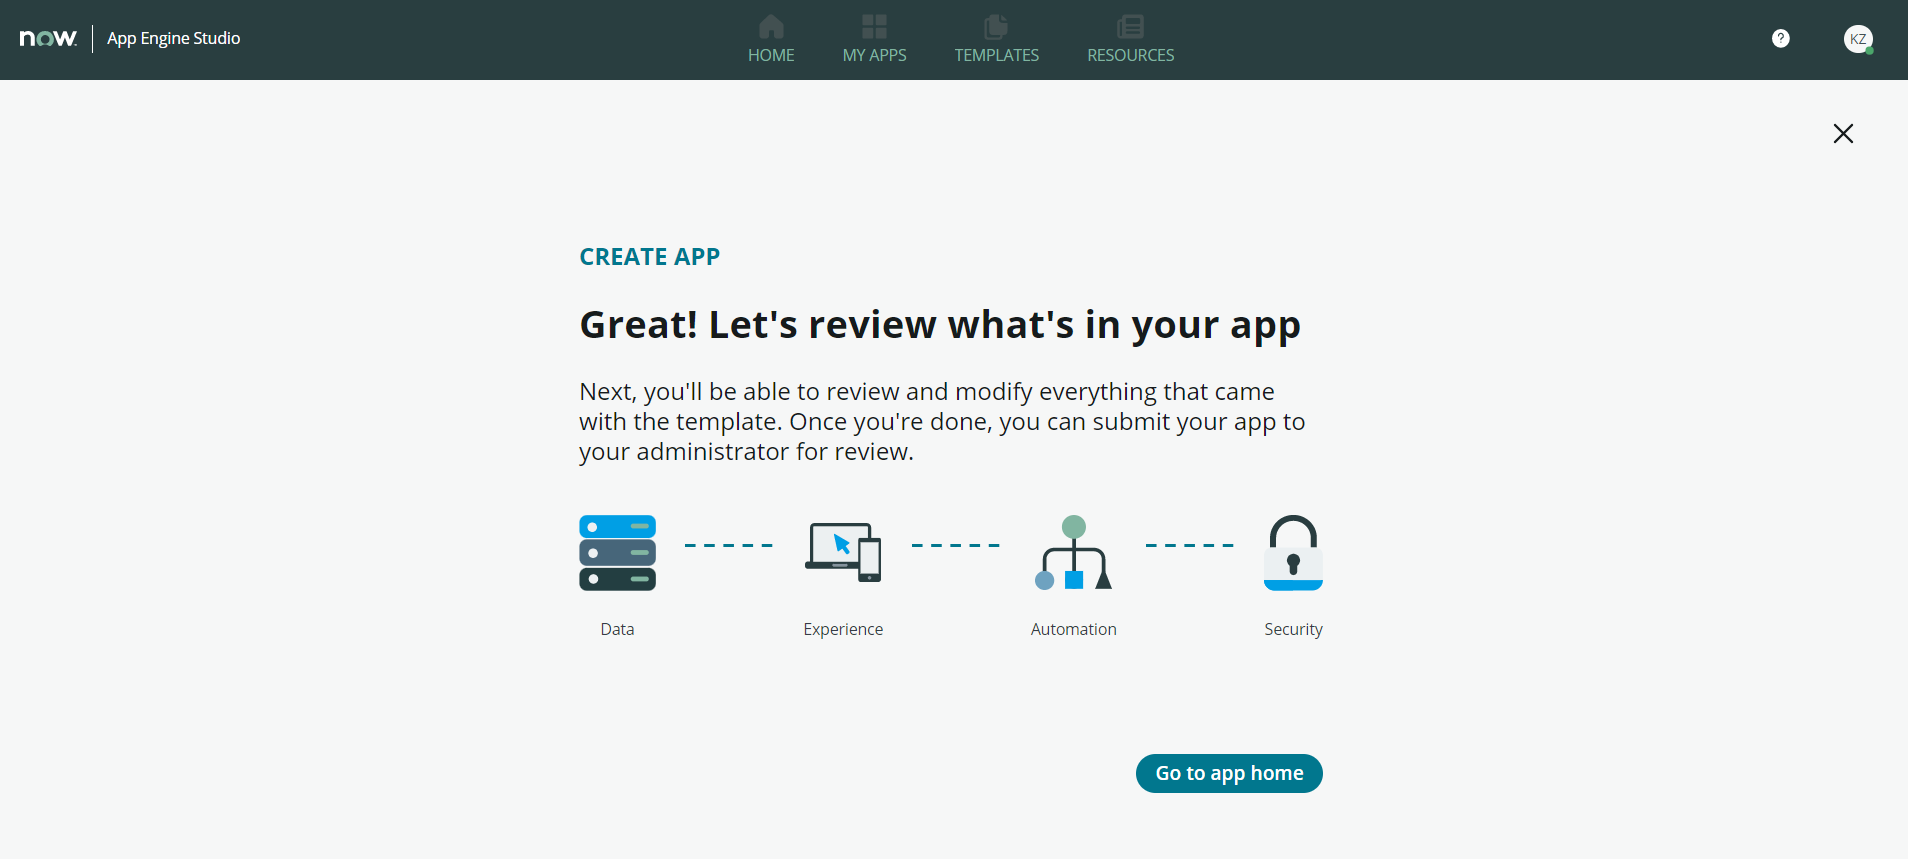
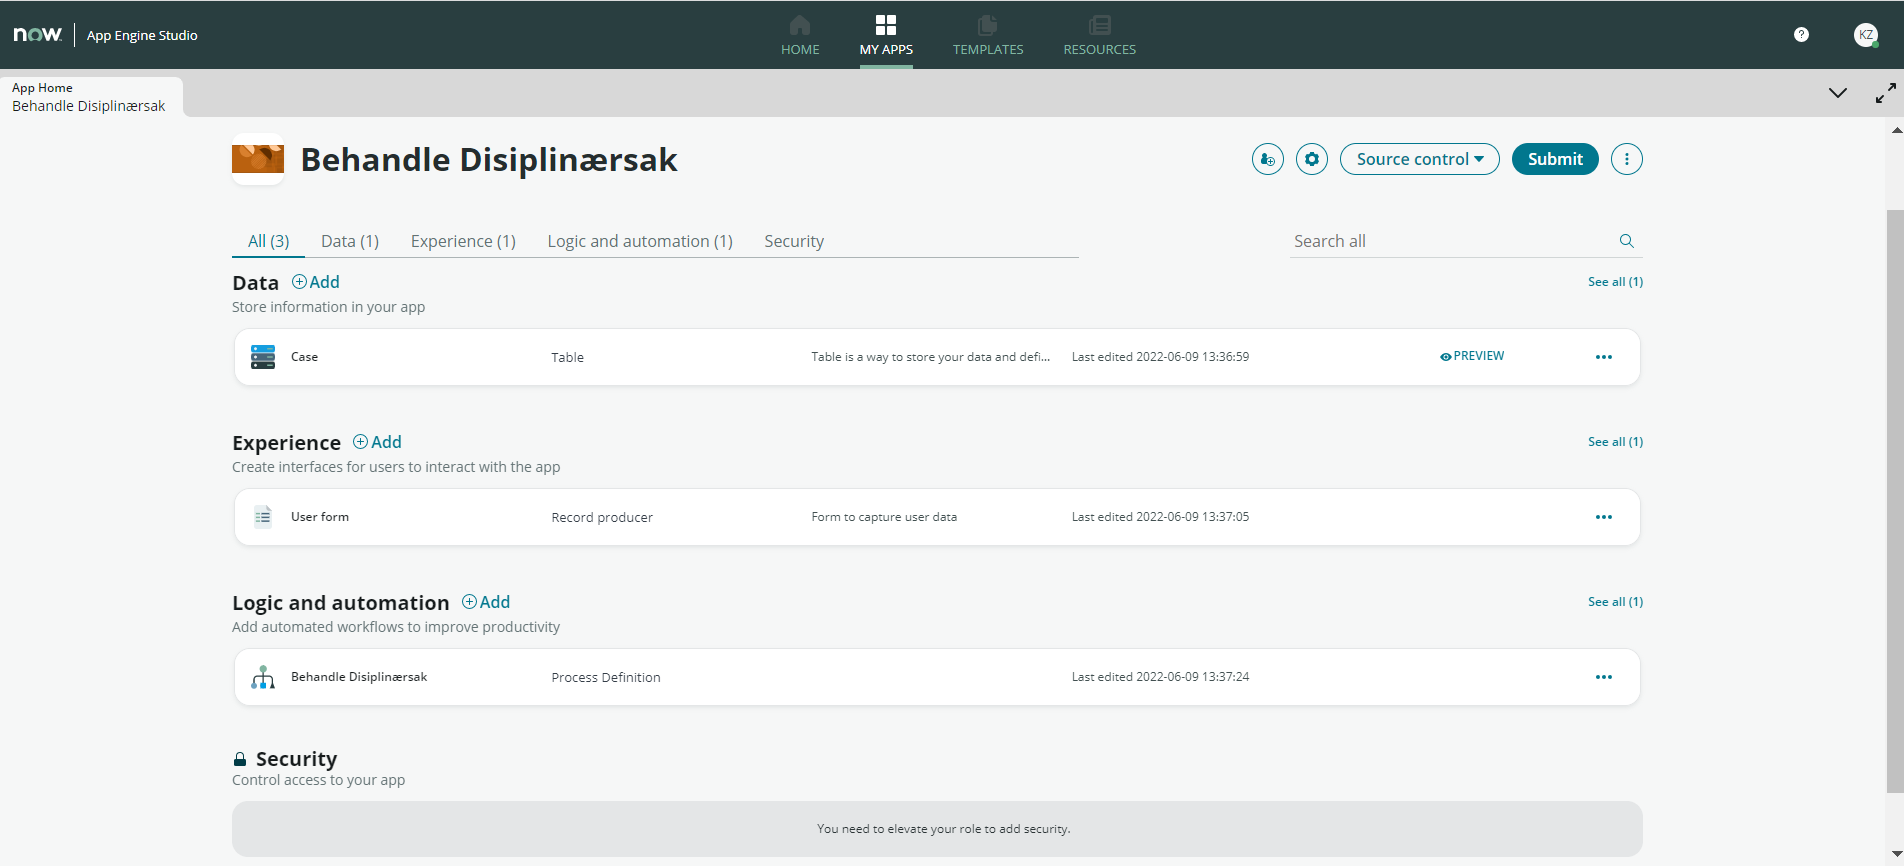
The first thing the user sees when the application is created will be similar to the image below. It will automatically be generated a table, a form and a process definition that users can use in any way they want. For more information about the different parts, read the following article: https://docs.servicenow.com/bundle/utah-application-development/page/build/app-engine-studio/concept/create-application.html
For this user guide, we will establish a process for handling disciplinary cases with students. We need to add some fields to the table and enter questions in a form for a student to see. Furthermore, with the process definition, we will extract the student's name from OrgReg spoke. To start, click on the existing table "Case".
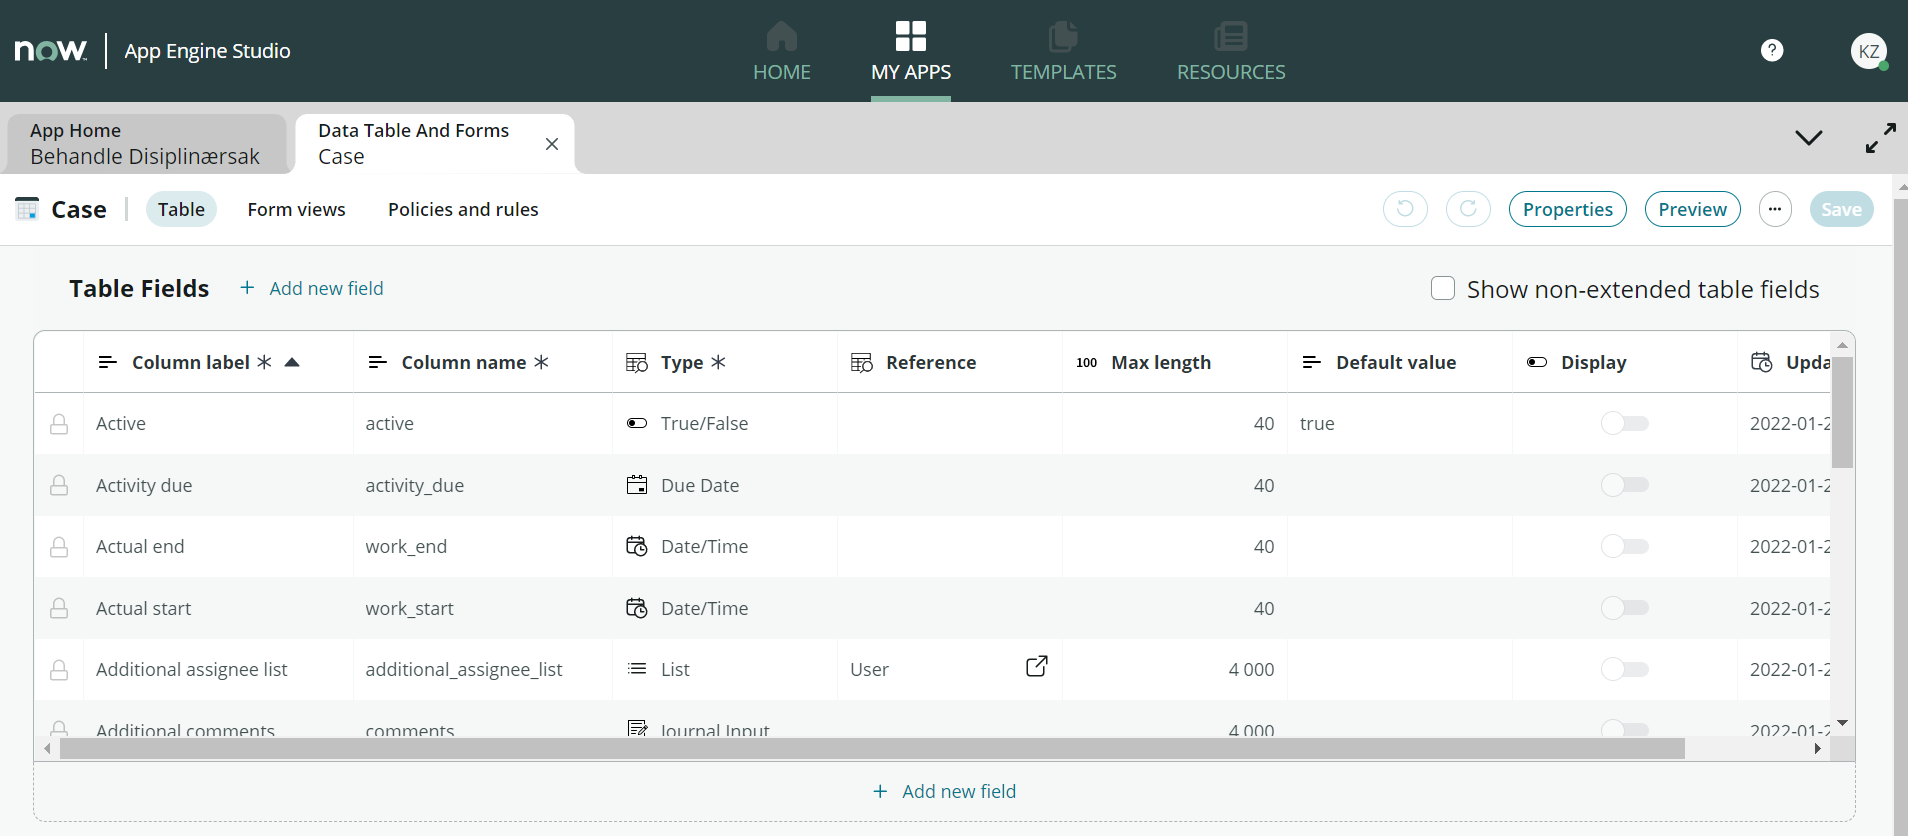
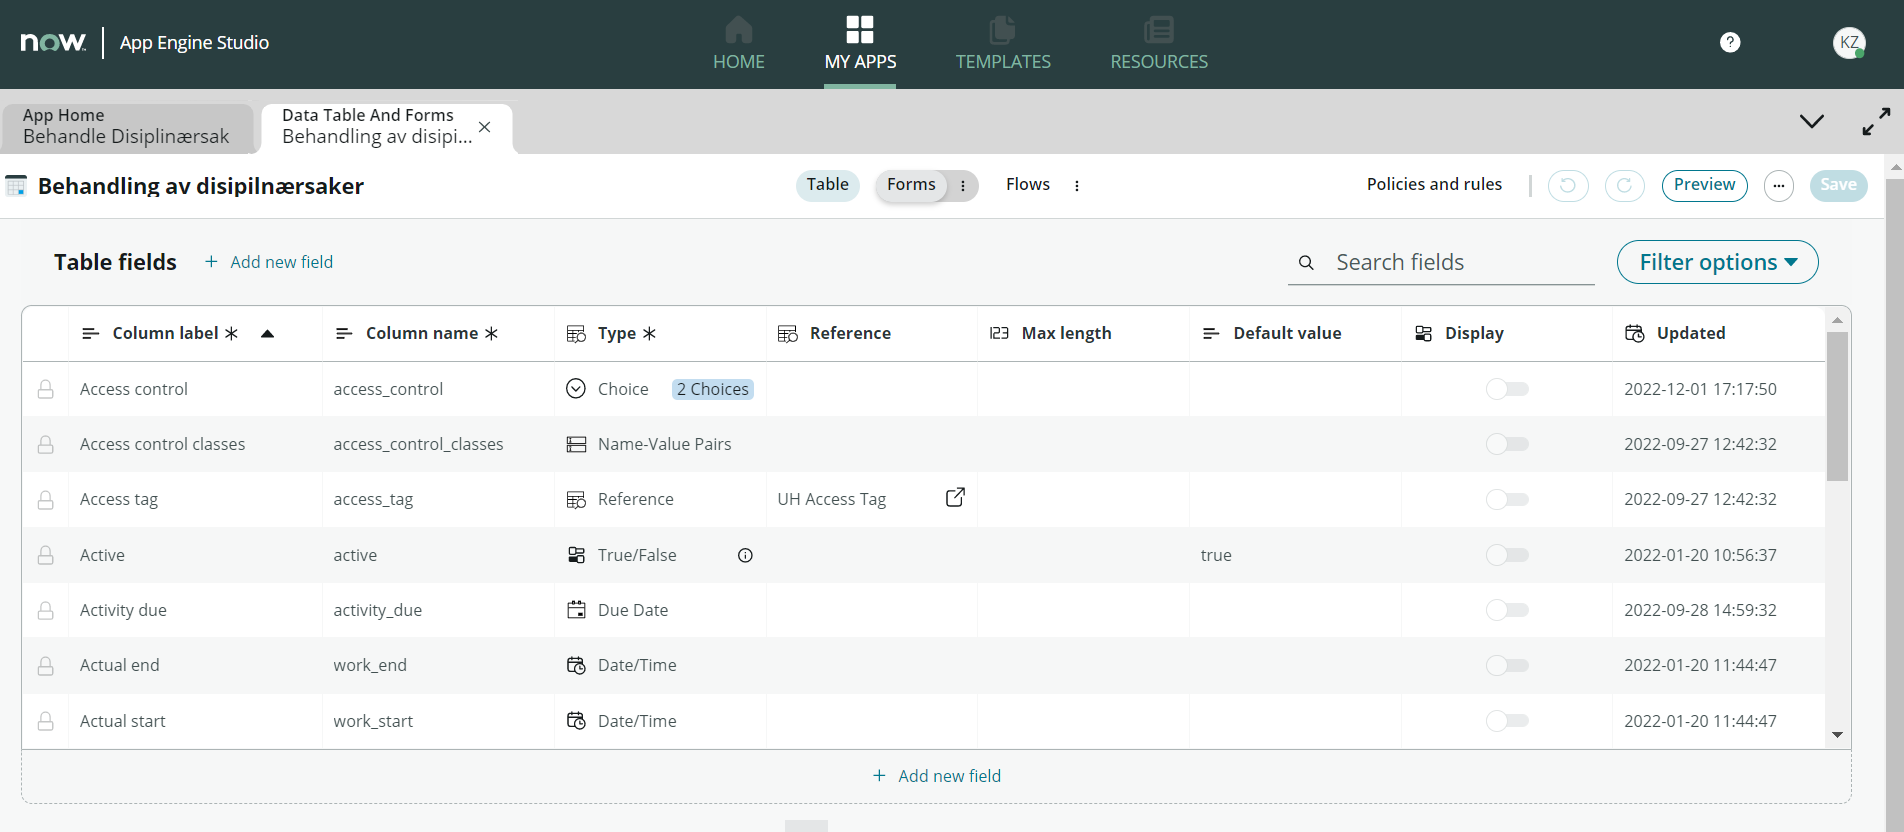
Here is a list of the fields that are already available and inherited from the core system. If you only want to see fields that are unique to this process, you can tick "Show non-extended table fields" in the upper right corner. We want to add more fields to collect information from the student as user input and through integrations from subject systems. This is stored as data in the application and visible to case officers. For this scenario, we are interested in knowing the type of disciplinary violation in question, here we want the student to be able to choose between several options. We thus create a new field by clicking on "+ Add new field".
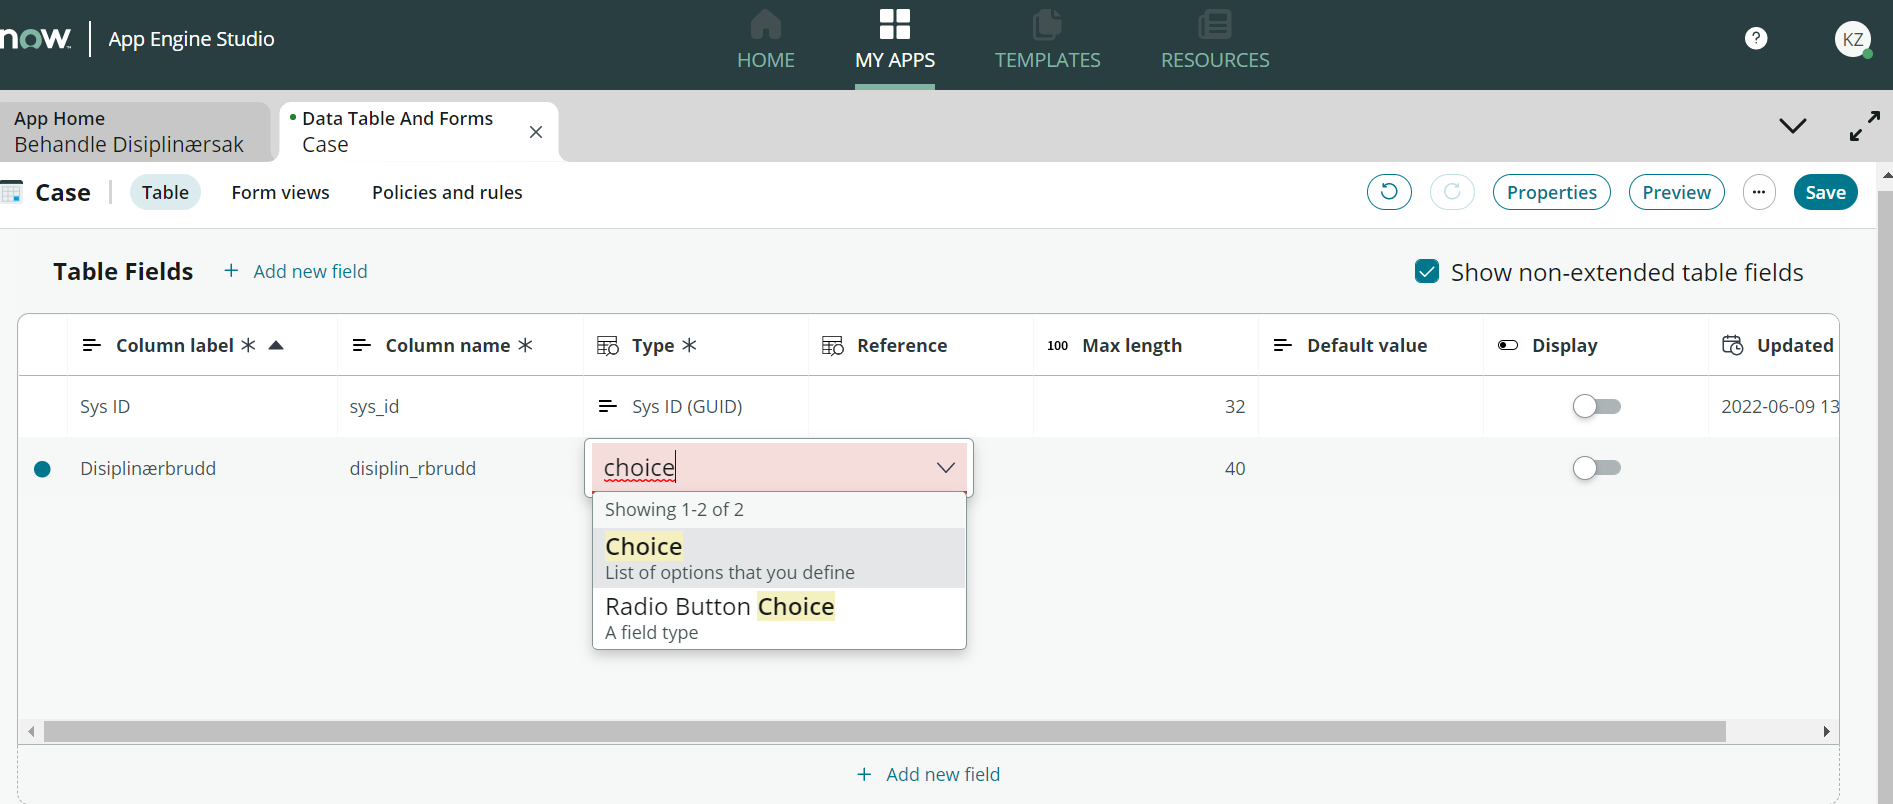
Give an appropriate name to the field under "Column label", the column name is automatically set when filled in. Then select "Choice" in the "Type" field. This gives us the opportunity to define several choices for this field.
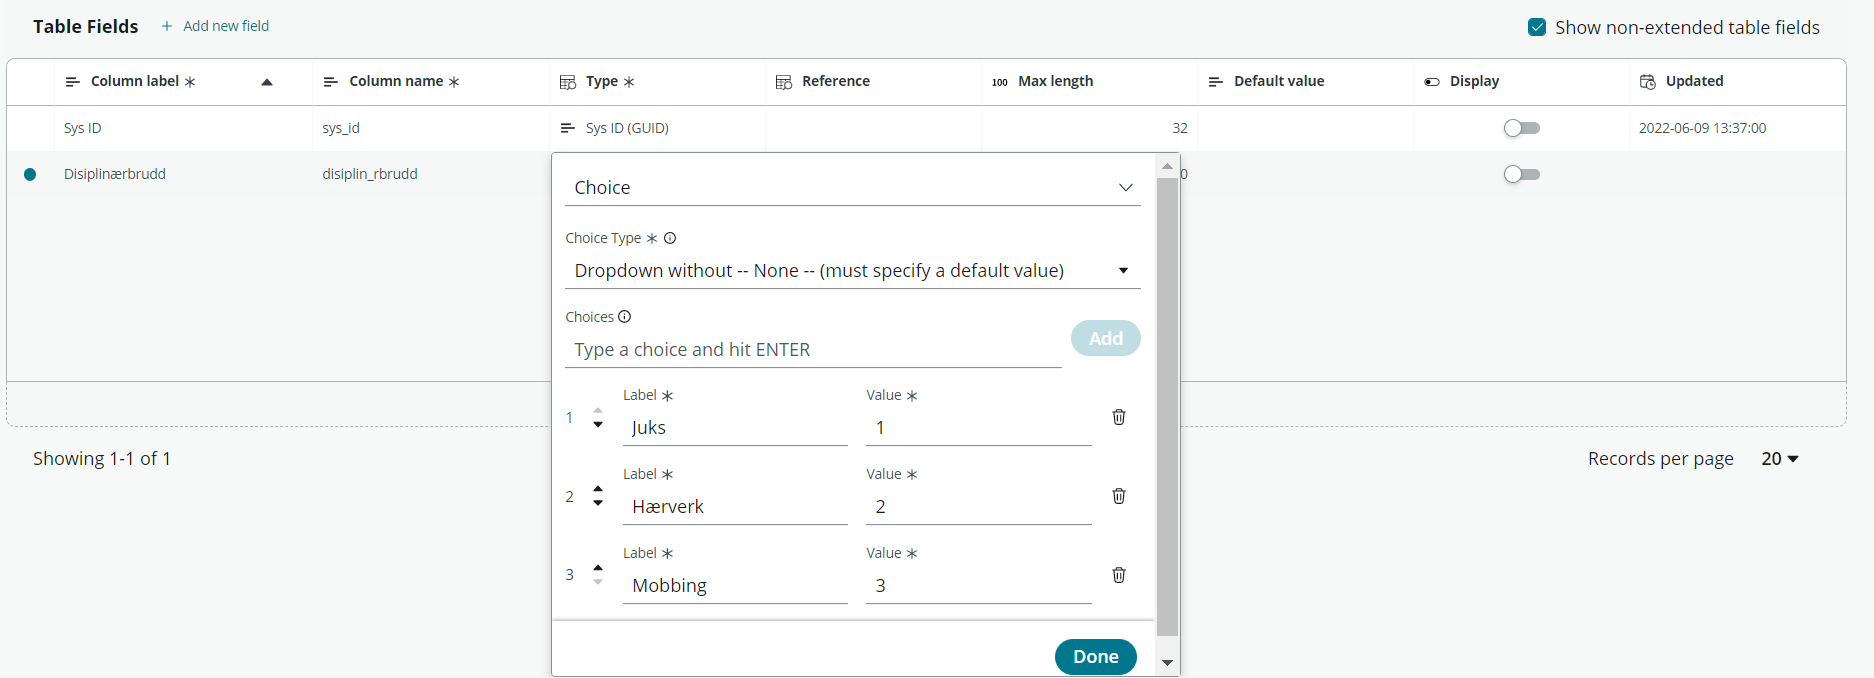
The next step defines which type of choice for the field is desired (e.g. drop-down). Then you enter the various choices, here we have defined three choices for disciplinary violations. For easier overview when adding something not quantitative, one should switch "Value" to a numerical value. Then click on "Done", and "Save".

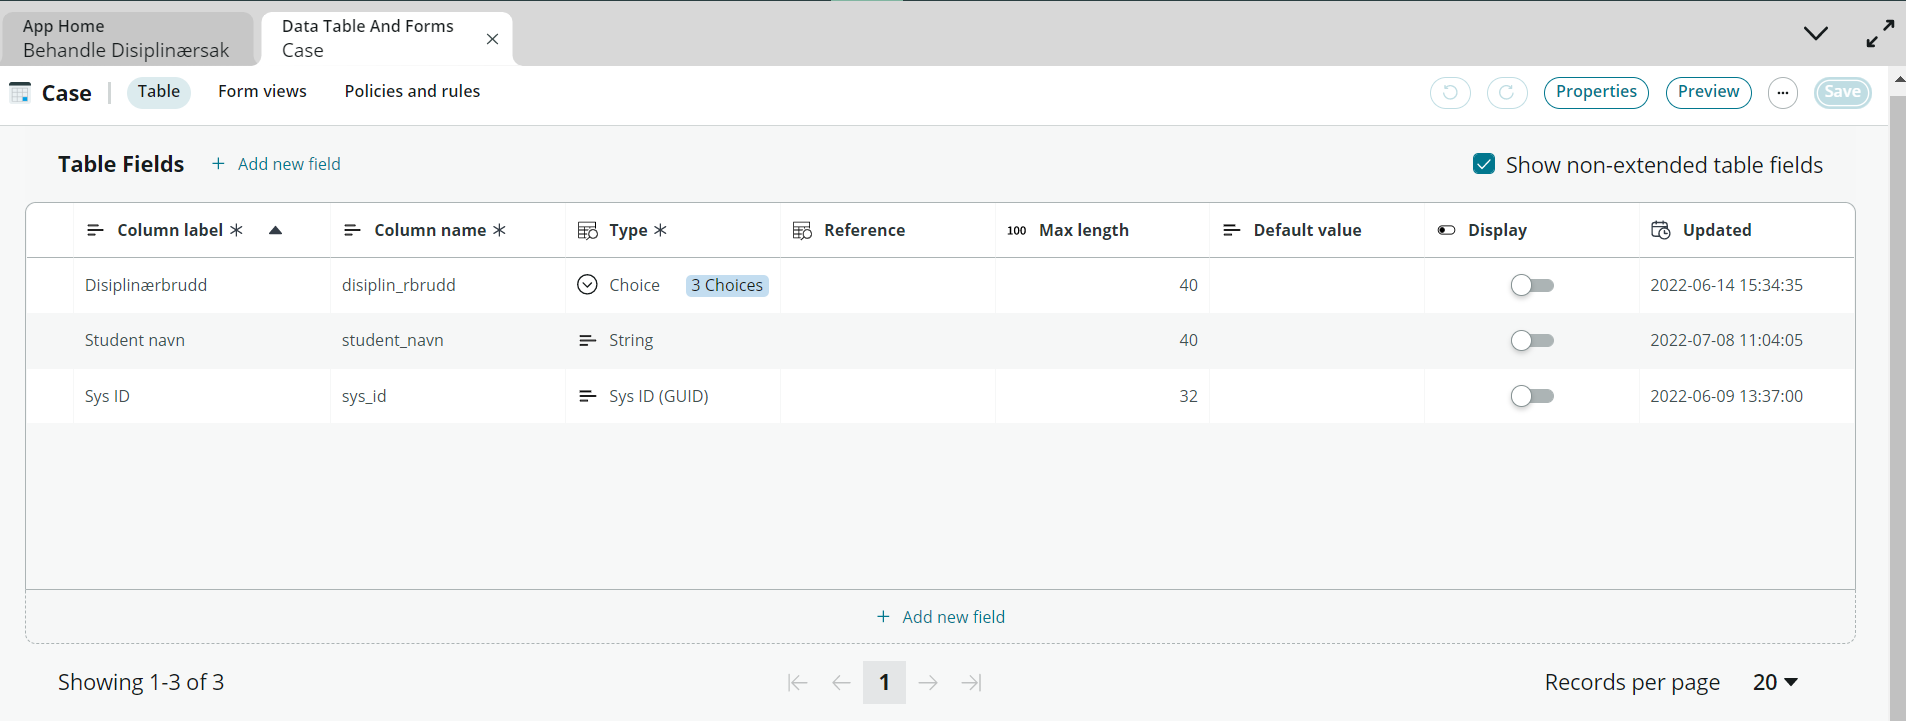
In addition, we add a field that retrieves the student's name through an integration from subject systems (this is looked at in more detail when we define the process flow later in the supervision). This field becomes of type "String", which is a text field.
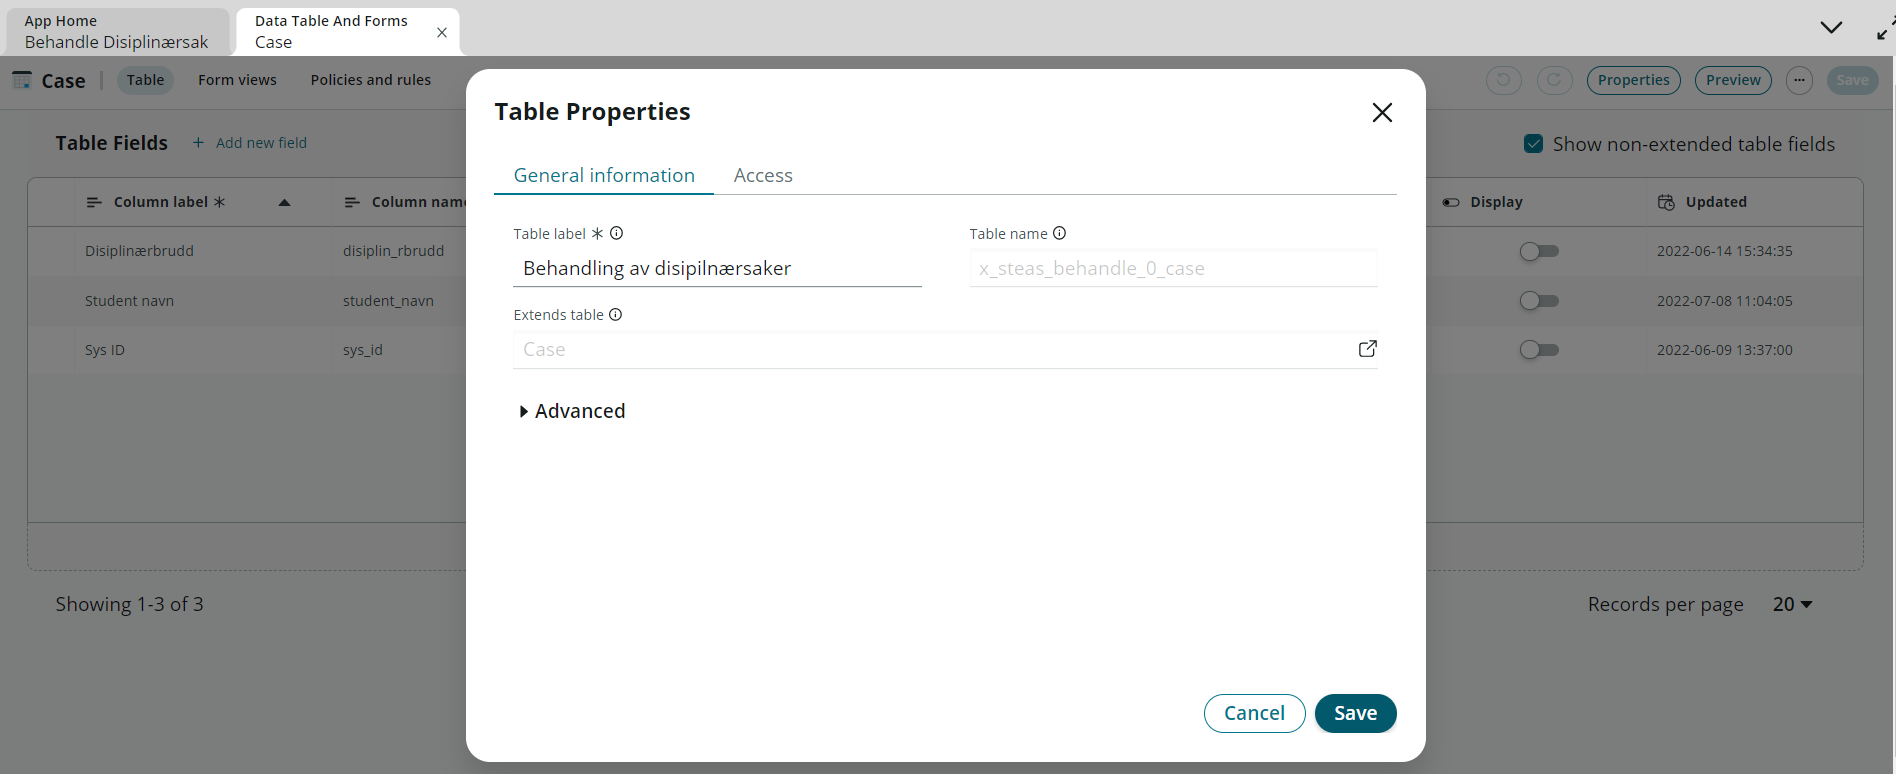
To easily find the table in later steps, we can define a suitable name for the table. This is done by clicking on the "Properties" button. Here you have the opportunity to change "Label" on the table. Since this is a process of handling disciplinary matters, we call it something that reflects that.

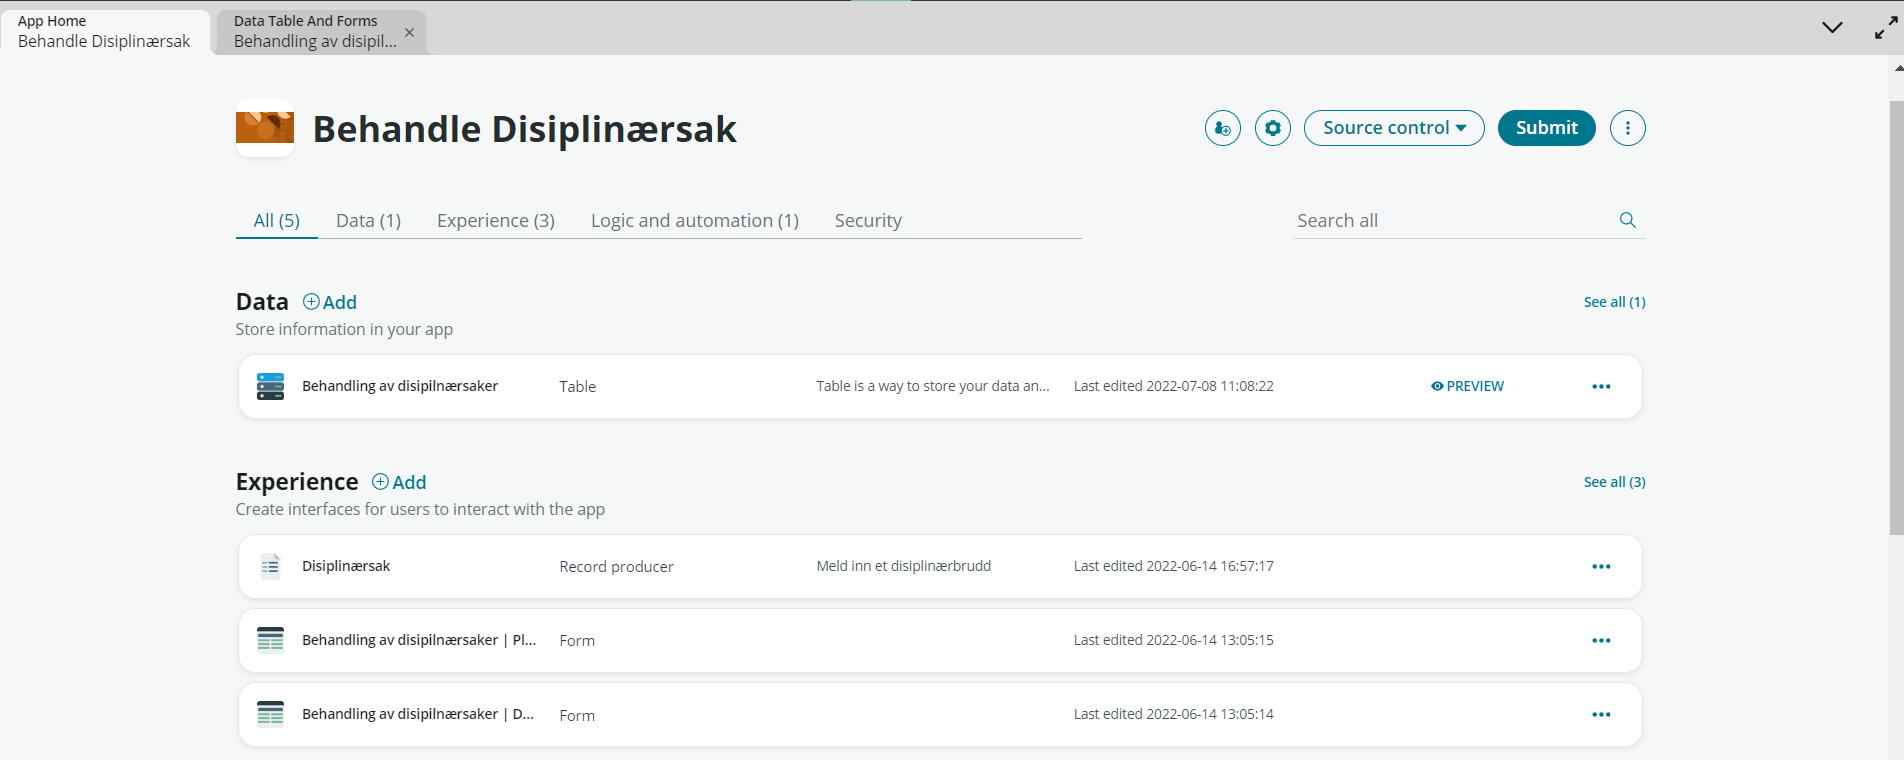
Navigate back to App home by clicking the first tab.
Access control
New tables are created with a default set of ACLs. If access to the table should be managed through RoLF, theses needs to be deleted or deactivated. We here describe how to acheive this.
-
From AES, edit the table
-
Open advanced view
-
Scroll down to the related list “Access control”
-
Change active to “false” for all records
Record producer
The next step will be to create the form that the student can see and use when they want to file a disciplinary case in the student portal. Navigate to disciplinary proceedings under "Experience", which takes us to Record Producer/ Post Producer.
Here are several steps to go through when creating a form. Follow the side menu on the left side from the first step.
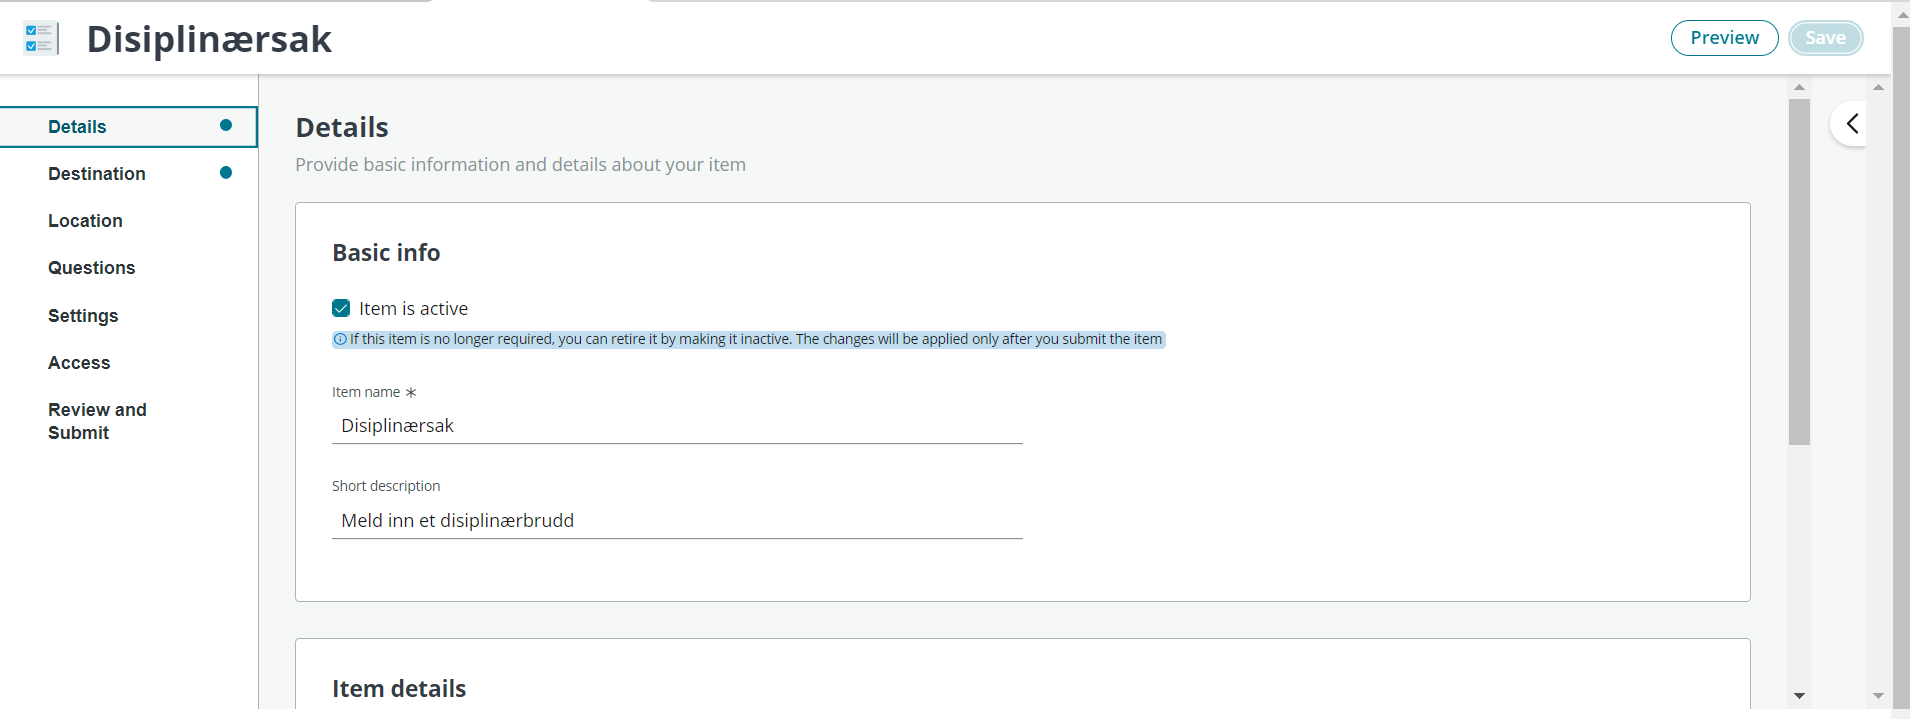
Details
Give a name and description to the form. Note that this is what the student will see when registering, so it is good to provide a detailed description of what the form will be used for. Click "Save" after the information is filled.
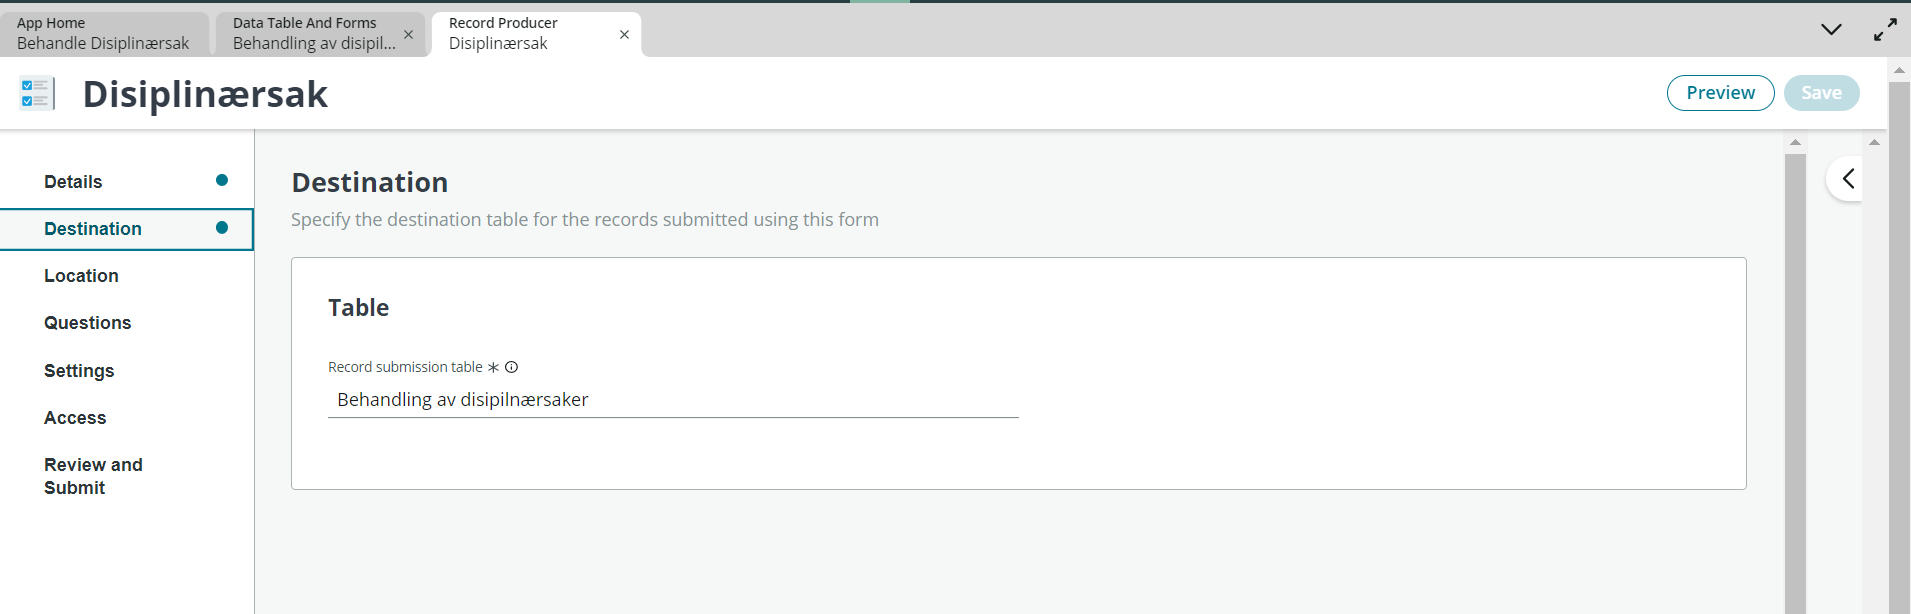
Destination
This is where the destination must be filled in. That is, which table this form should point to and update information in. This tends to be auto-filled when the form is created directly in App Engine Studio, or by using a template that automatically creates forms. If an application/process is created without the use of a template, one must also find the table this form should point to.
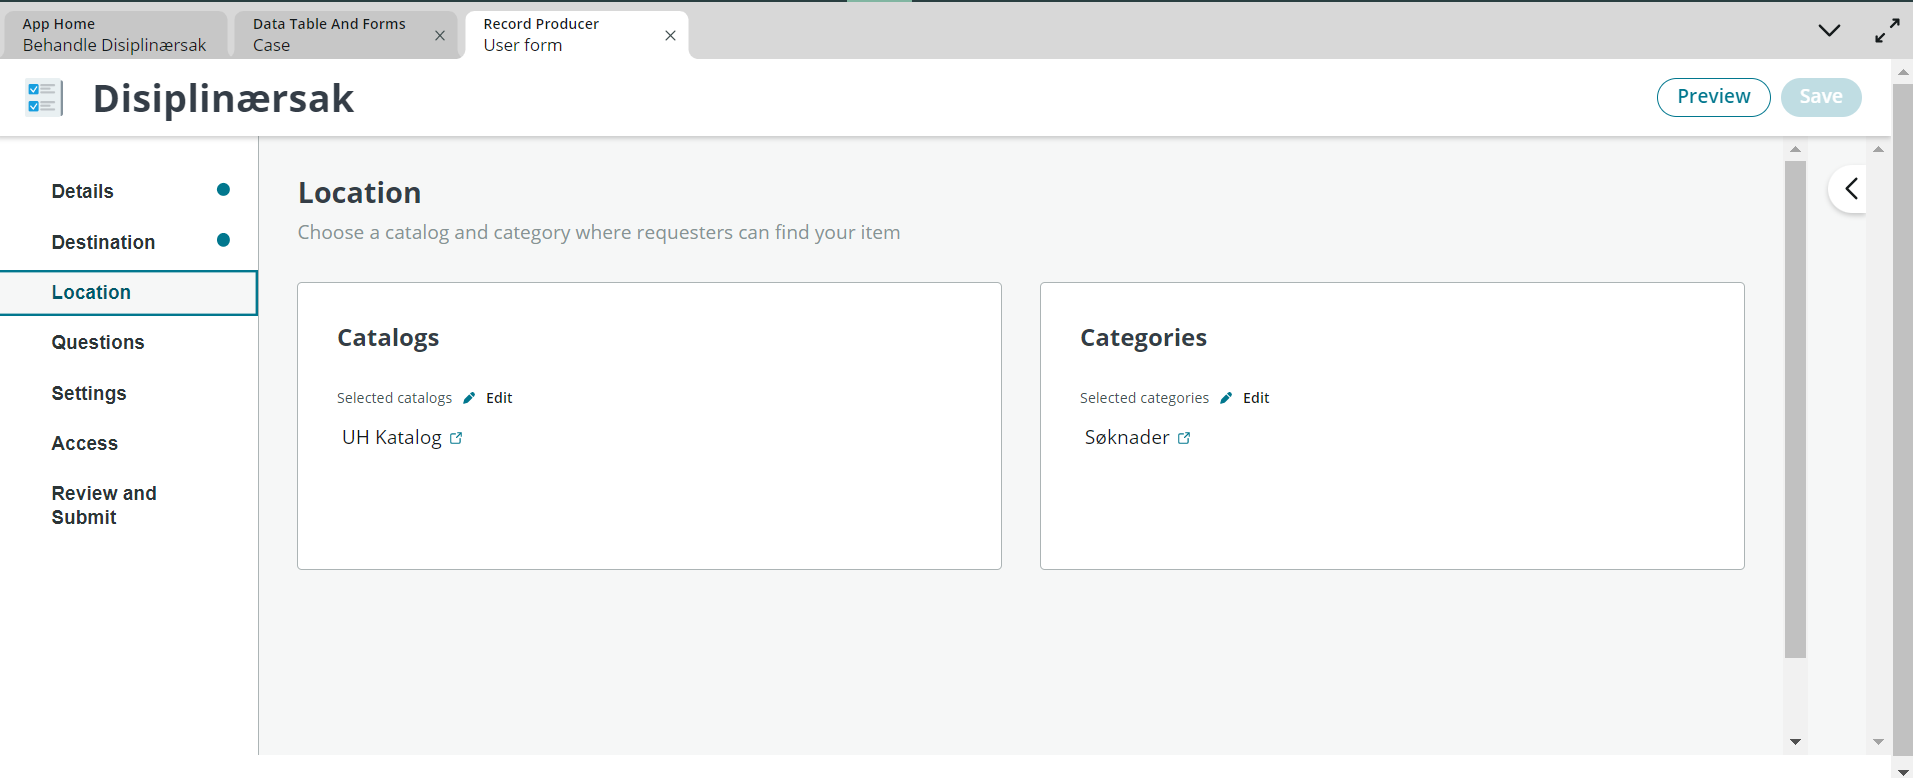
Location
On the next step, Location/Location, it should be defined where this form should be located. Here you will have access to choose a directory and which category it should be located under. This makes it available in the end-user protal and determines where in the directory they should be located. Click on "Browse" under Directories and select the appropriate one. It's the same procedure for categories.


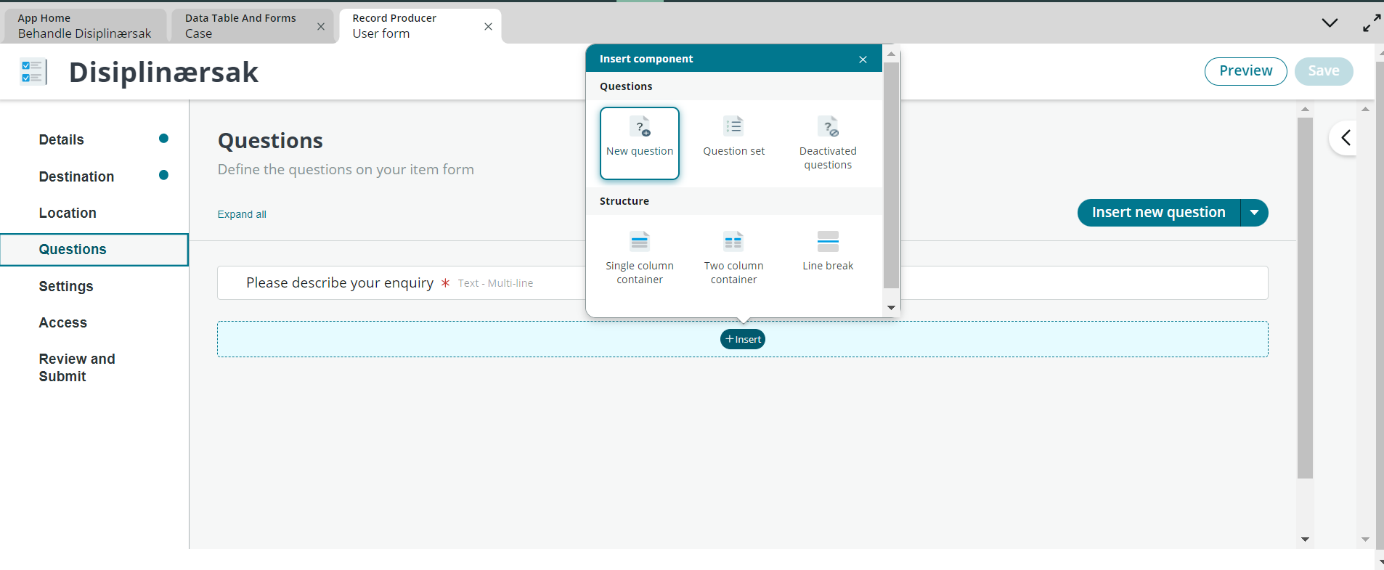
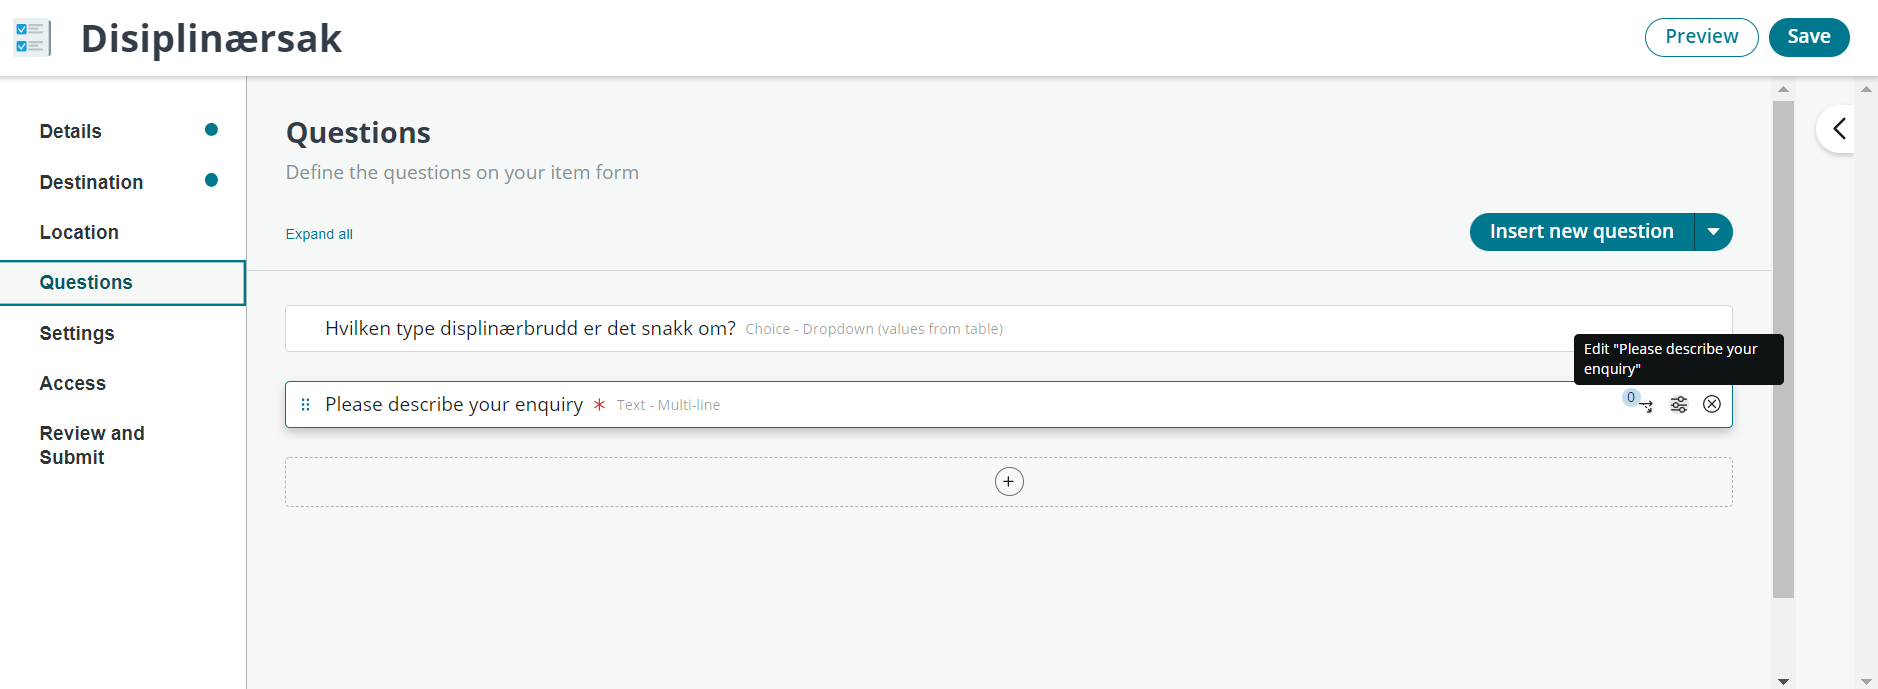
Questions
Furthermore, the questions are defined in the form. These are linked to the fields we created in the table. To define a new question click on "Insert new question" and select the type. We want to collect the type of disciplinary violation in question, so we choose "New Question".
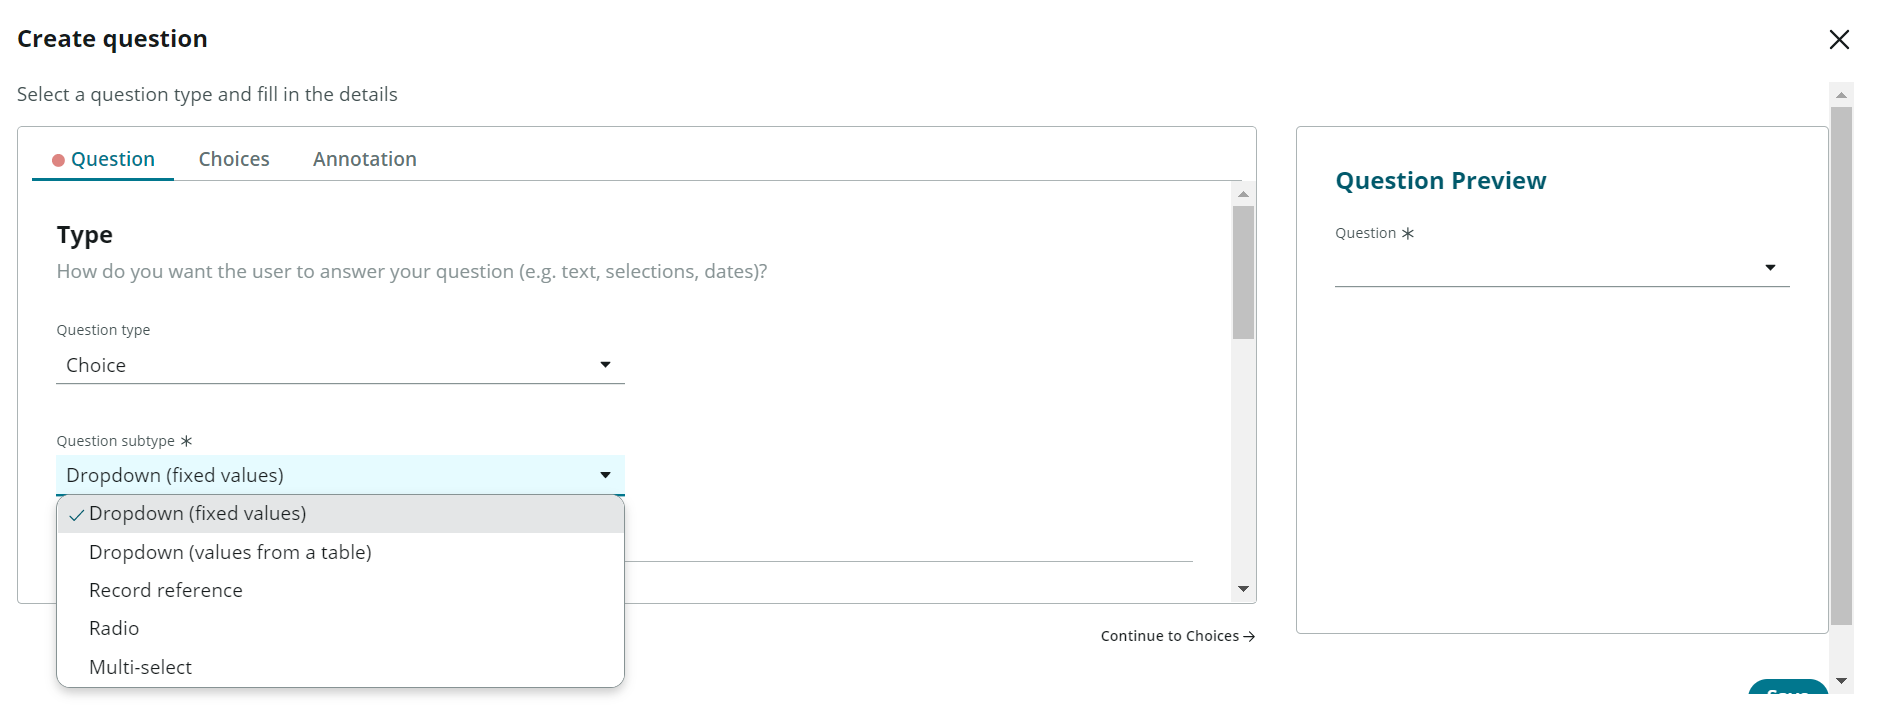
When creating a question, the type must be selected, in the same way that one defines a new field in a table. Here, type reflects the field, we want to give the student more choices, and select the question type "Choice". The values should be retrieved from the discipline violation field in the table, and thus select the drop-down menu "Fixed values".
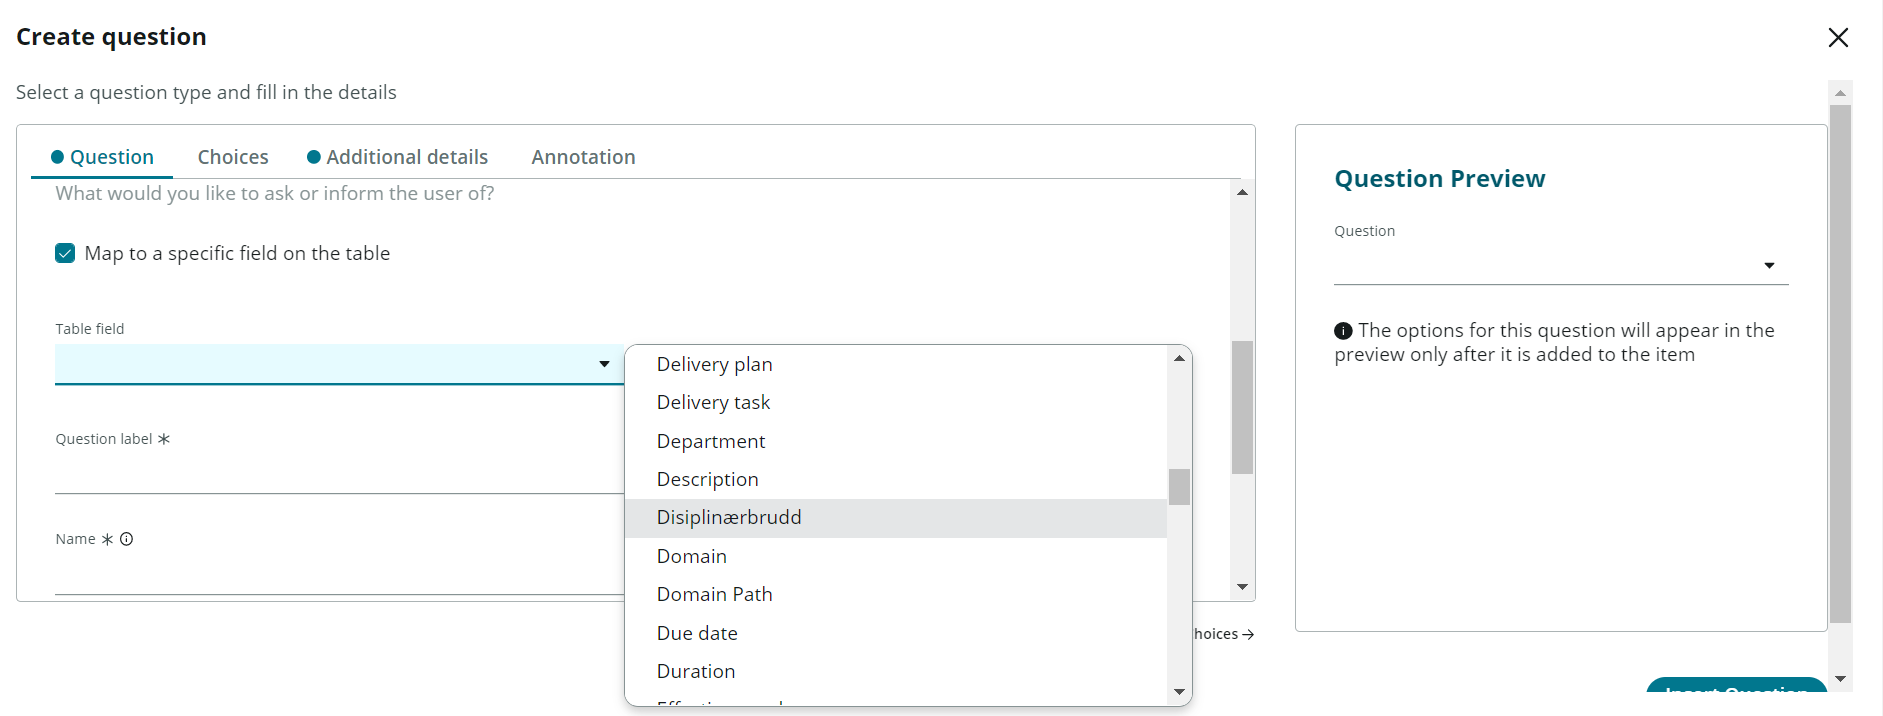
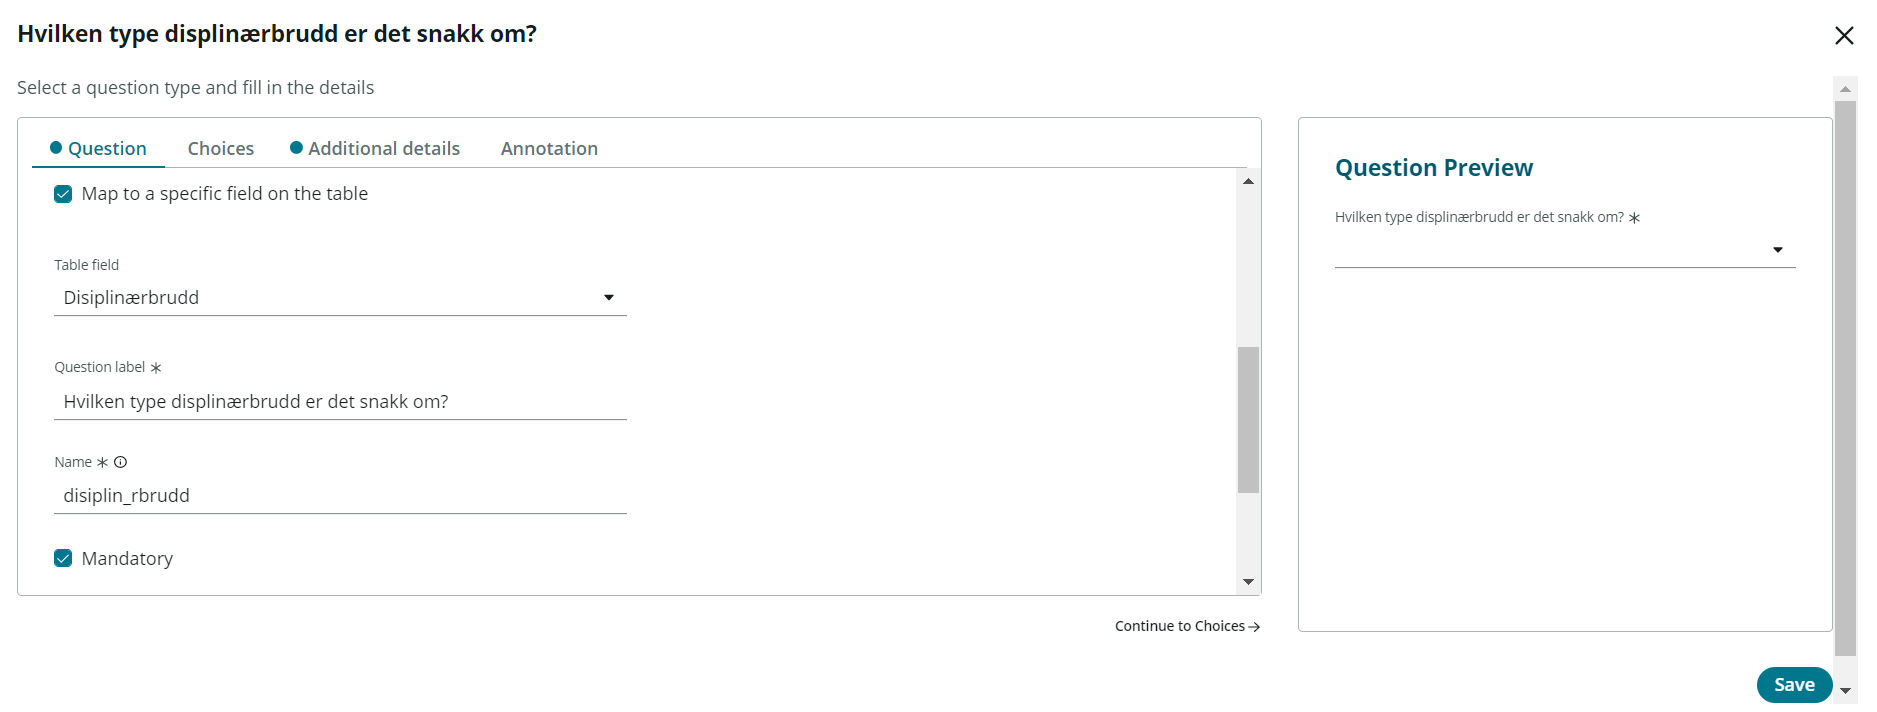
 Check "Map to a specific field on the table" and select the "Disciplinary violation" field created in the table. The name is automatically set as the field is selected. Furthermore, we must enter the actual question we want to ask the student, this will be what the student sees in the form.
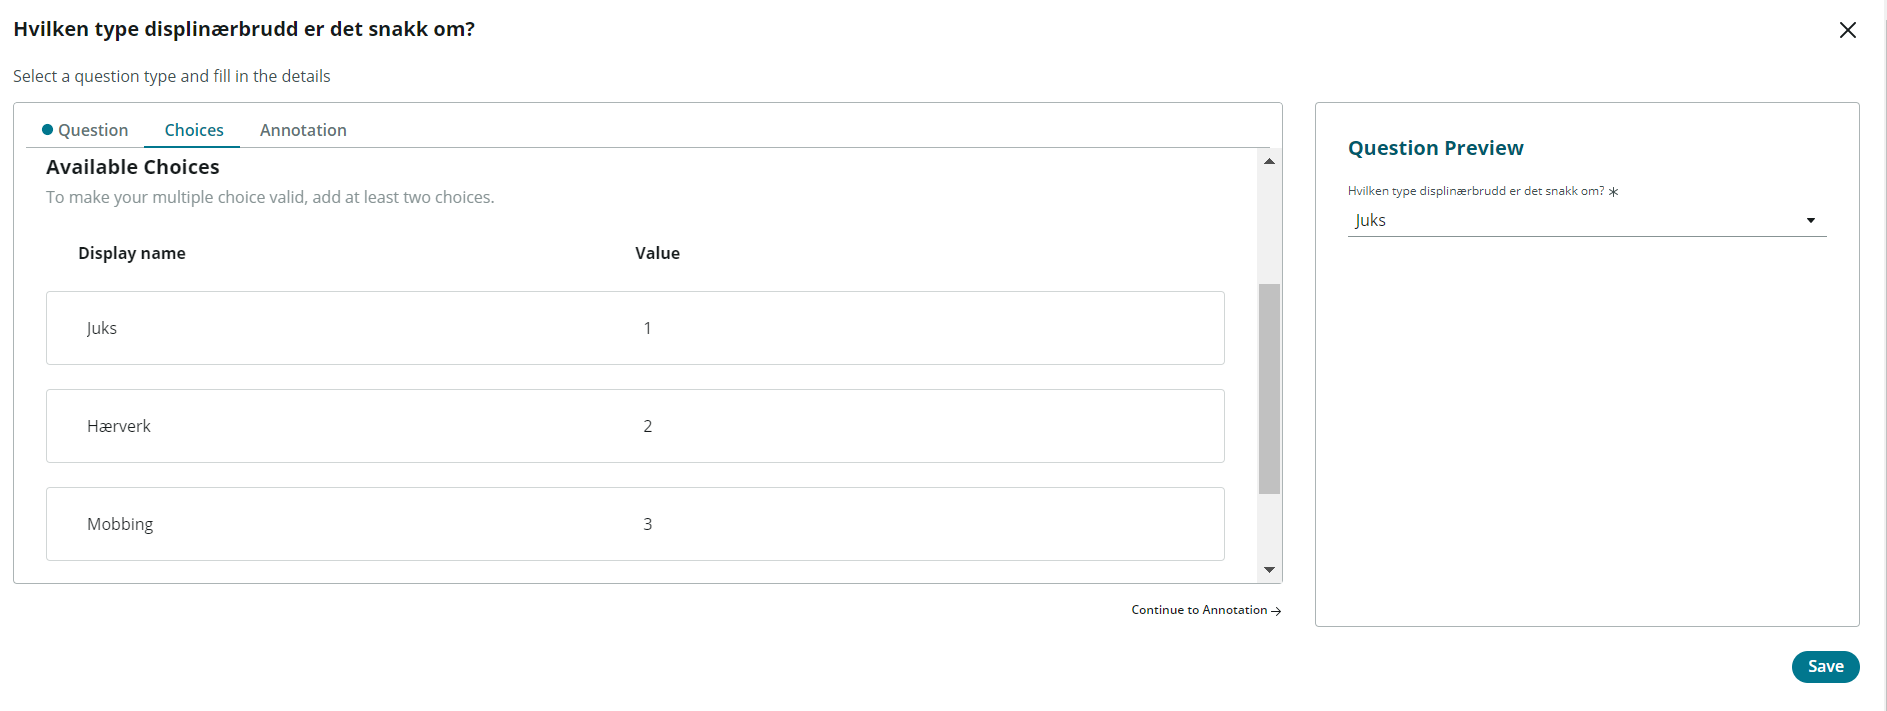
Further on the next tab, Options/Choices, we define the same choices that we entered at the field level in the table. Click "Insert question" / "Save" and you will automatically be taken back to the previous page.
 We also want a description of the disciplinary violation, here the existing question that already points to the description field can be used. To edit the question, click on the icon in the center. The procedure is the same as the question we created above.
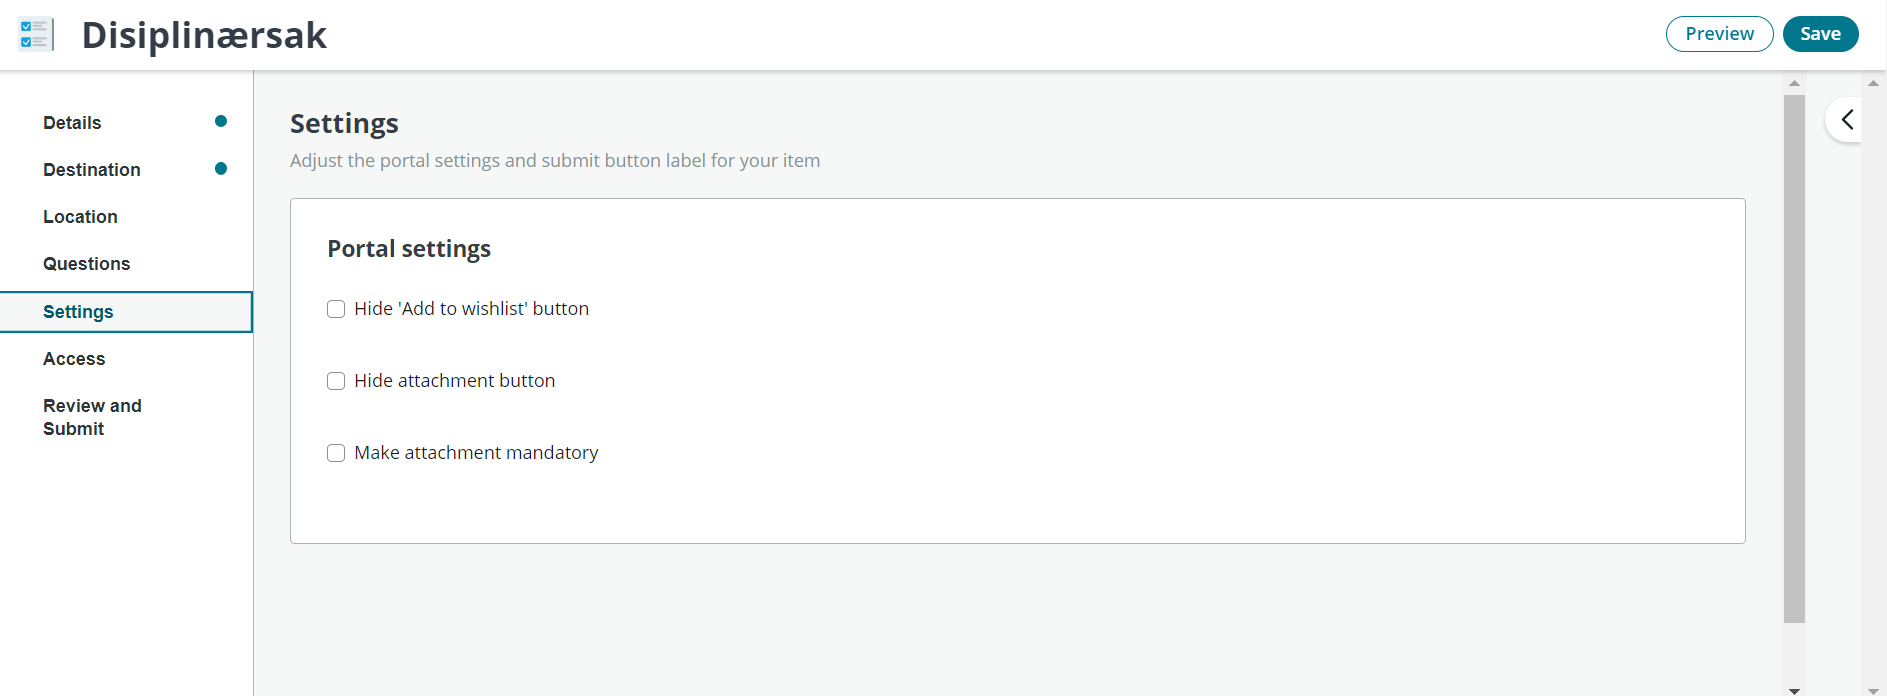
Settings
Under settings you can choose whether you want to give the student the opportunity to add attachments or not, or hide buttons. Here it is important to note that if you choose to hide the "Add to wishlist" button, the archiving functionality in the portal for this form will also disappear. We thus choose to leave everything as it does.
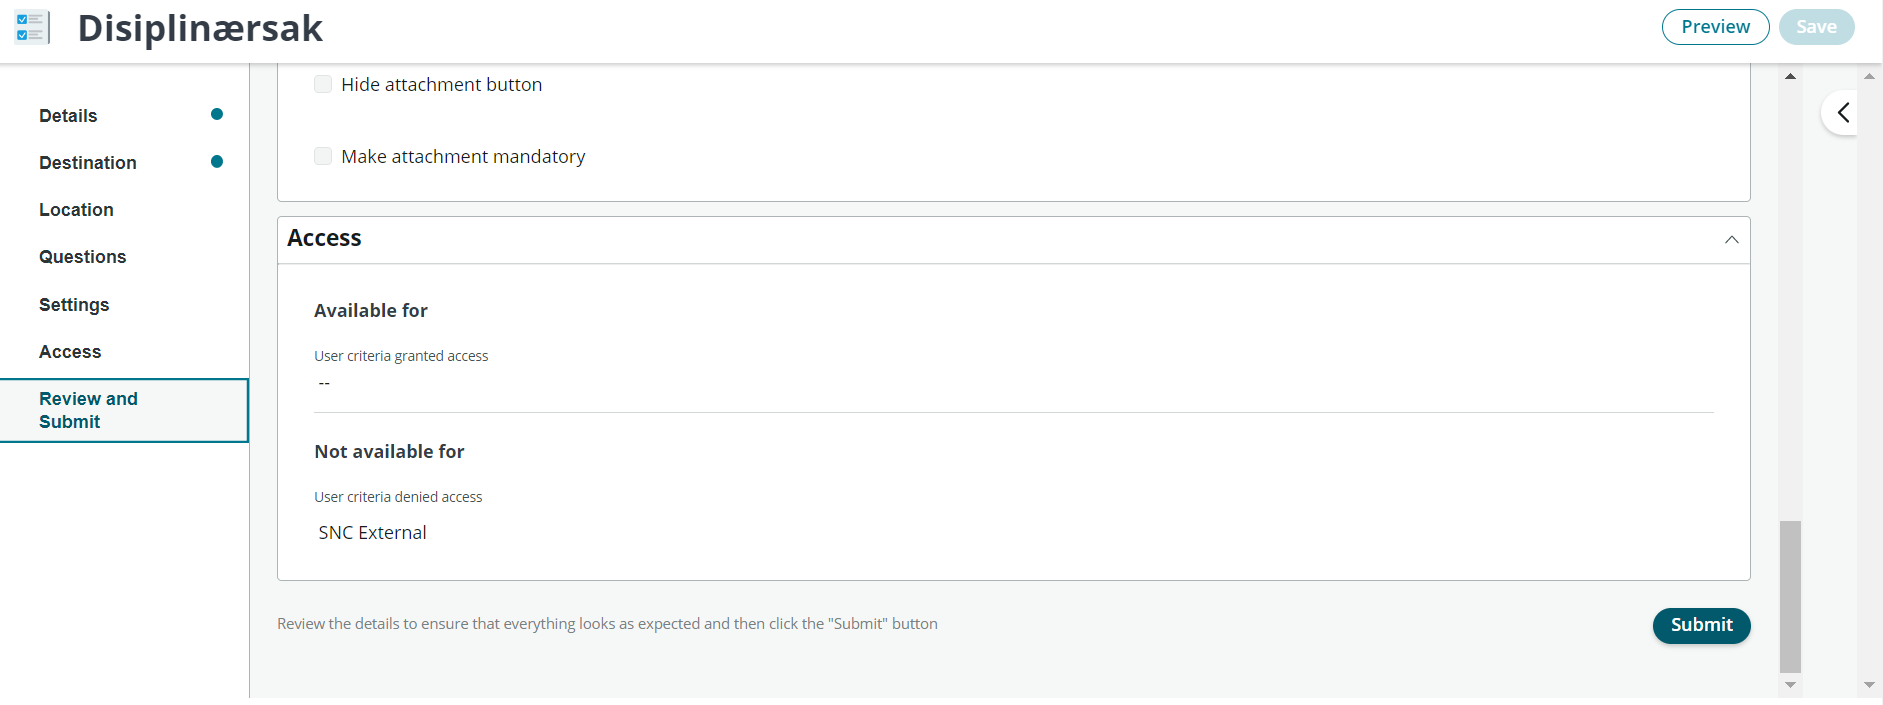
Access
Under accesses/access, you can define which group or role should have access to the form. This automatically falls on the "SNC external" group if nothing is added manually, which is a group to grant access to external users.
Review and submit
At the last step, a summary is displayed and all choices, questions and any locations you have chosen for the form to be. To make the form available to users click "Submit". To see a form preview, click "Preview".
Form preview:

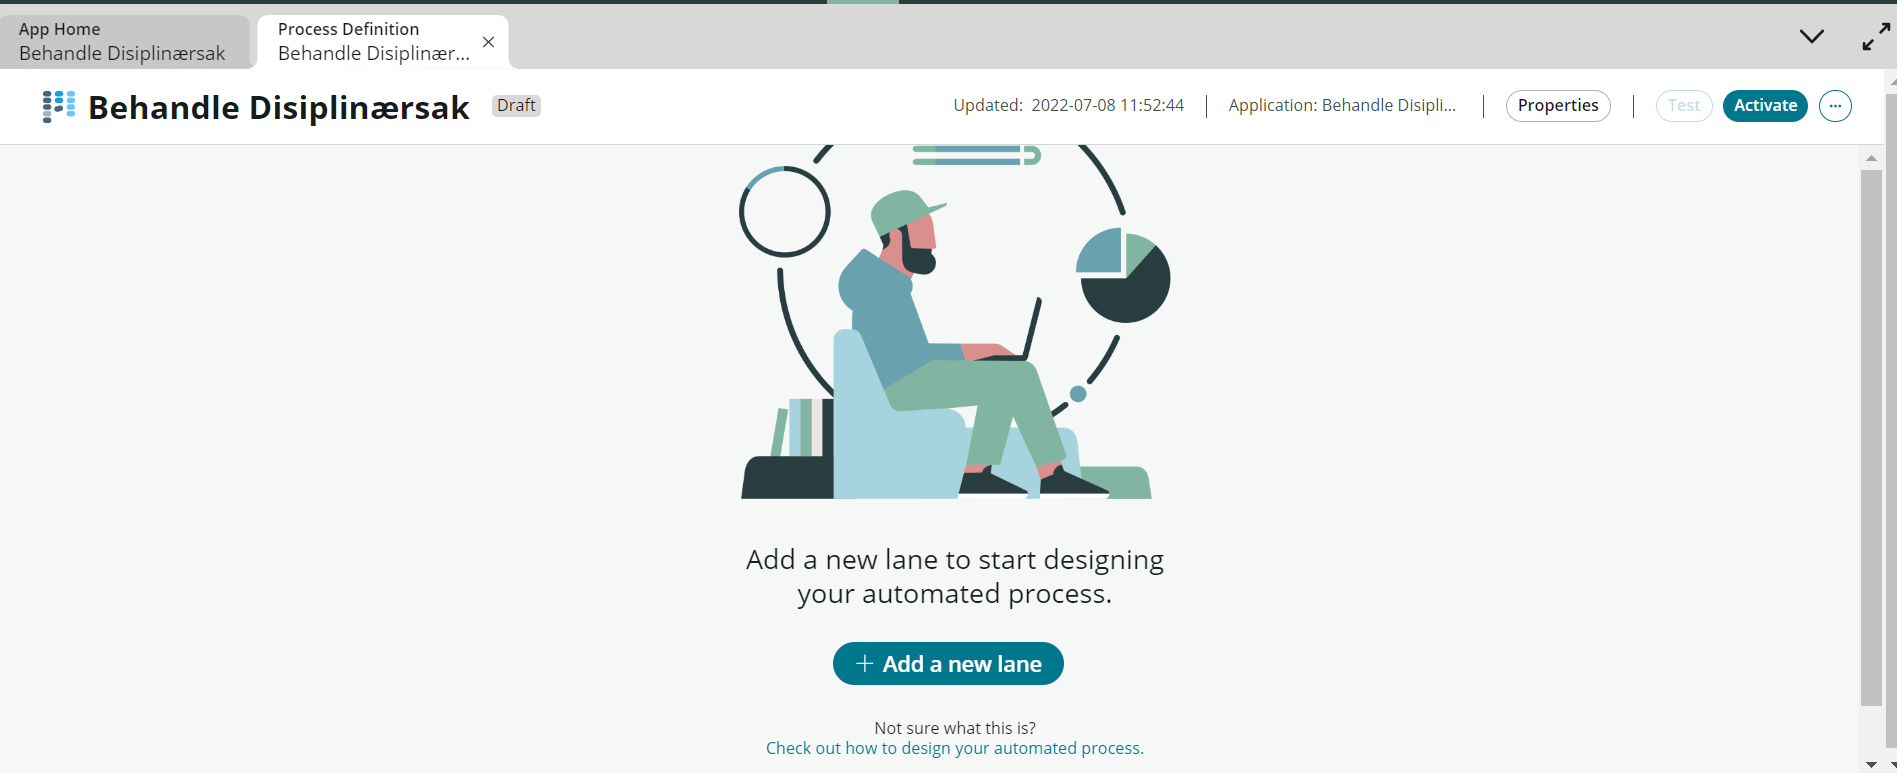
We now navigate back to App Home and start setting up a process definition that will use the data we have created in the table. The purpose of the process in the example in this guide is to retrieve and update information about the student submitting a disciplinary violation case. We use process definition to automate this, making it easier for a case officer to handle the case with correct information. To start, click on the "Logic and Automation" tab and click into the process definition.
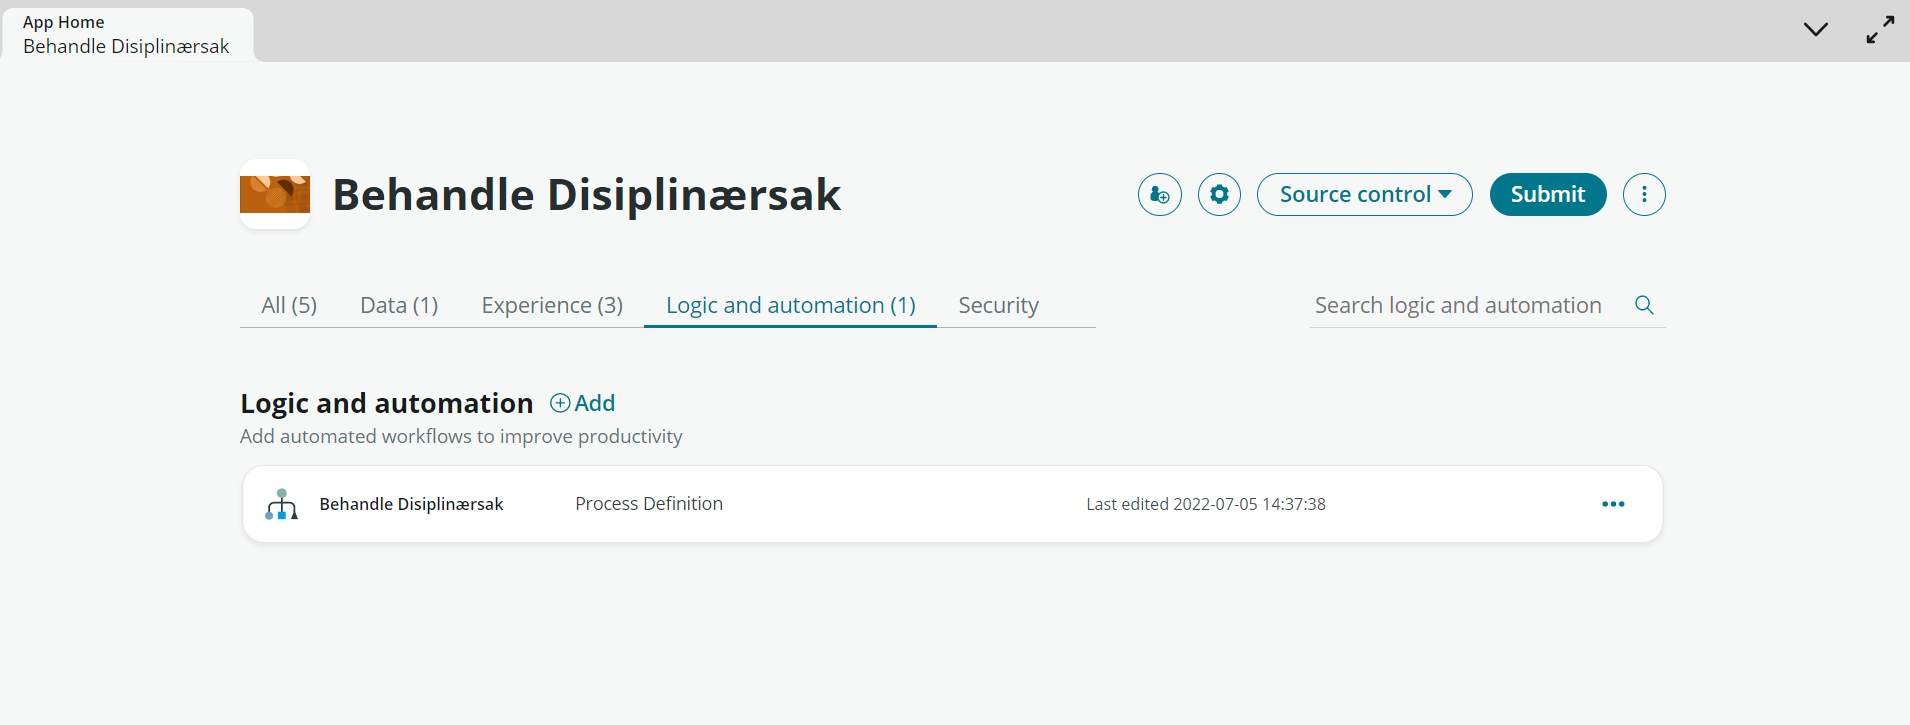
Start by adding a swimlane to the process by clicking "+ Add a new lane". A swimlane, "Lane", can be seen as a grouped sequence of activities within a process. For more information such as the individual components of Process Automation Designer (PAD) read the following article: https://docs.servicenow.com/bundle/utah-build-workflows/page/administer/process-automation-designer/concept/process-automation-designer.html
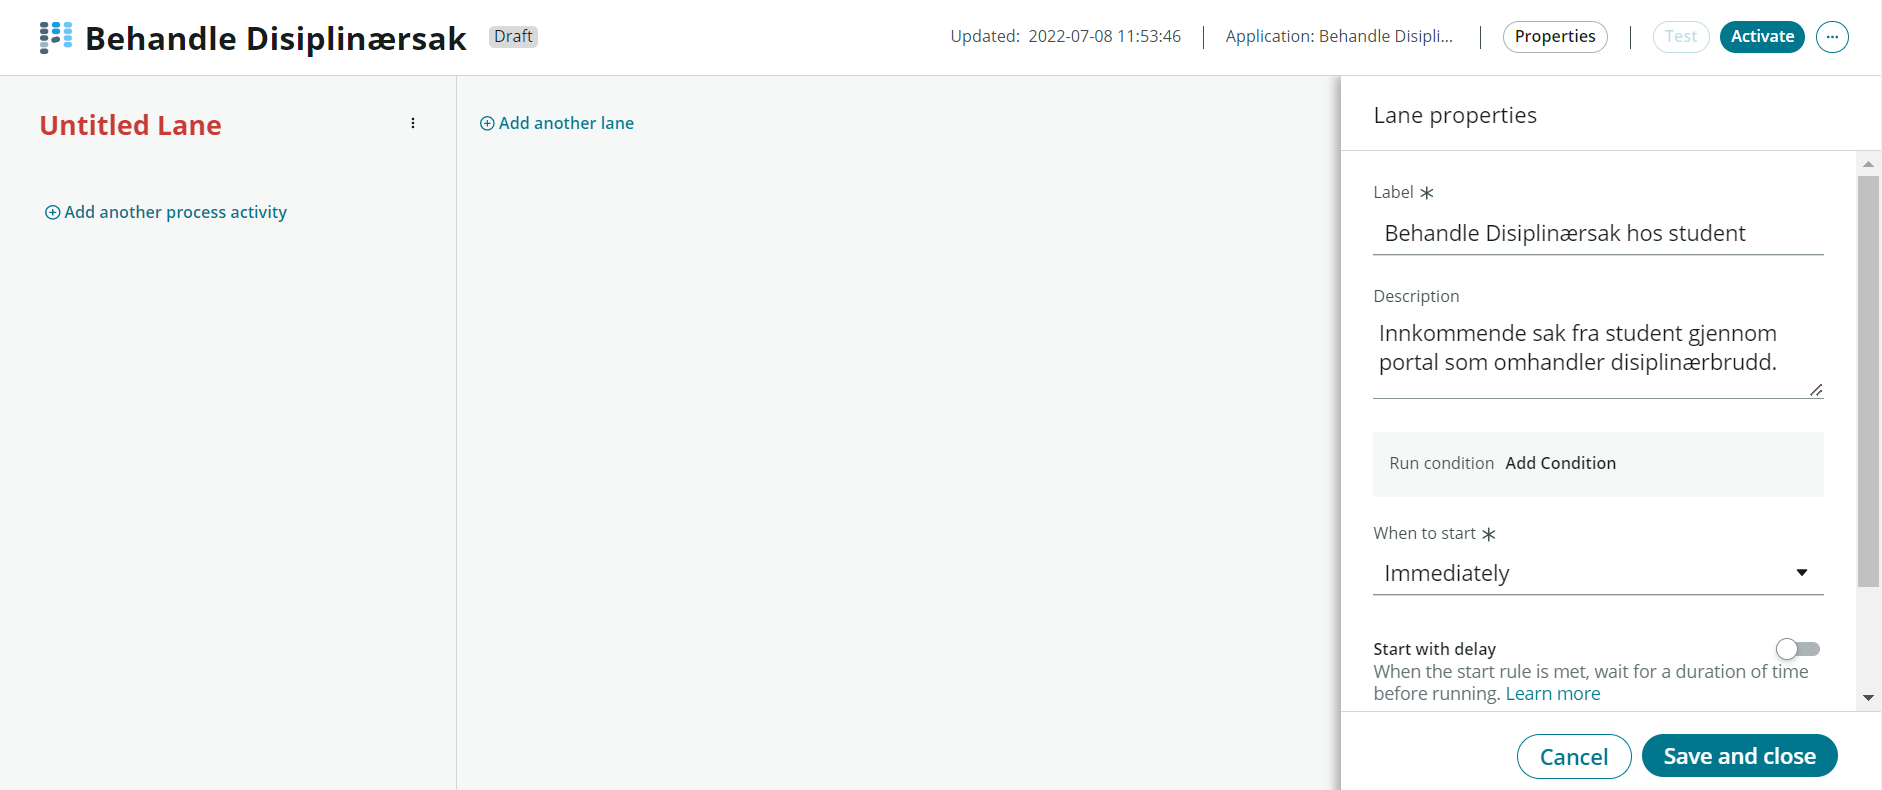
Here we give a short title to the swimlane and a description that says something about what this swimlane should do. Click "Save and close" to save the information.
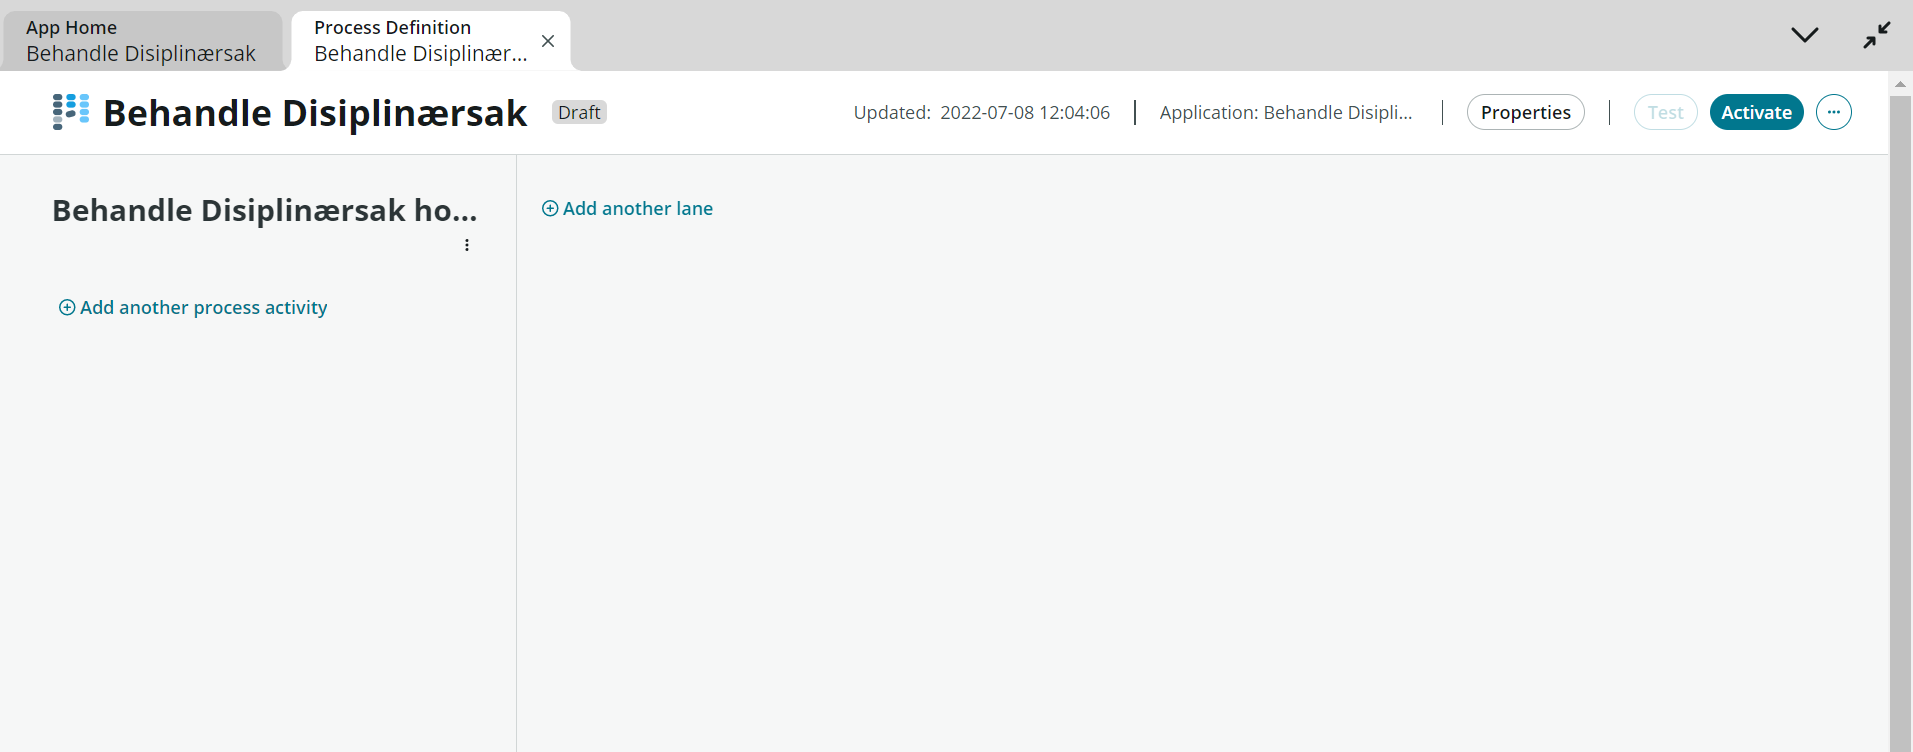
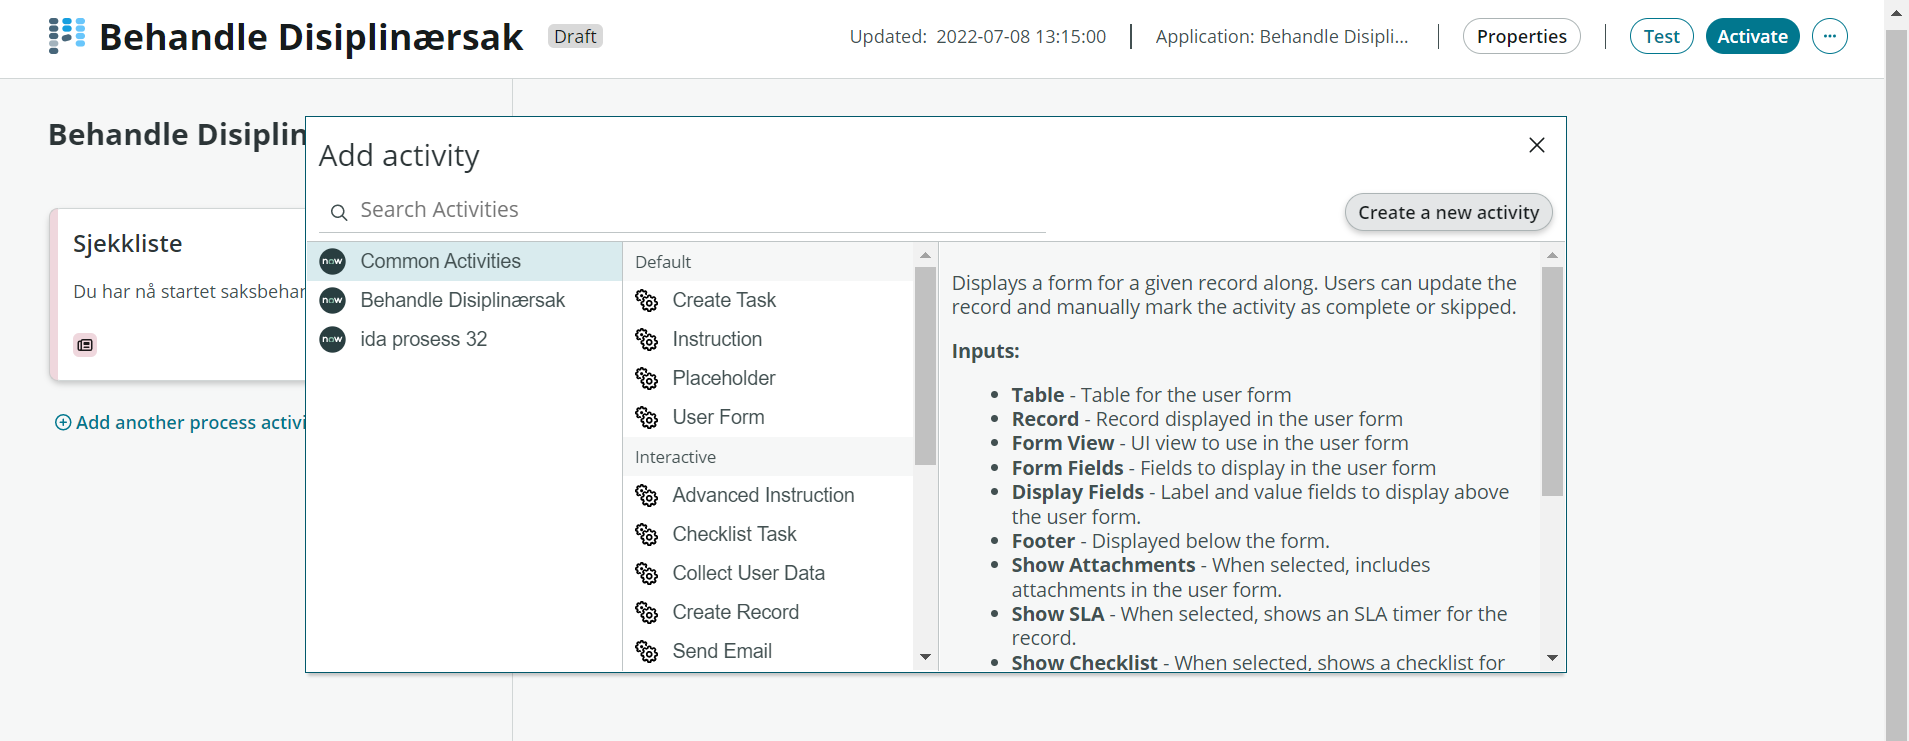
We start by adding a first activity by clicking on "Add another process activity" in the left tab. The first thing we want a caseworker to see is an instruction. This instruction should contain a concise checklist for the further activities we will add to the flow, and which we would like a case officer to quality check before further case processing is carried out.
Navigate to Common Activities/Common Activities Instruction.🡪
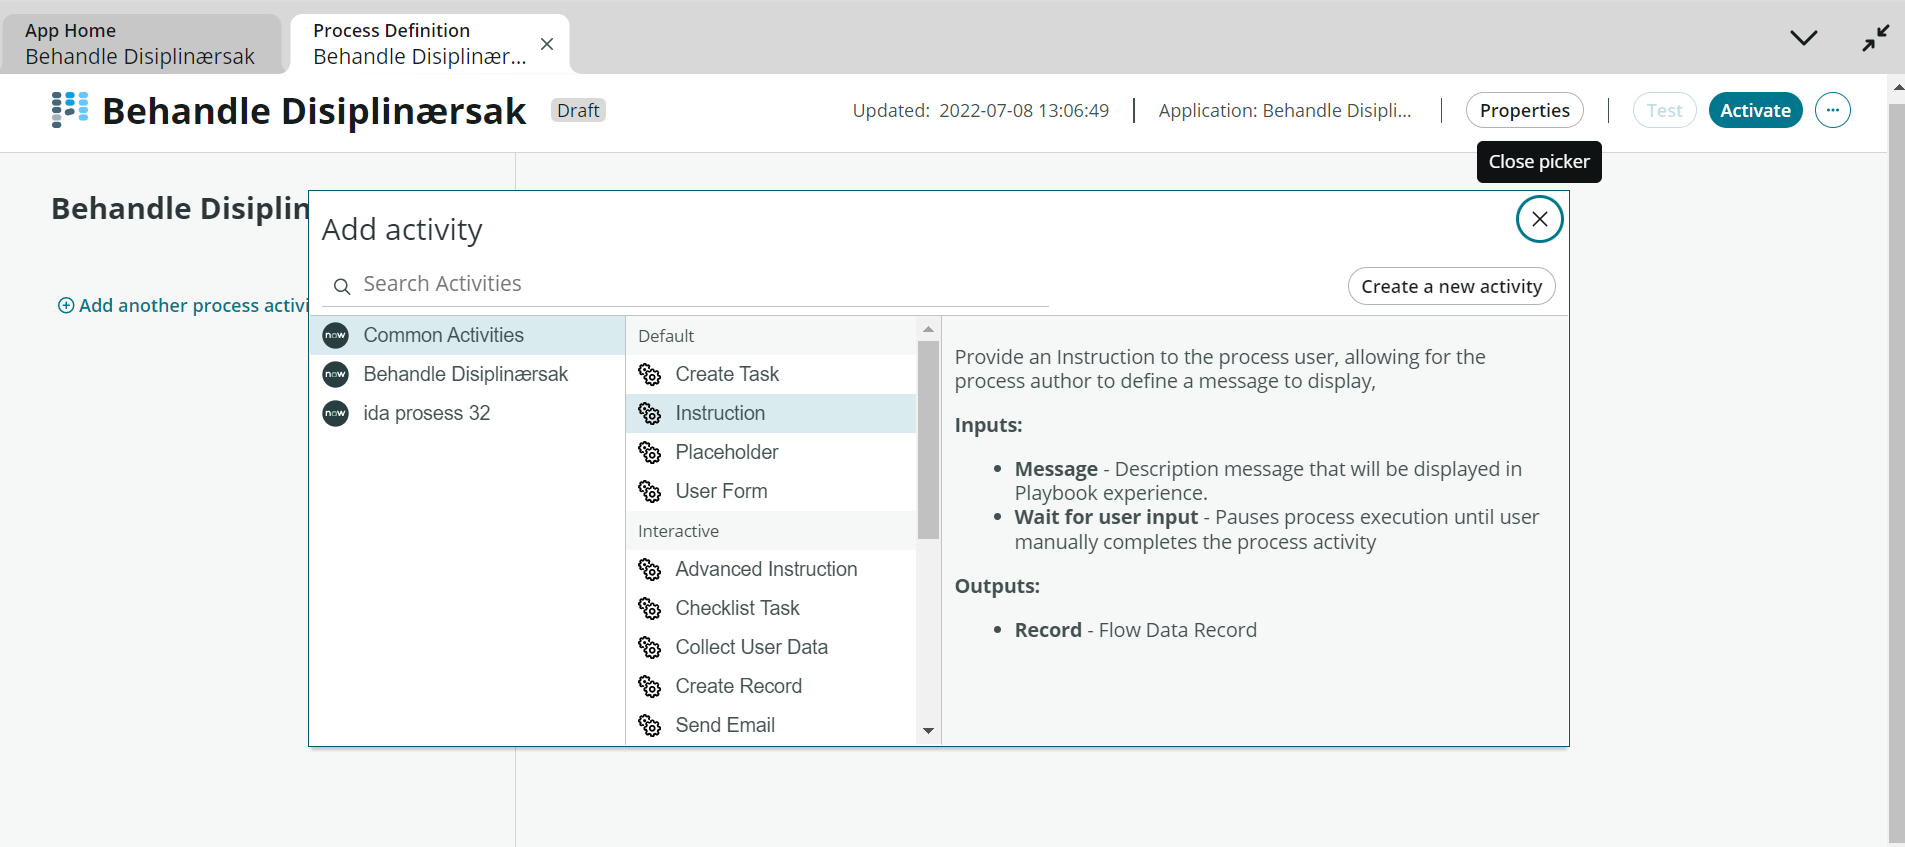
Fill in an appropriate title and description. Click "Save and close" to save the activity.

Earlier in the user guide, we created metadata in the table. Here we created a multiple choice field where one can choose the type of disciplinary violation, and a field that should contain the student's name. We can expect to receive data from the form the student submits when they report a new violation. We have previously defined it as a mandatory field the student must complete to submit the case. We also want to know the student's name and automatically fill the data in that field to simplify the processing of the case for a case officer. We can, for example, obtain this information through an integration with a professional system. For this user guide, we retrieve the student's name via the system OrgReg.
To do this, we must create a custom activity that is linked to an already created integration. First, select a new activity by clicking on "Add another process activity". Then click on "Create a new activity".
Write an appropriate title that reflects what this activity will do. The table this should point to is where OrgReg is located.
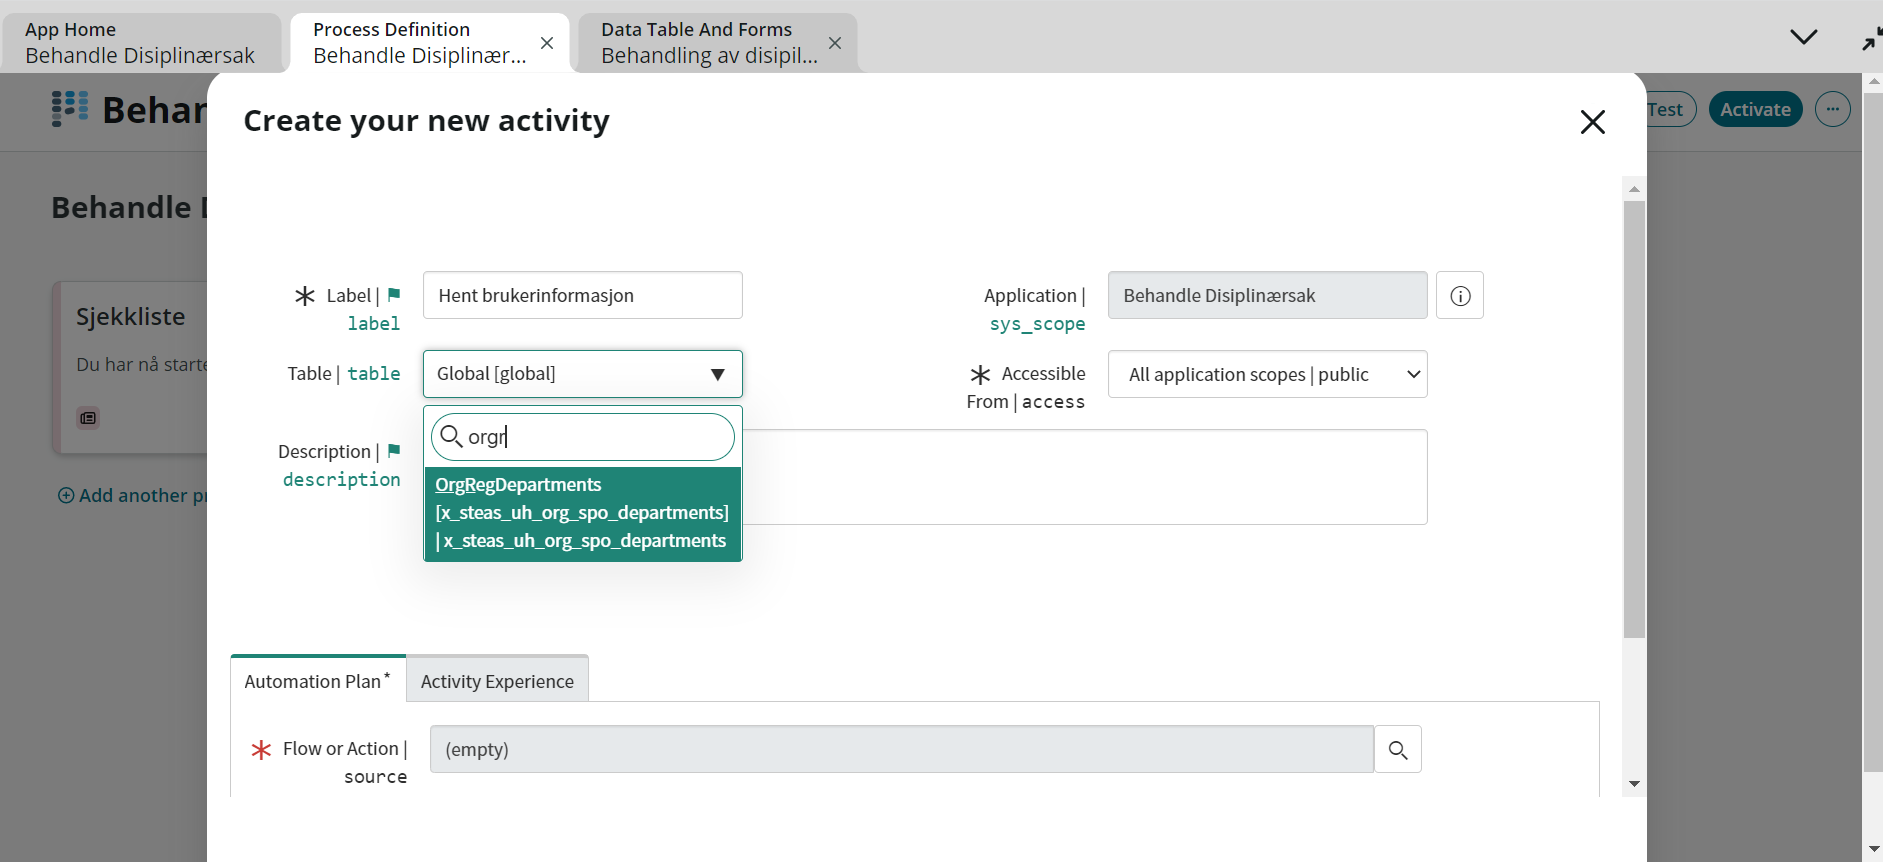
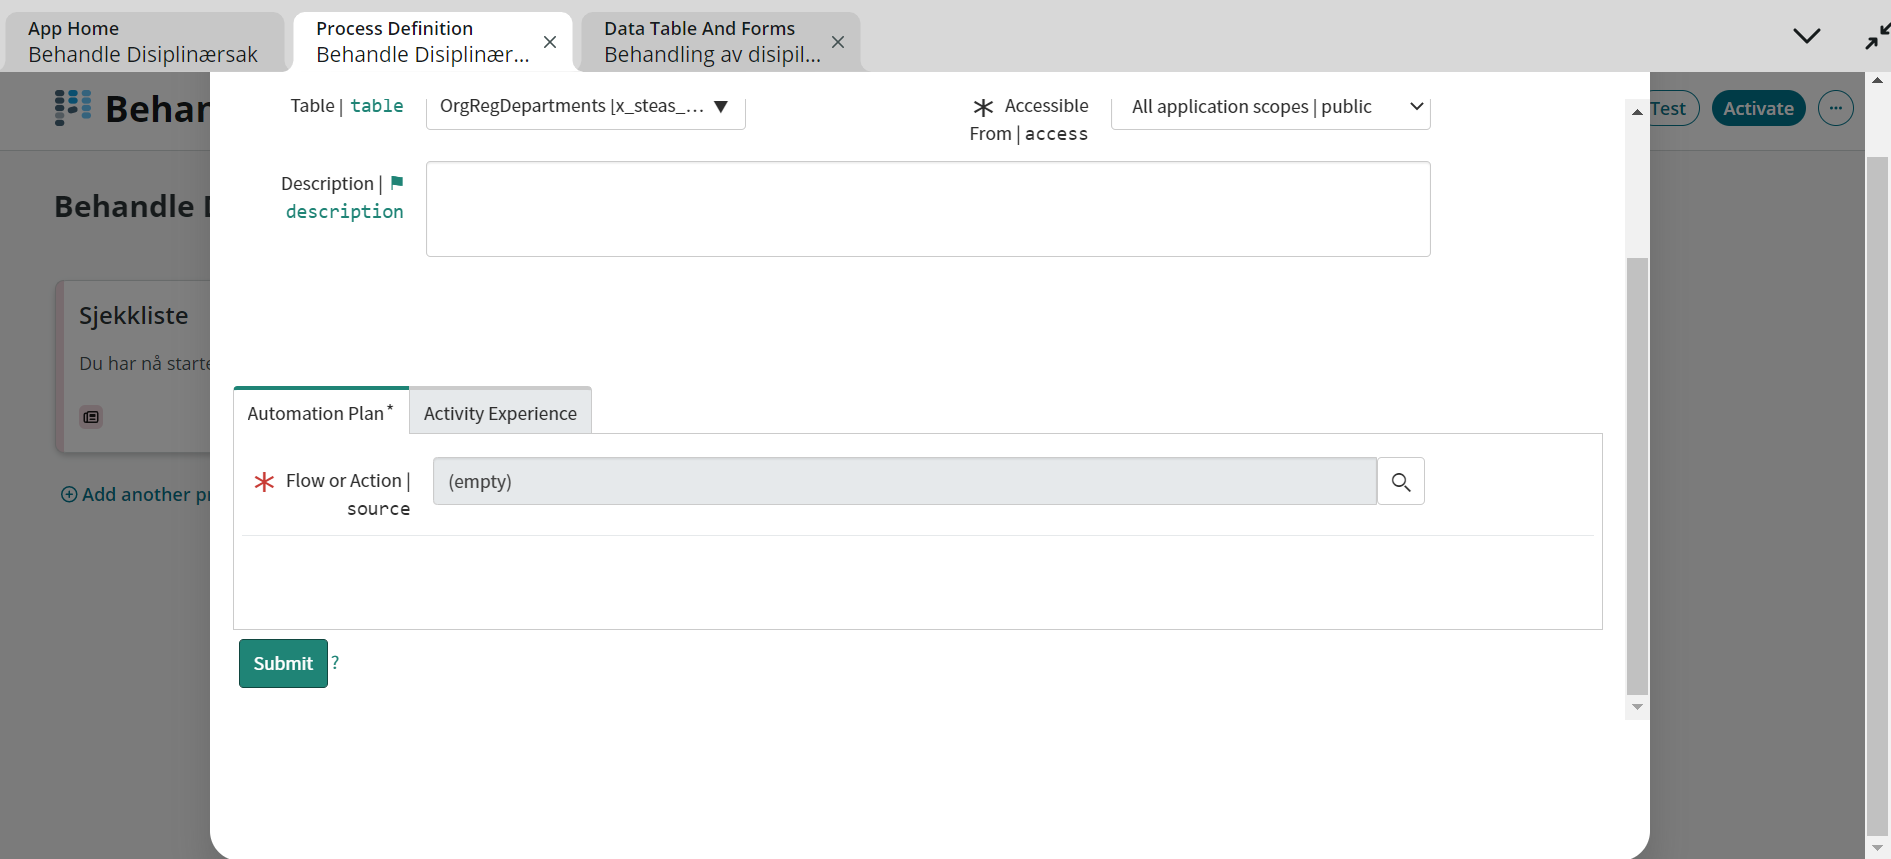
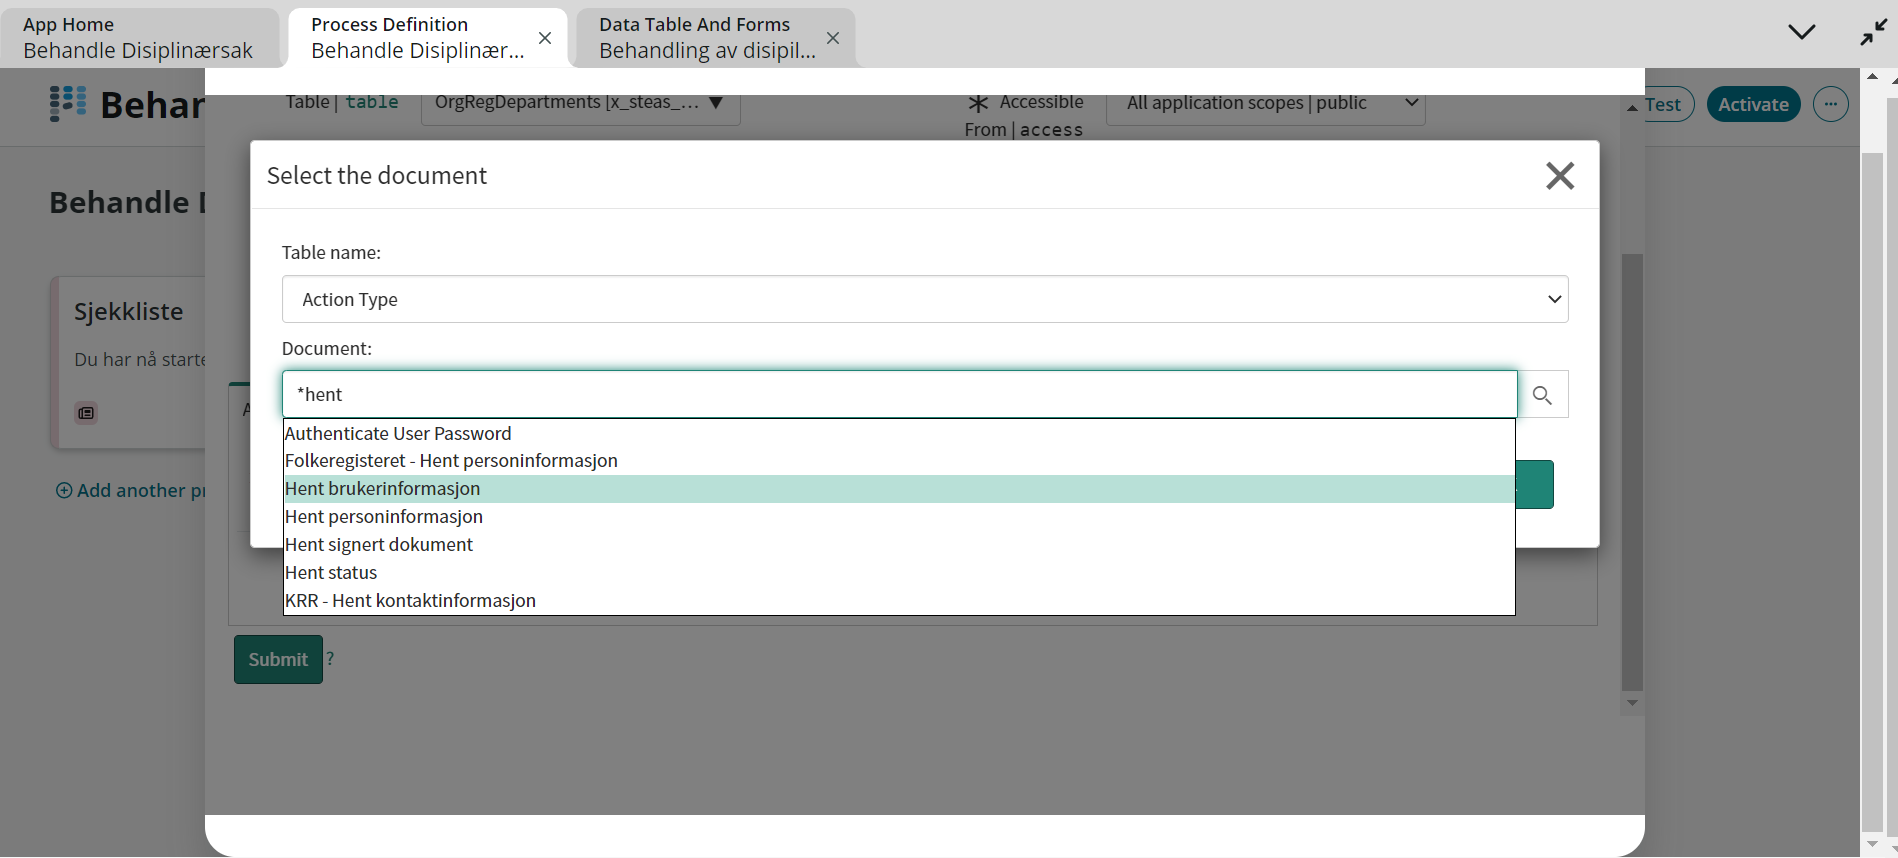
Further down in the same tab, we need to define which flow this information should be retrieved from. For more information about Flow Designer, see the following article: Flow designer (Service now) Click on the magnifying glass and find the right action.

After saving the new activity by clicking "Submit", we need to find it again in the activities in the same way we arrived at the instruction: Click to "Add an activity", and we navigate to Manage disciplinary case Retrieve user information🡪. You can also look up the activity.
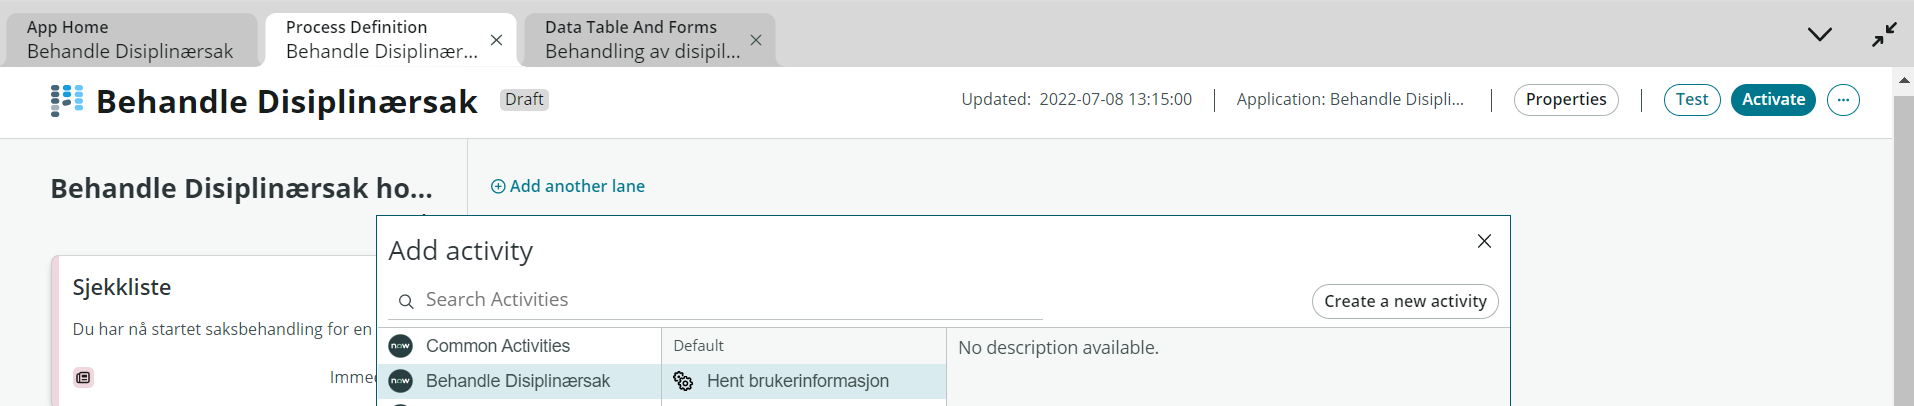
Here we automatically get metadata from the integration that we can use to link and retrieve information. Here there is both the opportunity to use the right tab or see an expanded view by clicking "View all properties".

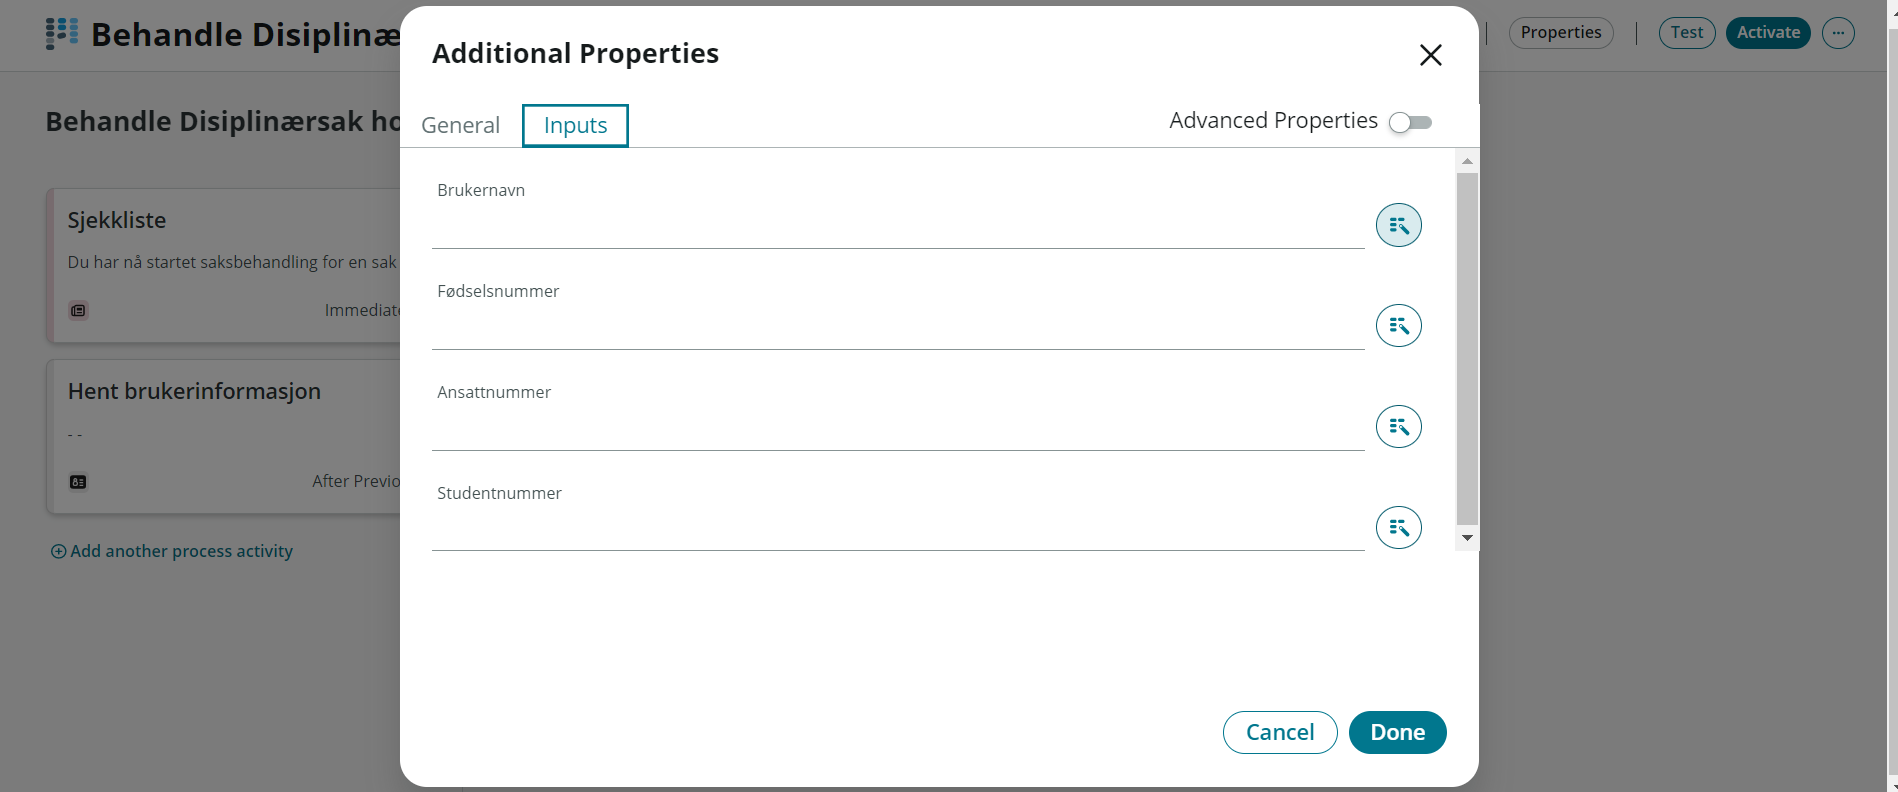
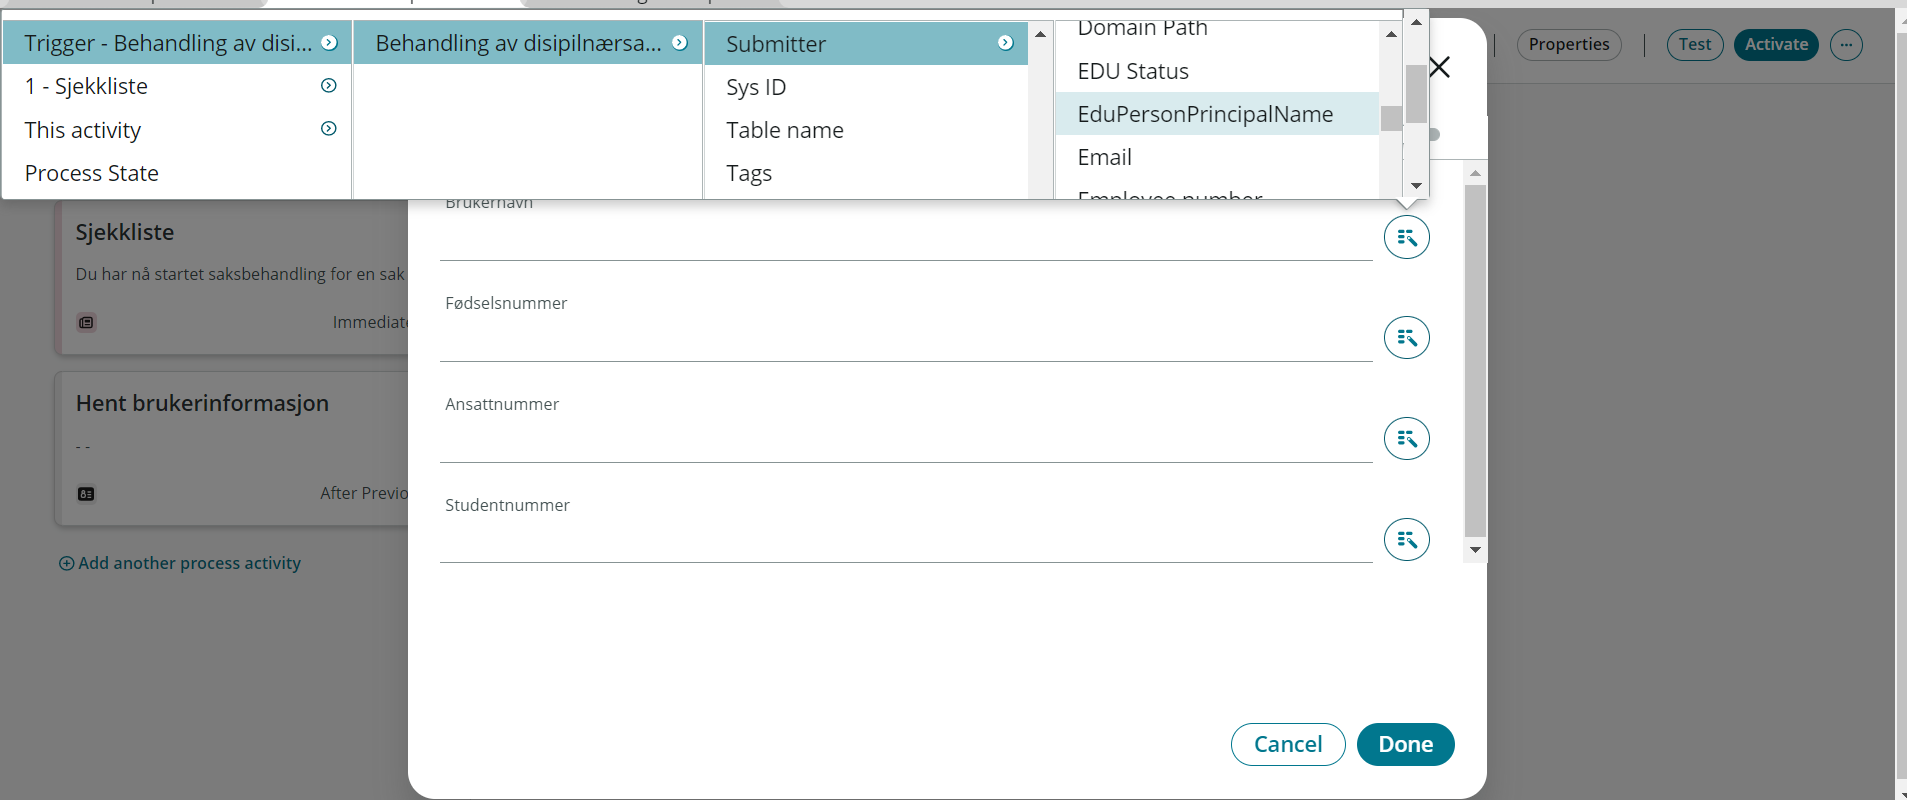
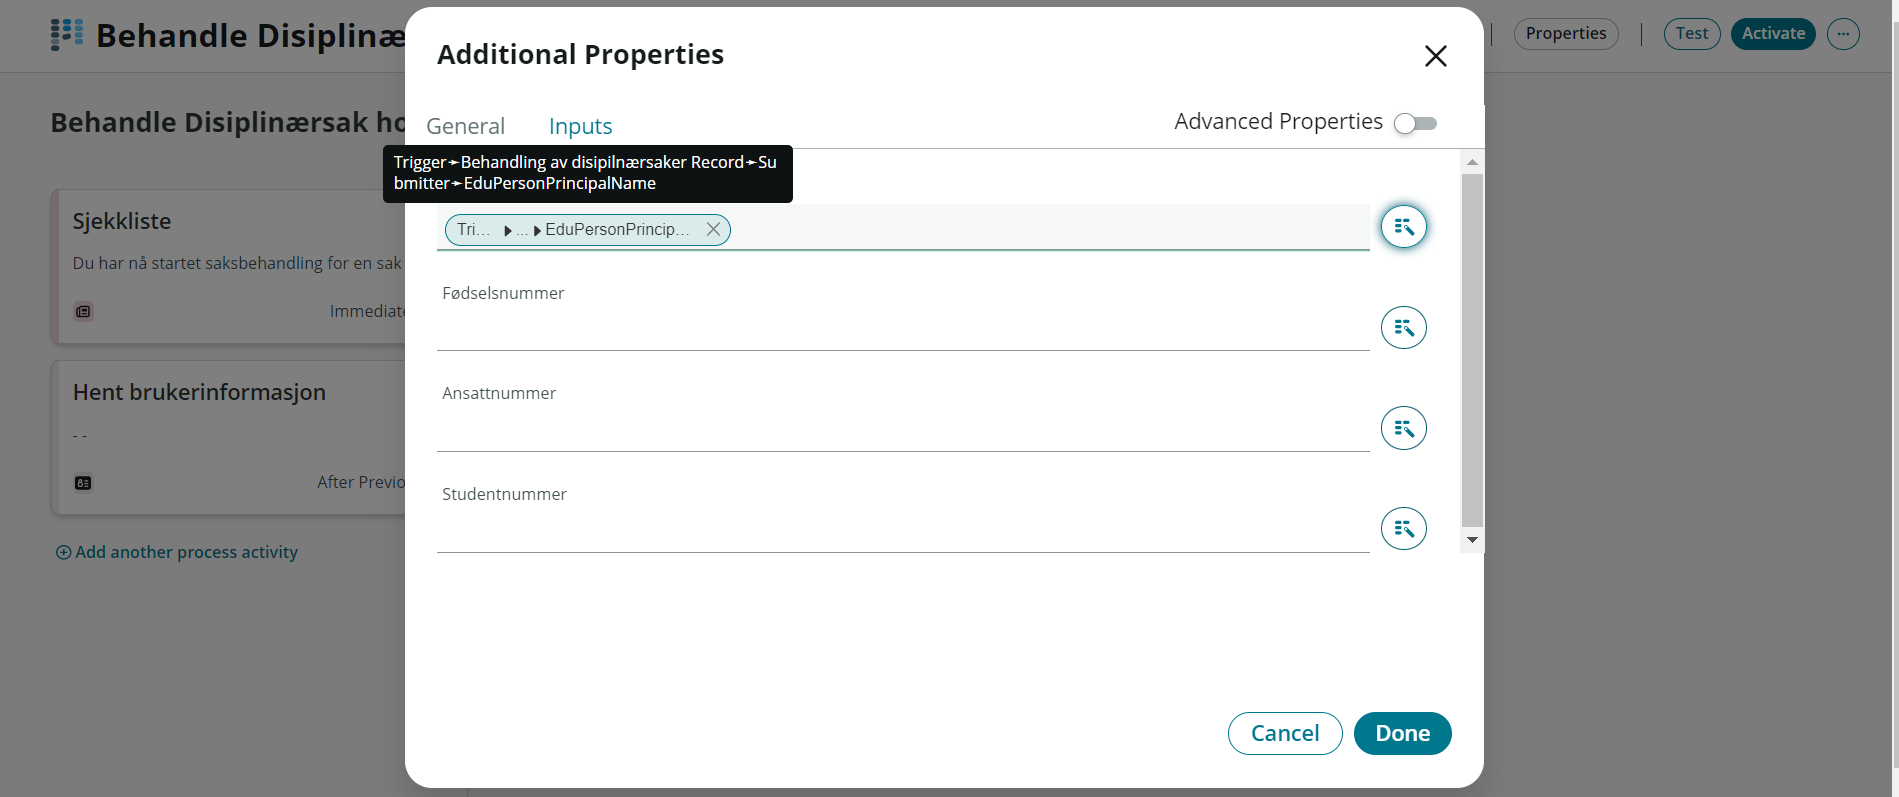
We want to link the field from the integration to retrieve information about enrollees. Here we want the name of the enrollee / student and find the field that contains that information.
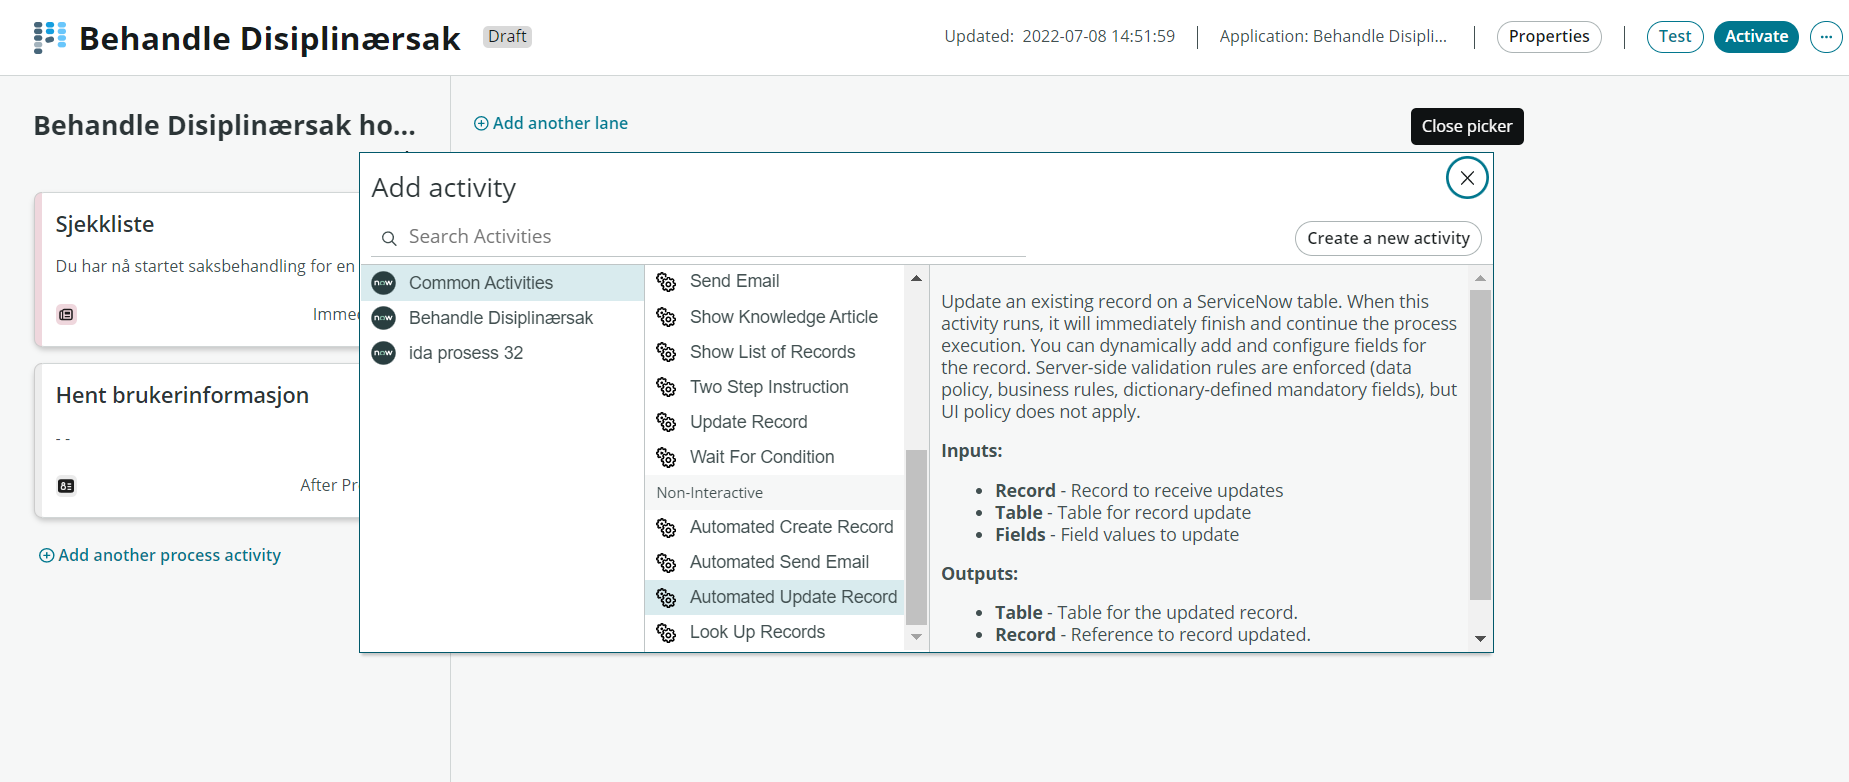
After saving information from the previous step, we will now add a new activity that updates the field we have created (Student name) in our table with data we retrieve from the integration. Select the activity "Automated update record".
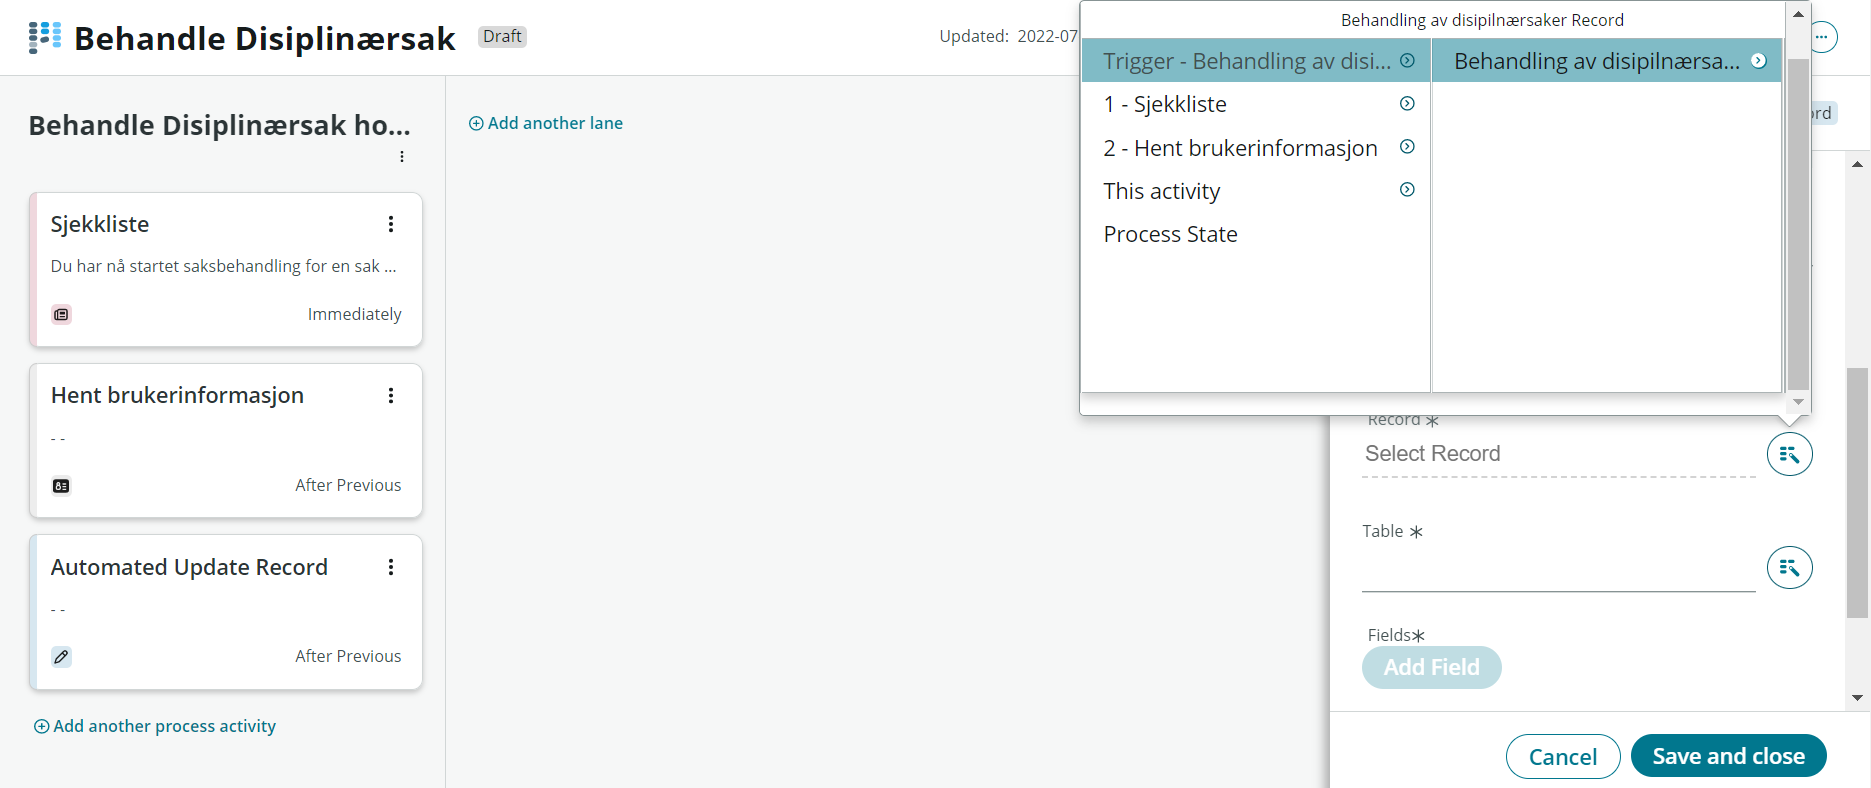
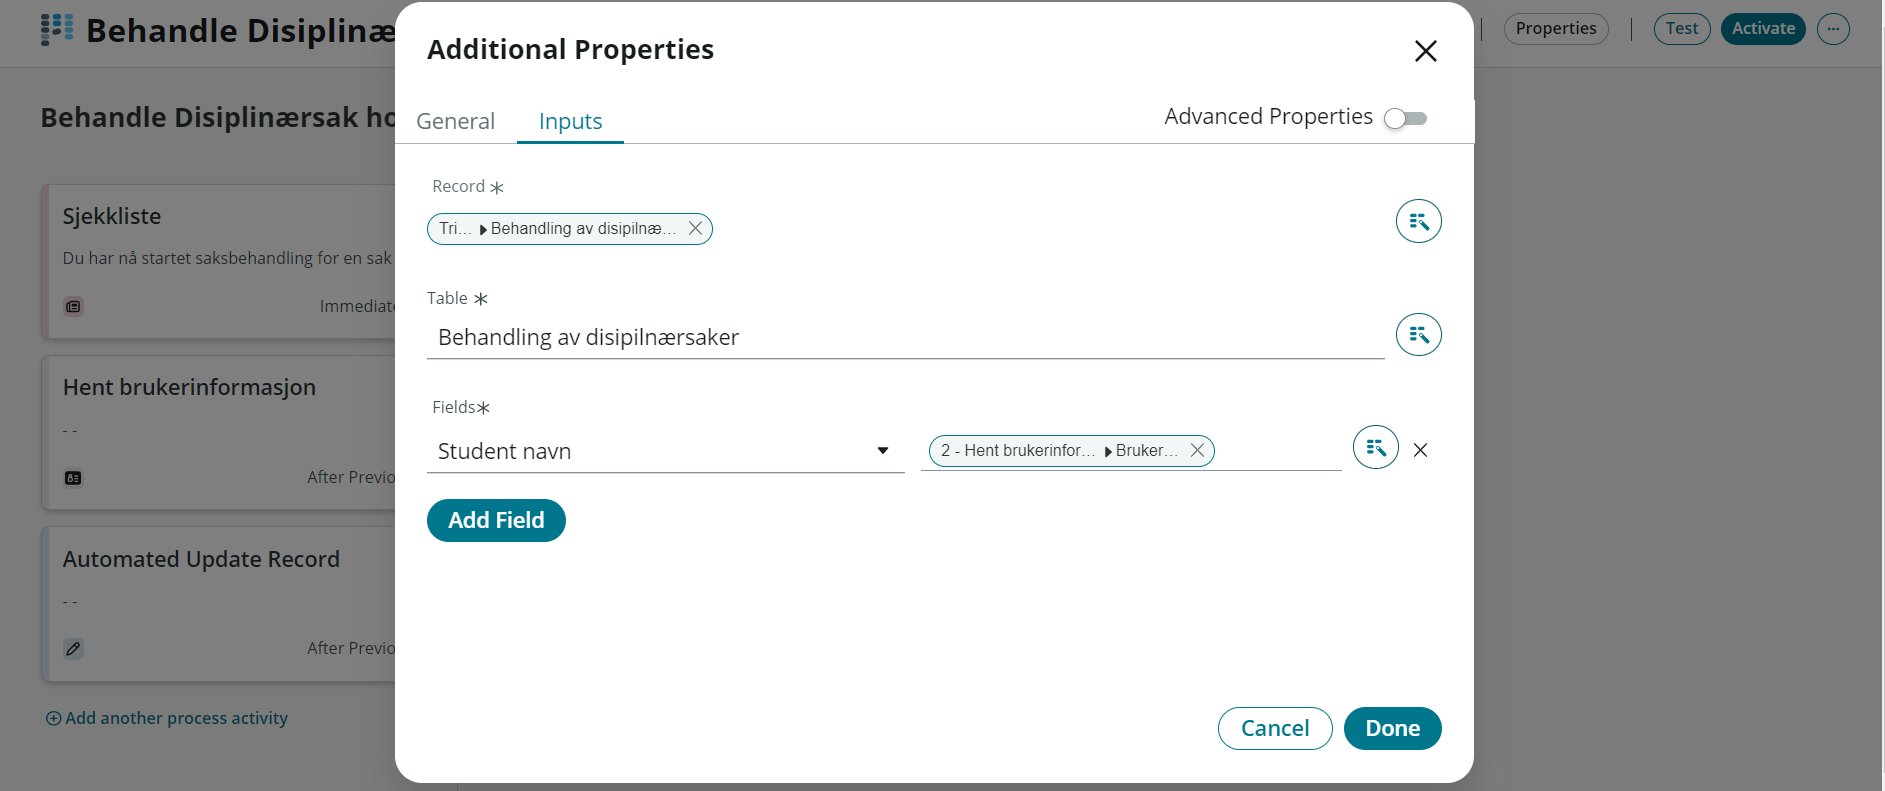
Navigate to the "Automation" tab and link the "Record" field in the right tab to retrieve new cases that are created. You can easily do this with the help of a Data pill.
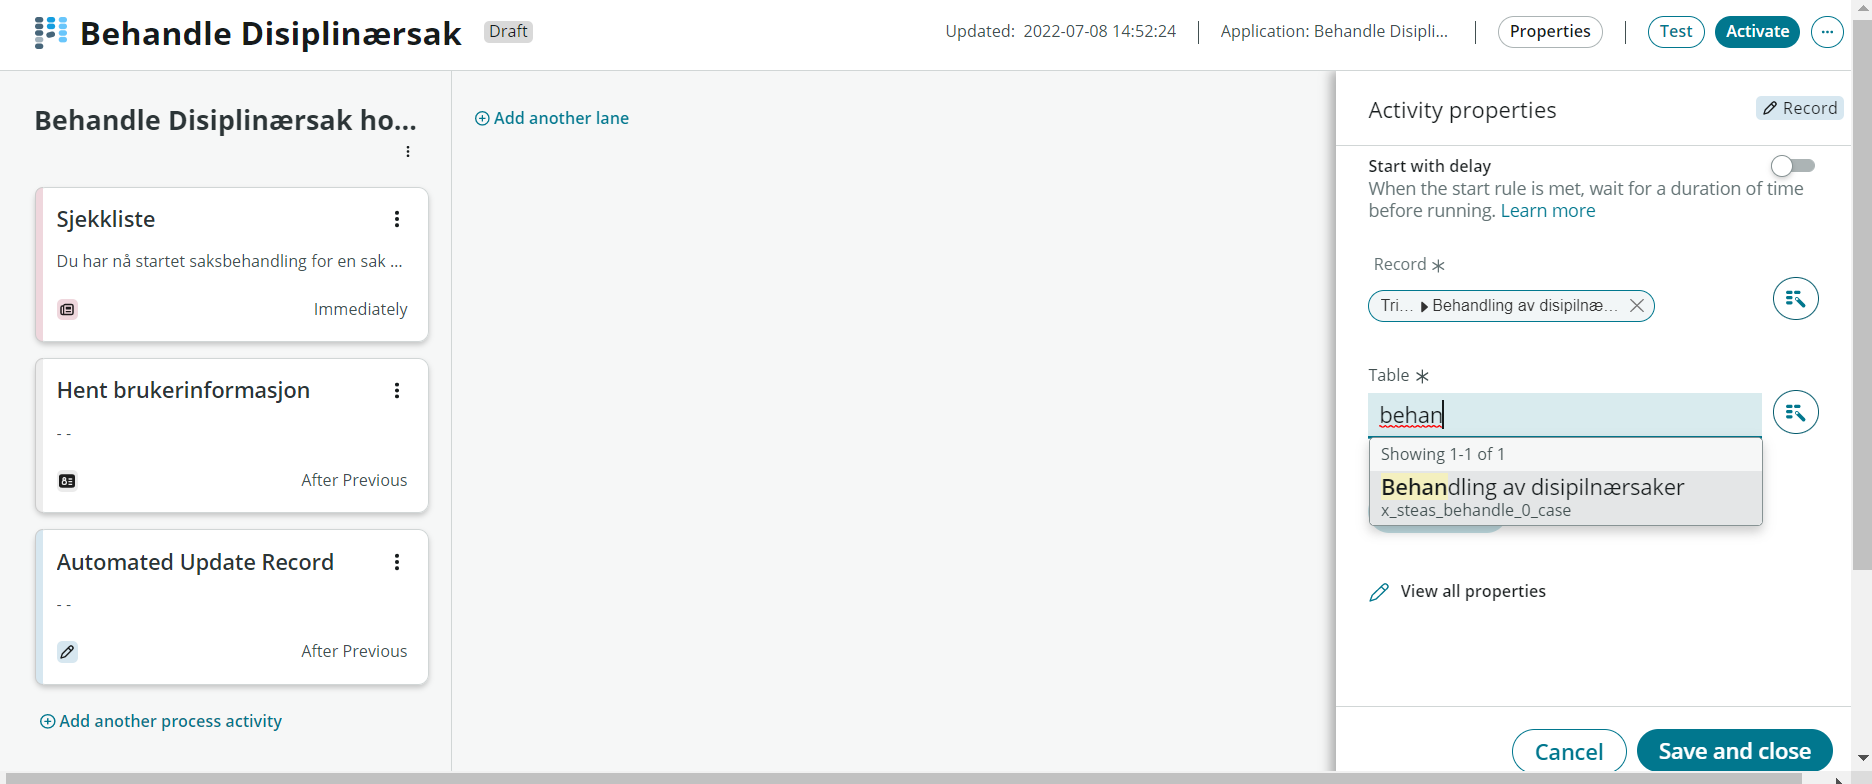
The table field on the right tab we must associate with the table where all cases are located. Here we select the table we created "Disciplinary Proceedings".
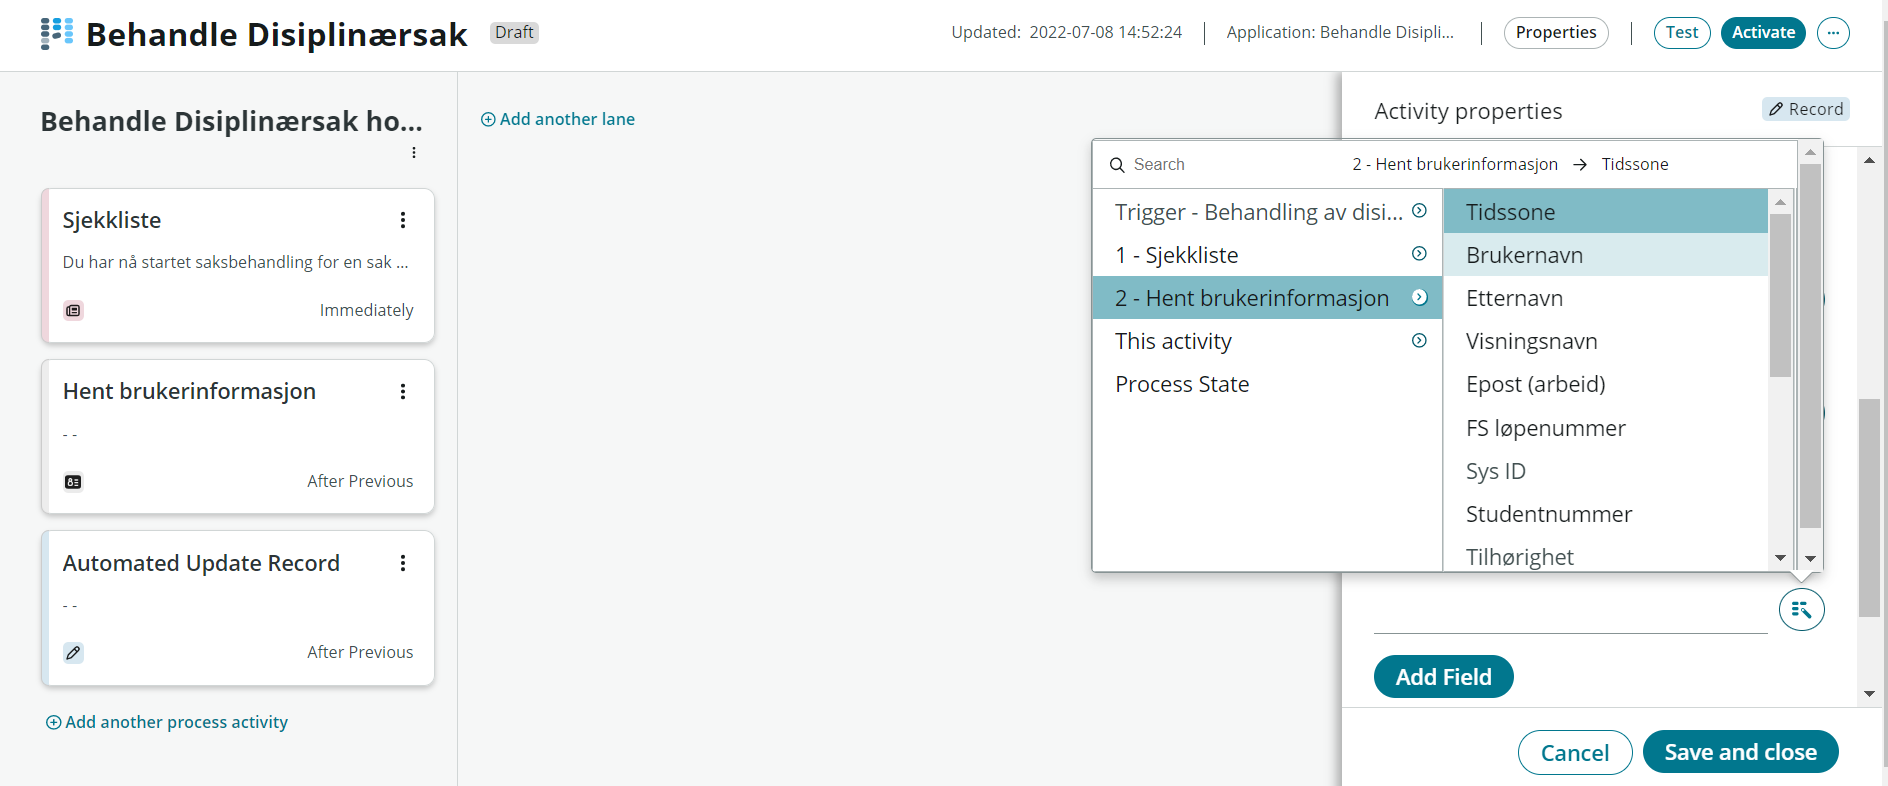
We then associate the field we want to update in the table. Here we must also link the "Value" field to the activity we created in previous steps, which retrieves user information from the integration.

This is what it will look like when all fields are associated with the correct data source.
We then add a final activity that only notifies the case officer that they can continue further processing of the case once the first steps have been completed.
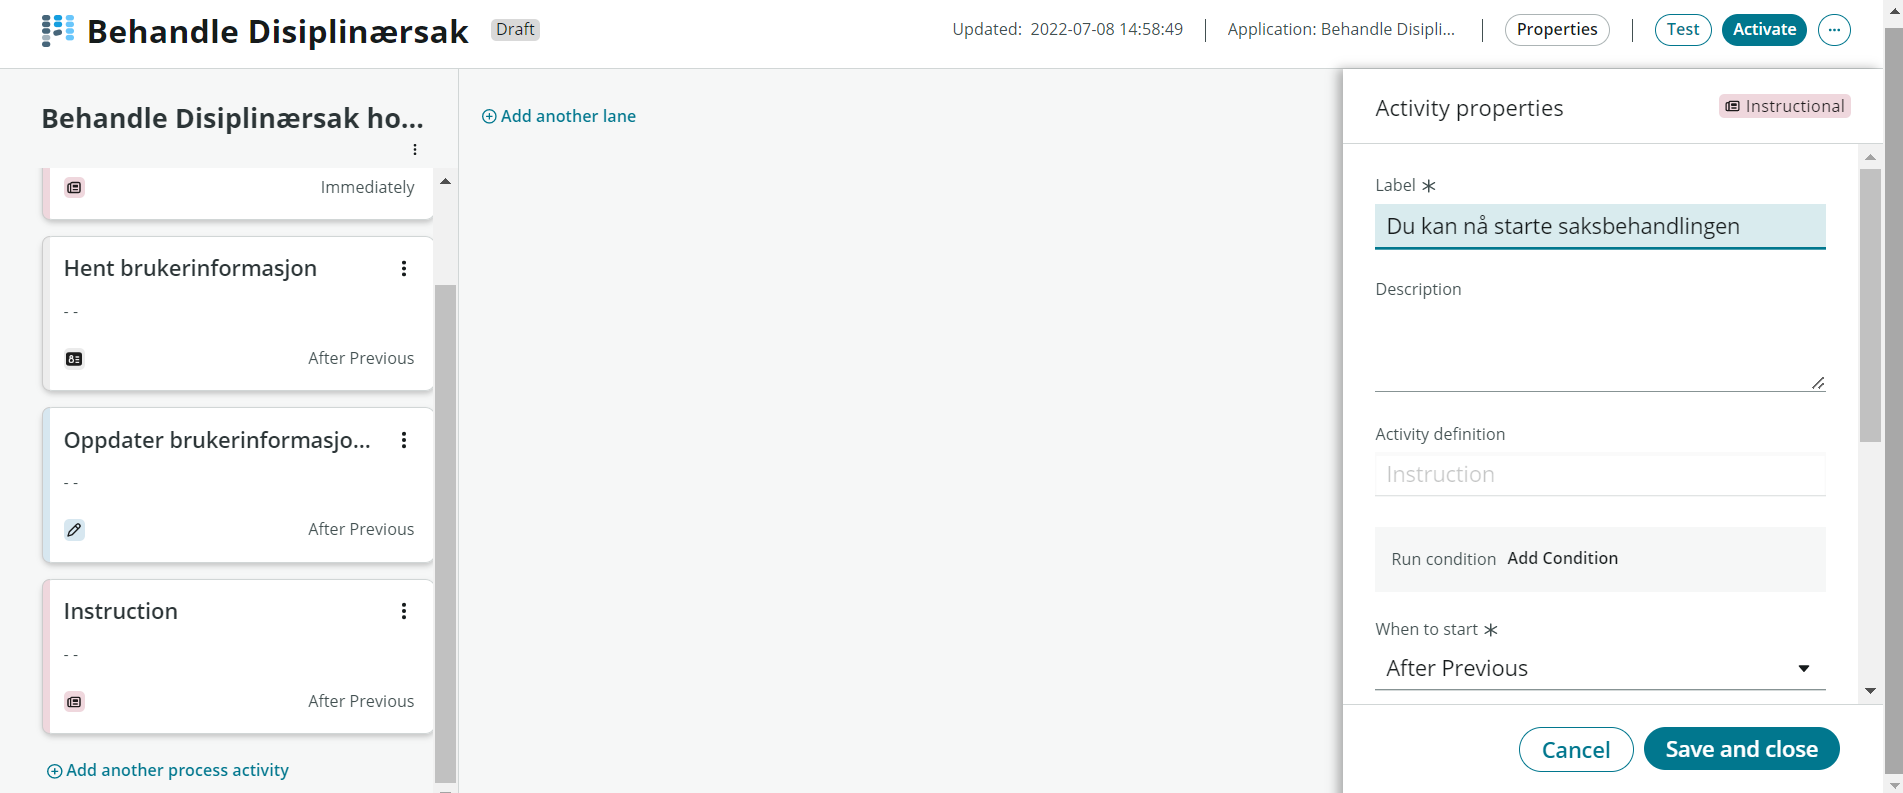
Now the process is ready, to use it one must activate the process by clicking on «Activate». You also have the opportunity to test the flow before activating.
Caseworker form:
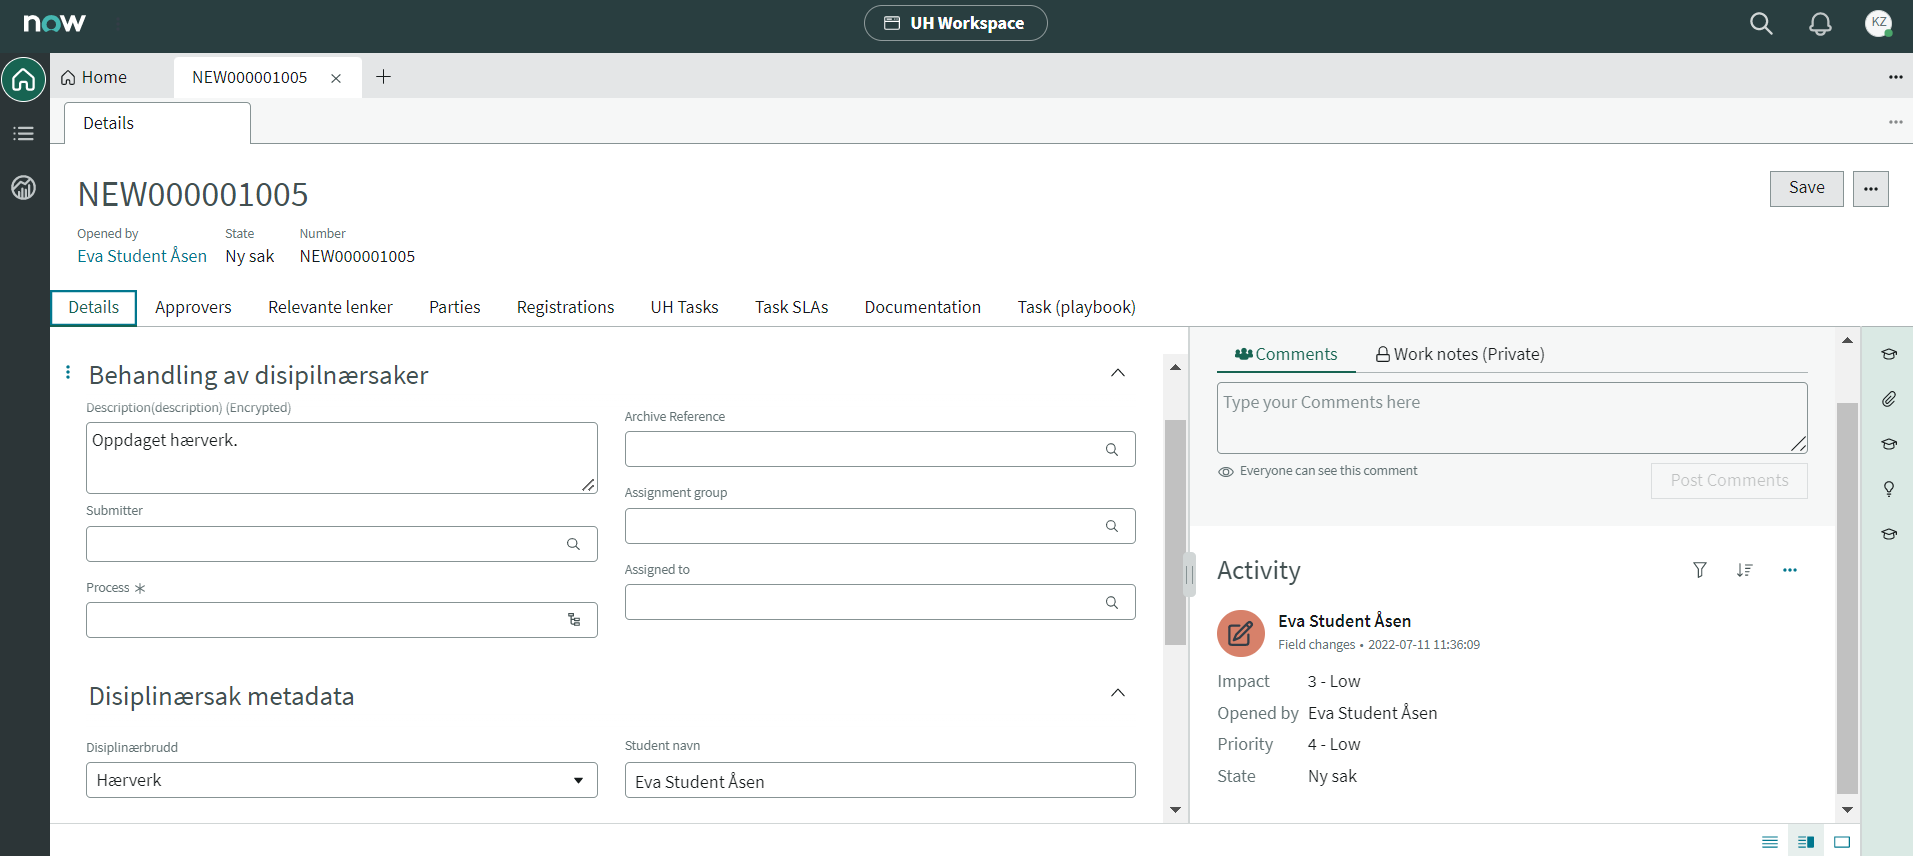
Back in the table view, we can find forms pointing to the workbench of caseworkers. This form is what the case officer sees when they open a case associated with the process "Handling disciplinary violations". Navigate to the second tab "Forms".
It is possible to remove fields you do not want to see in the form and add other fields. To find a field, you can also use the search engine on the left tab. Here we have identified a field we created in the table "Disciplinary violations". To add to the form click on the field and drag it into the location desired.
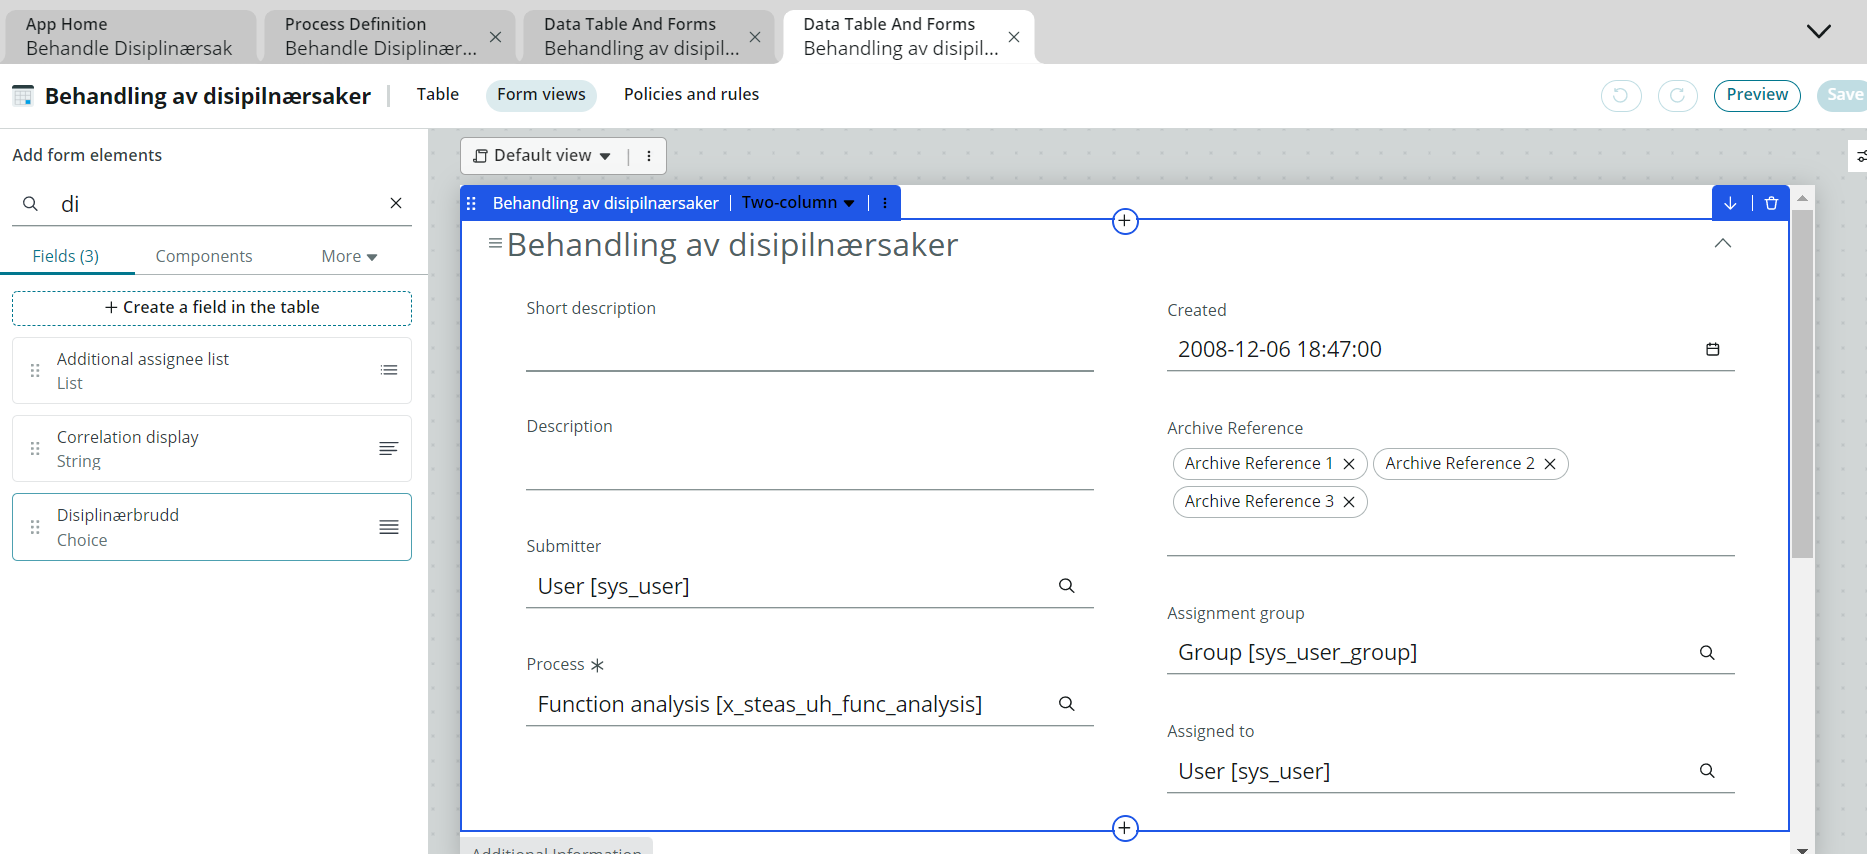
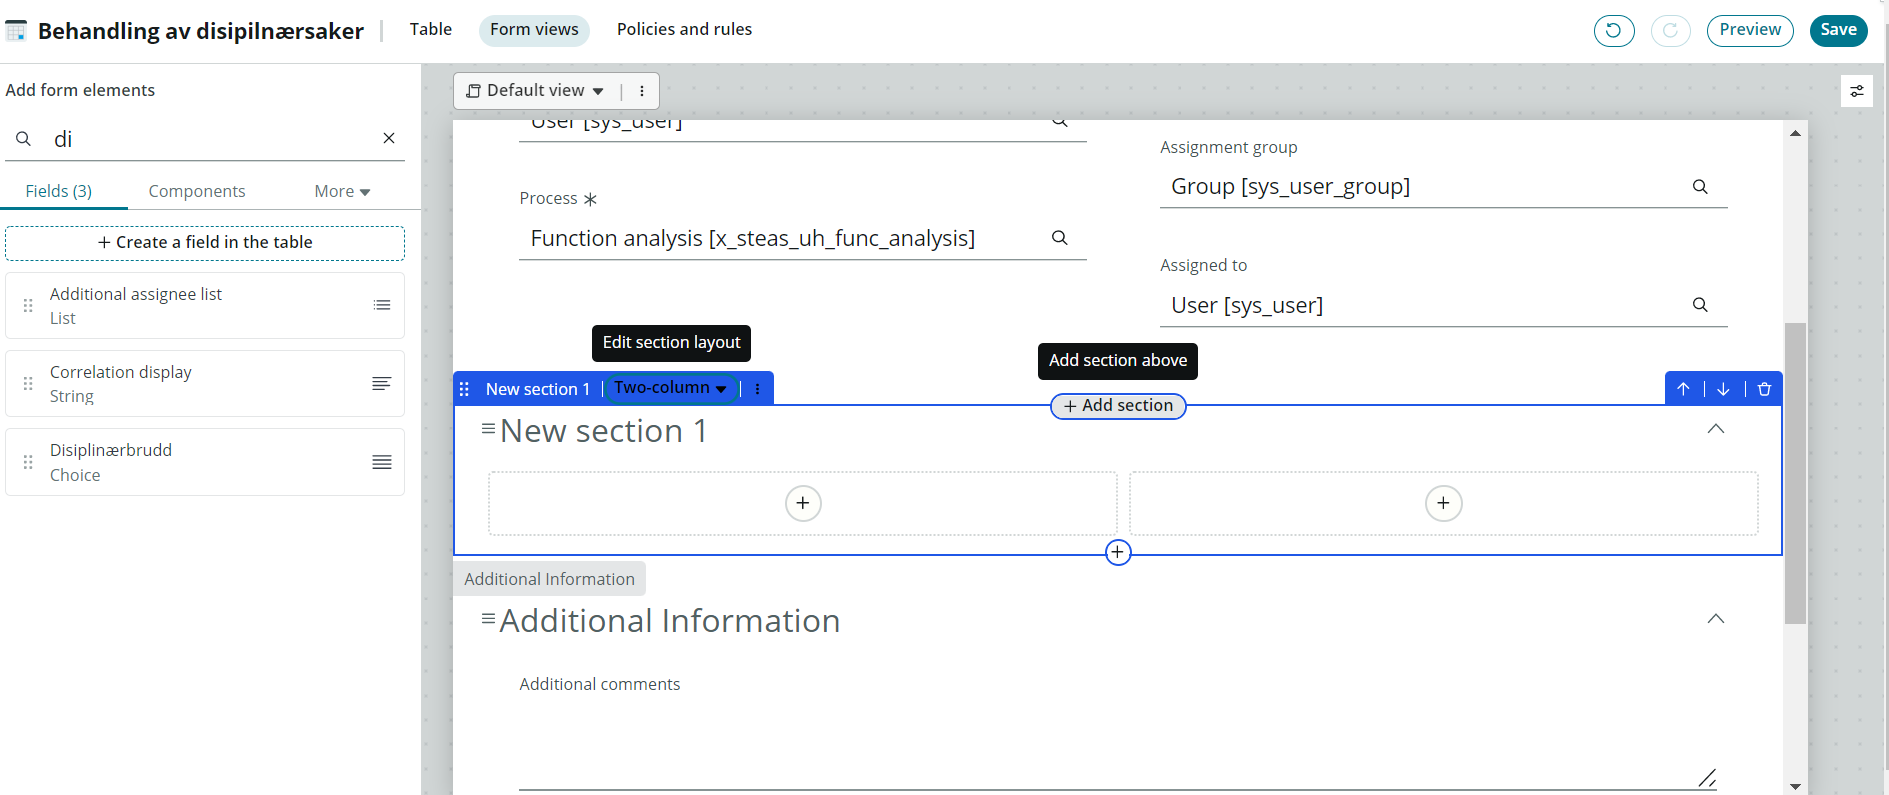
You also have the opportunity to create new sections in the form. We're creating a new section for the record and adding the two fields we've worked on the most in this process: Disciplinary Violations and Student Names. After configuring the form as desired, click "Save".

Now the new process is ready for use. The form is ready in the portal, and a case officer now gets this process up every time a case of disciplinary violation is reported.
Report a case
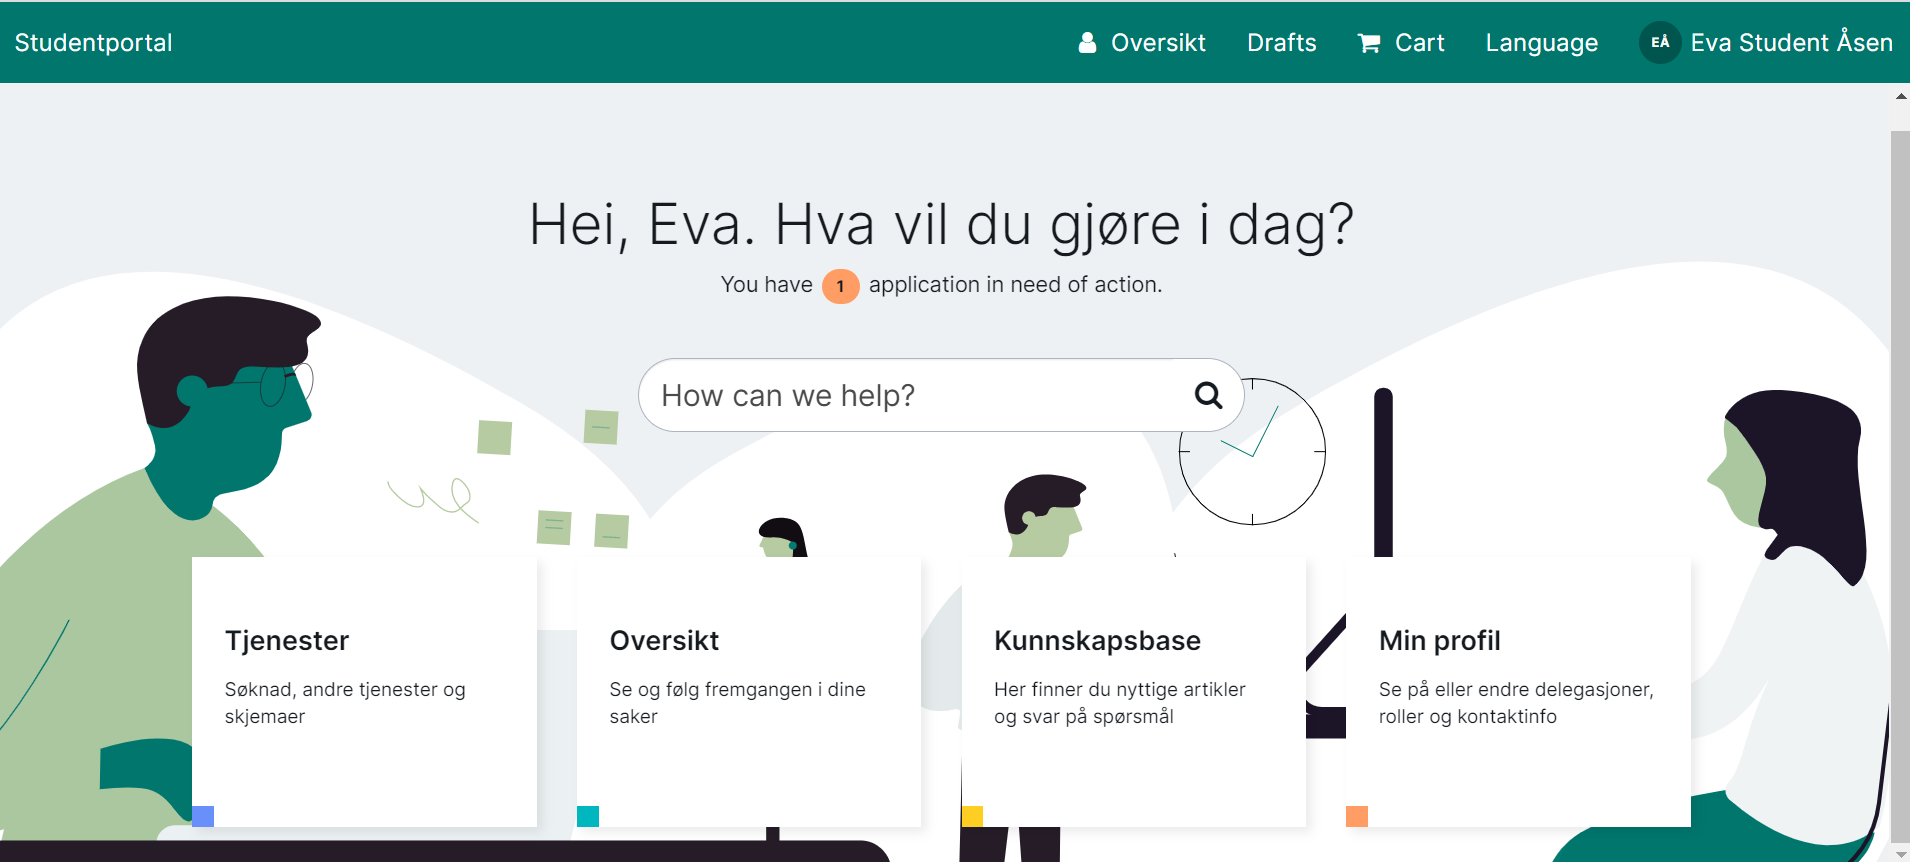
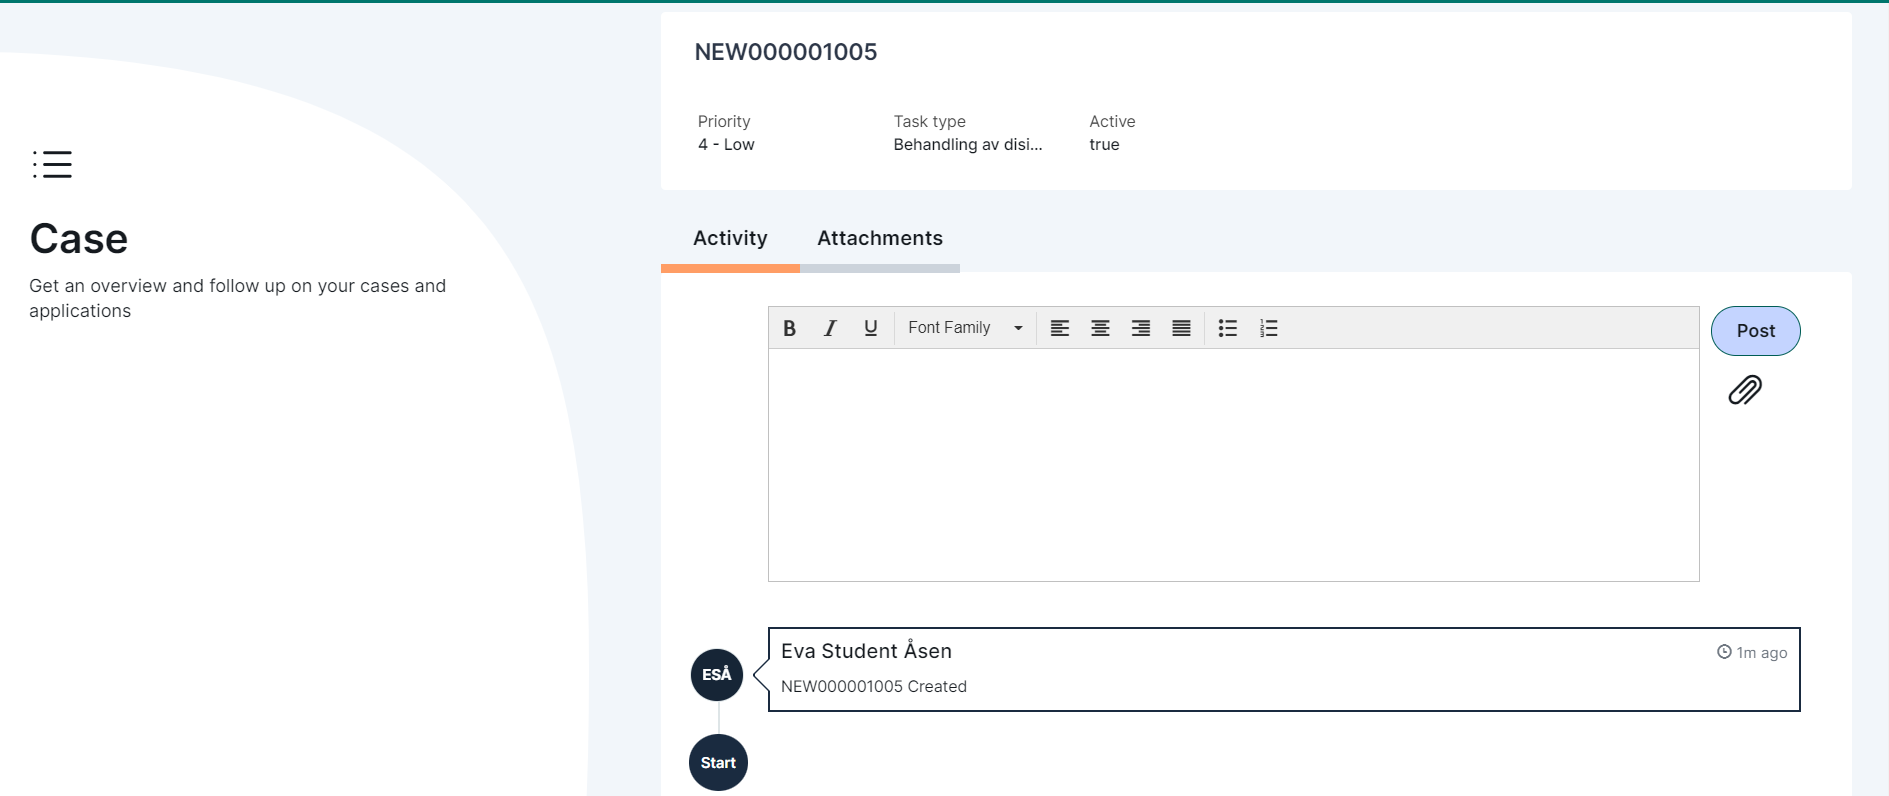
Now that we have set up our own process, it is ready to be used. To test this, we can log in with a student account and file a disciplinary violation case. We will then open the case as a case officer and check whether all the information needed to start the case processing is available. We start by opening the student portal and find the form by clicking on "Services".
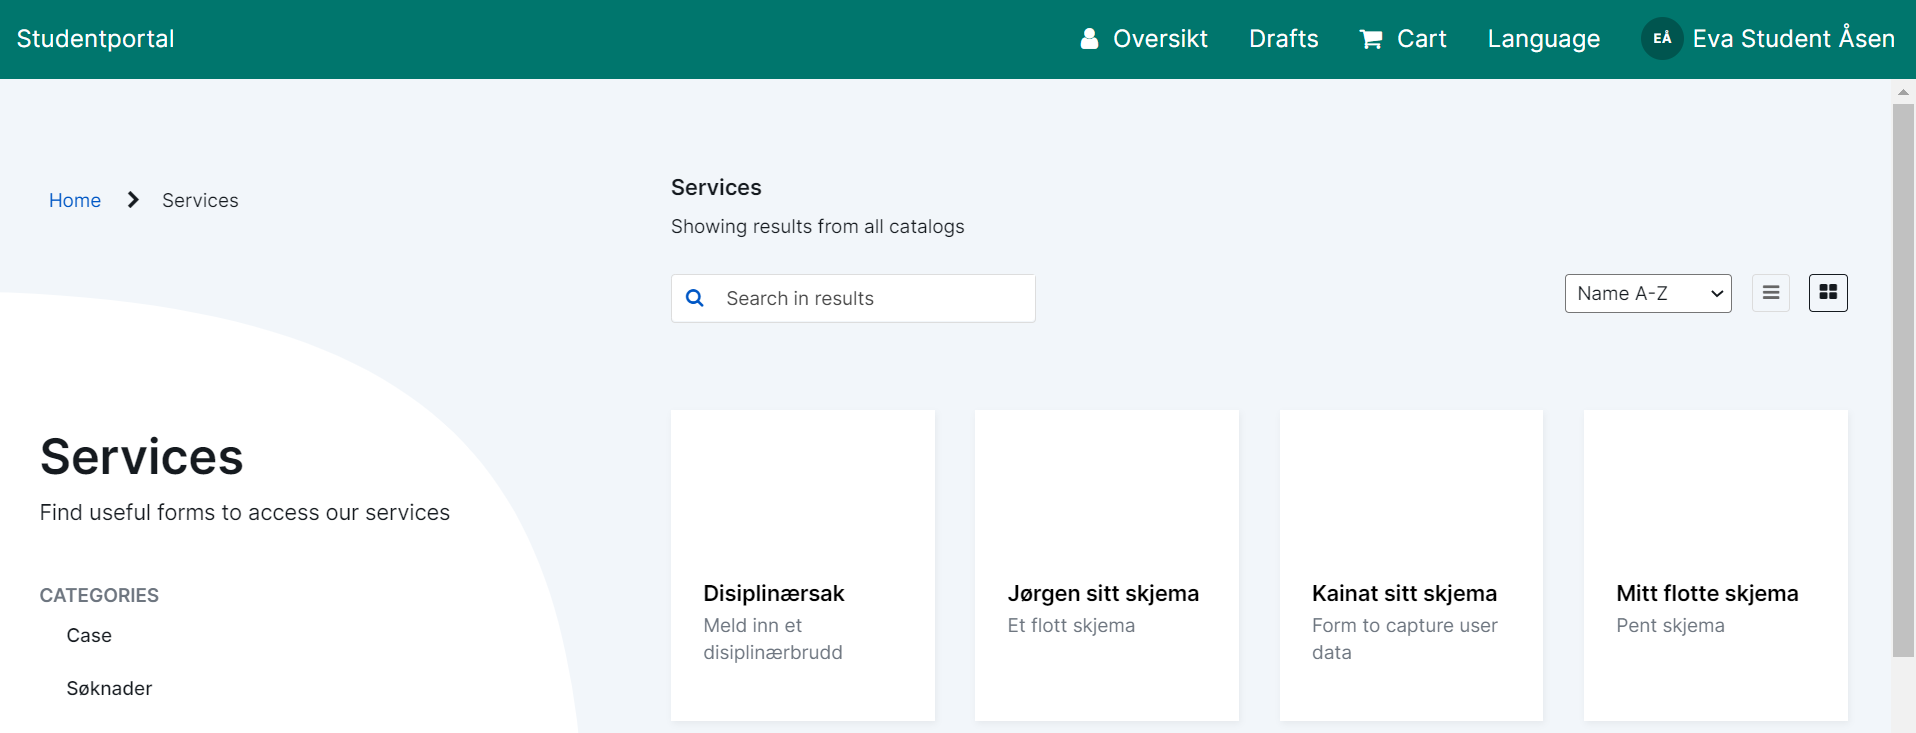
Here, the student will have a variety of forms available. A student should also be able to see categories on the left side that act as a filtering of these. We select the form "Disciplinary case".
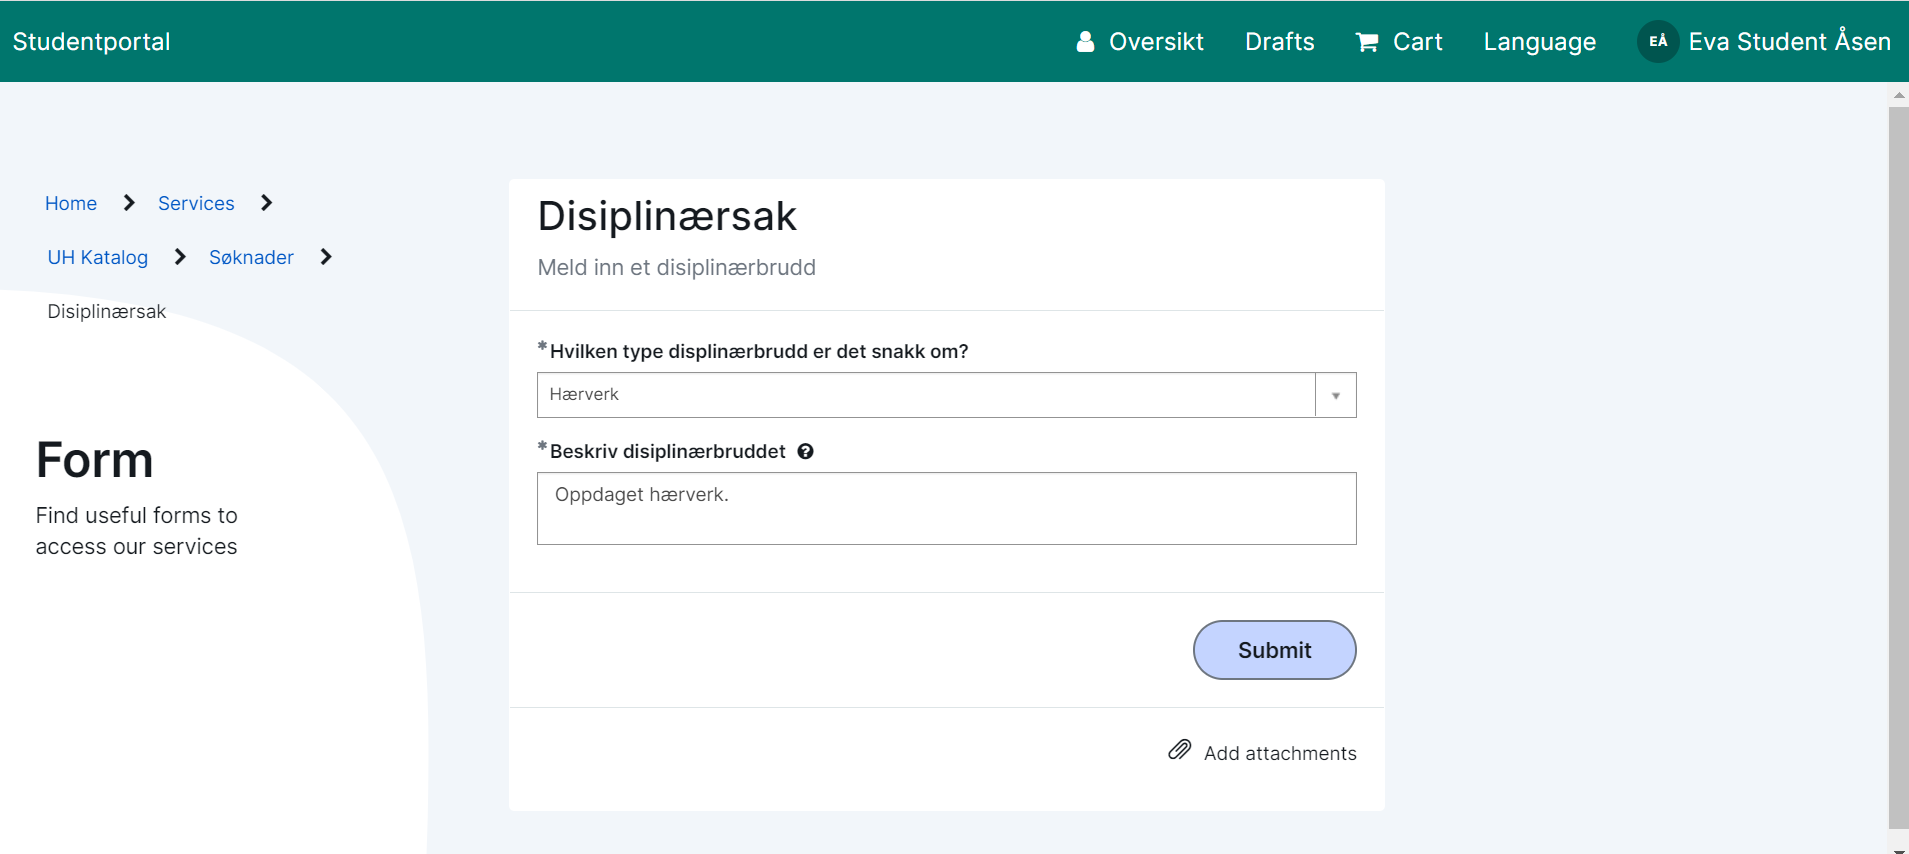
Fill in information about the violation and click "Submit". A new disciplinary case is now being established.
Case officer receives a new disciplinary case
In the case management platform, we have opened the new case that has come in from the student. The first thing a caseworker navigates is Guidance with a variety of activities. These are the same activities we defined in the process designer. As a case officer, the steps are followed downwards. The case officer first gets a checklist.
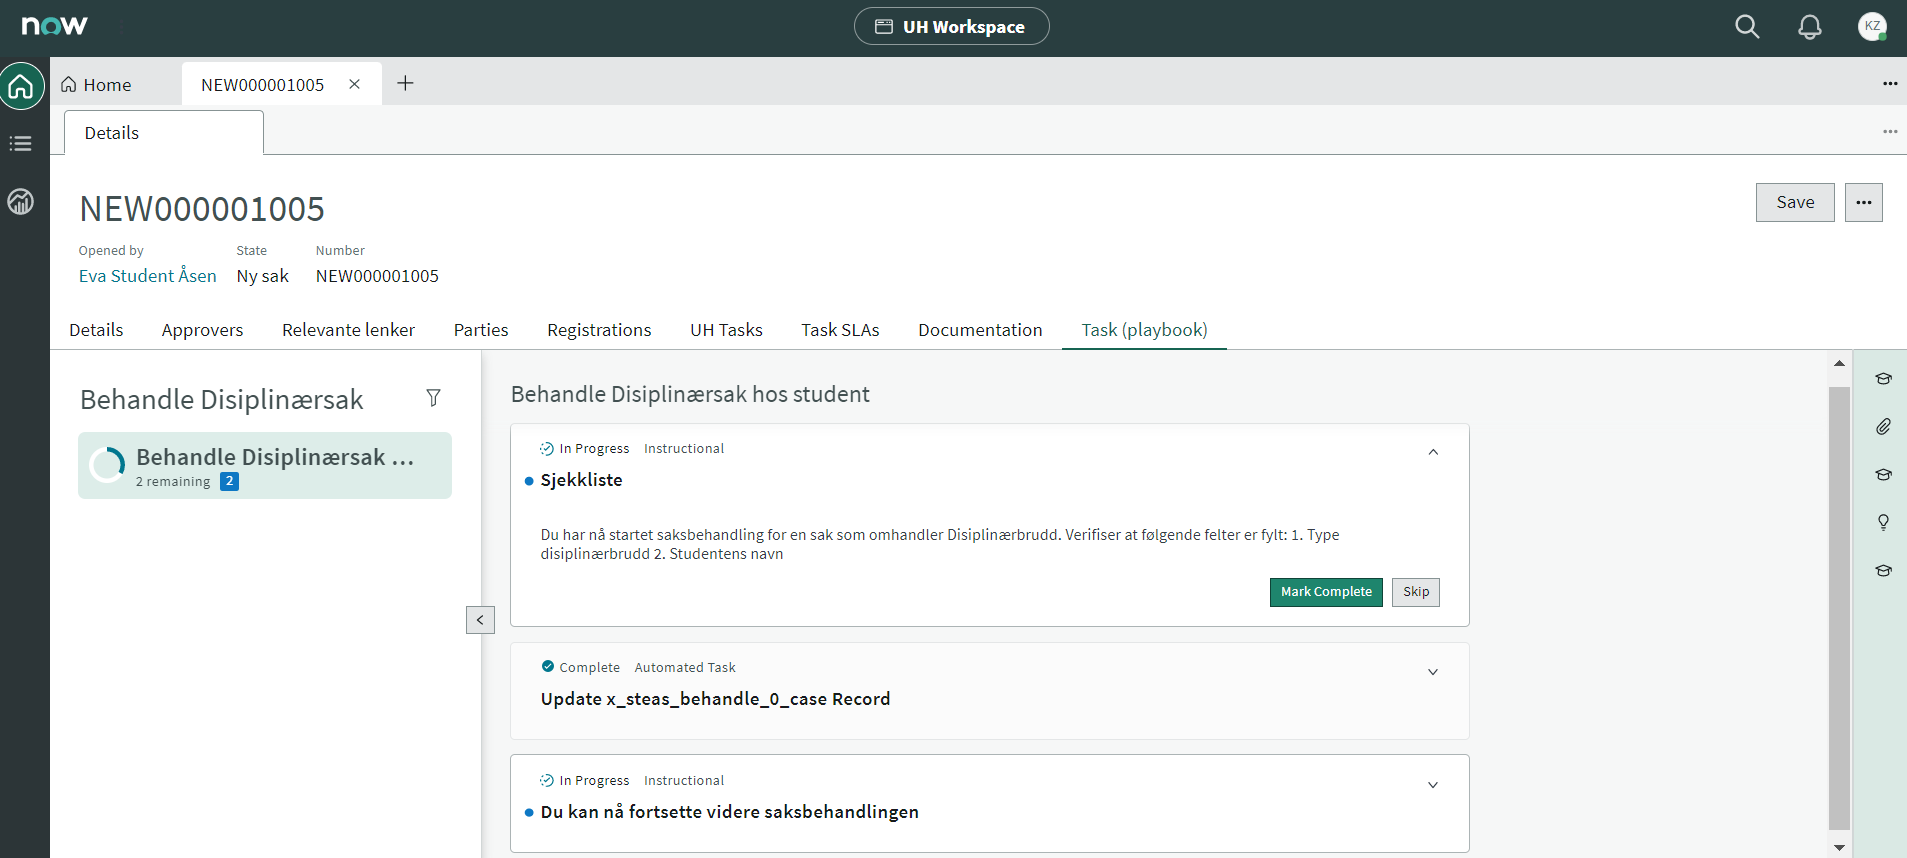
As a case officer, the checklist is followed, and the task is to check whether the Disciplinary violations and student names fields contain data. This will then be important information for a case officer to have before they can continue the case processing.
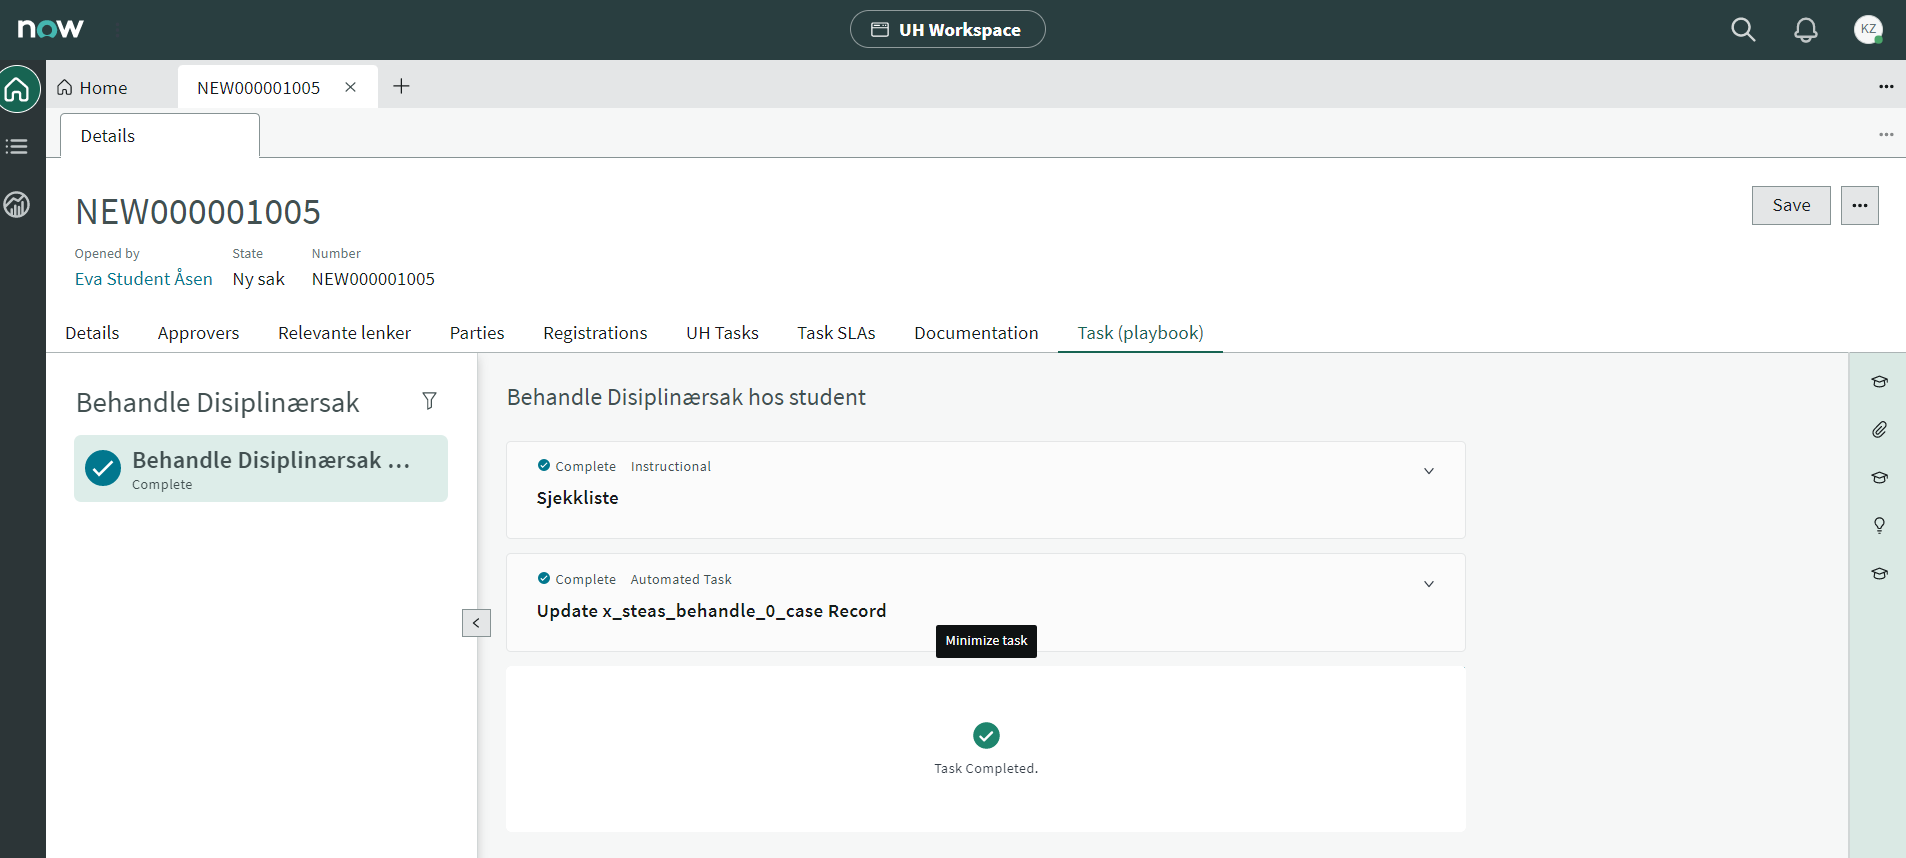
After verification, the case officer can check off for the task, which indicates that it has been completed. This is done by clicking "Mark Complete".
Other relevant ServiceNow user documentation
The following links can be used to learn more. Note that some of the information may be out of date and may be available in a different version when updating to newer versions of Service Now.
Robotic Process Automation: https://www.servicenow.com/products/robotic-process-automation.html
Artificial Intelligence: https://www.servicenow.com/now-platform/now-intelligence.html
API / Spokes: https://docs.servicenow.com/bundle/tokyo-application-development/page/administer/flow-designer/concept/spokes.html
Description of available field types that can be added to forms: https://docs.servicenow.com/en-US/bundle/utah-platform-administration/page/administer/field-administration/task/t_CreatingNewFields.html
Date/timefields: https://docs.servicenow.com/bundle/utah-platform-administration/page/administer/time/reference/r_UseDateAndTimeFields.html